

WATCH VIDEO: Live Masks explained
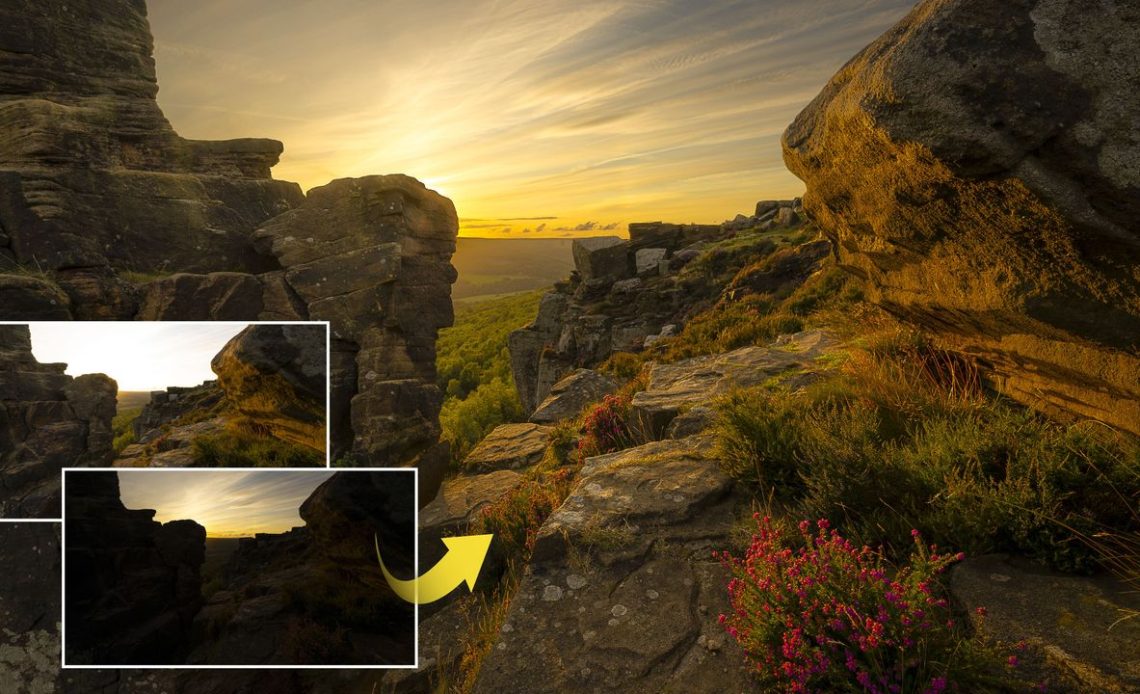
When shooting towards the sun at sunset, it can be tricky to record a balanced exposure. If we expose for the sky, the land looks too dark; but if we expose for the land, the sky can blow out.
At times like this it’s usually worth shooting a bracketed sequence of exposures, in which your camera will take under-and overexposed frames alongside the ‘correct’ exposure sandwiched in the middle of them. This way, you have several options.
You can pick the best exposure from the bunch, or merge the set to an HDR image, or blend the exposures later on. The last option usually involves opening two or more images into your editing software, then masking one image to blend it with another. This is where Live Masking in Affinity Photo can prove very useful.
There are three different kinds of Live Masks in Affinity: Hue, Luminosity and Band-pass. They will enable you to blend a layer with the layers below based on a set of parameters. Luminosity – which we’ve used here – enables us to blend based on the lightness values of pixels.
Effectively, it gives us a fine degree of control over blending light pixels on one layer with darker pixels on another – or vice versa. As such it’s very useful for exposure blending, as we can fill in an overexposed sky with a correctly exposed version in seconds.
Many of us will have lots of bracketed sets of exposures on our hard drives to try this technique out on. Open up a couple of images and try it, or download the Land.jpg and Sky.jpg pictures here to experiment with. We’ll use those in the following steps…
1. Align the images
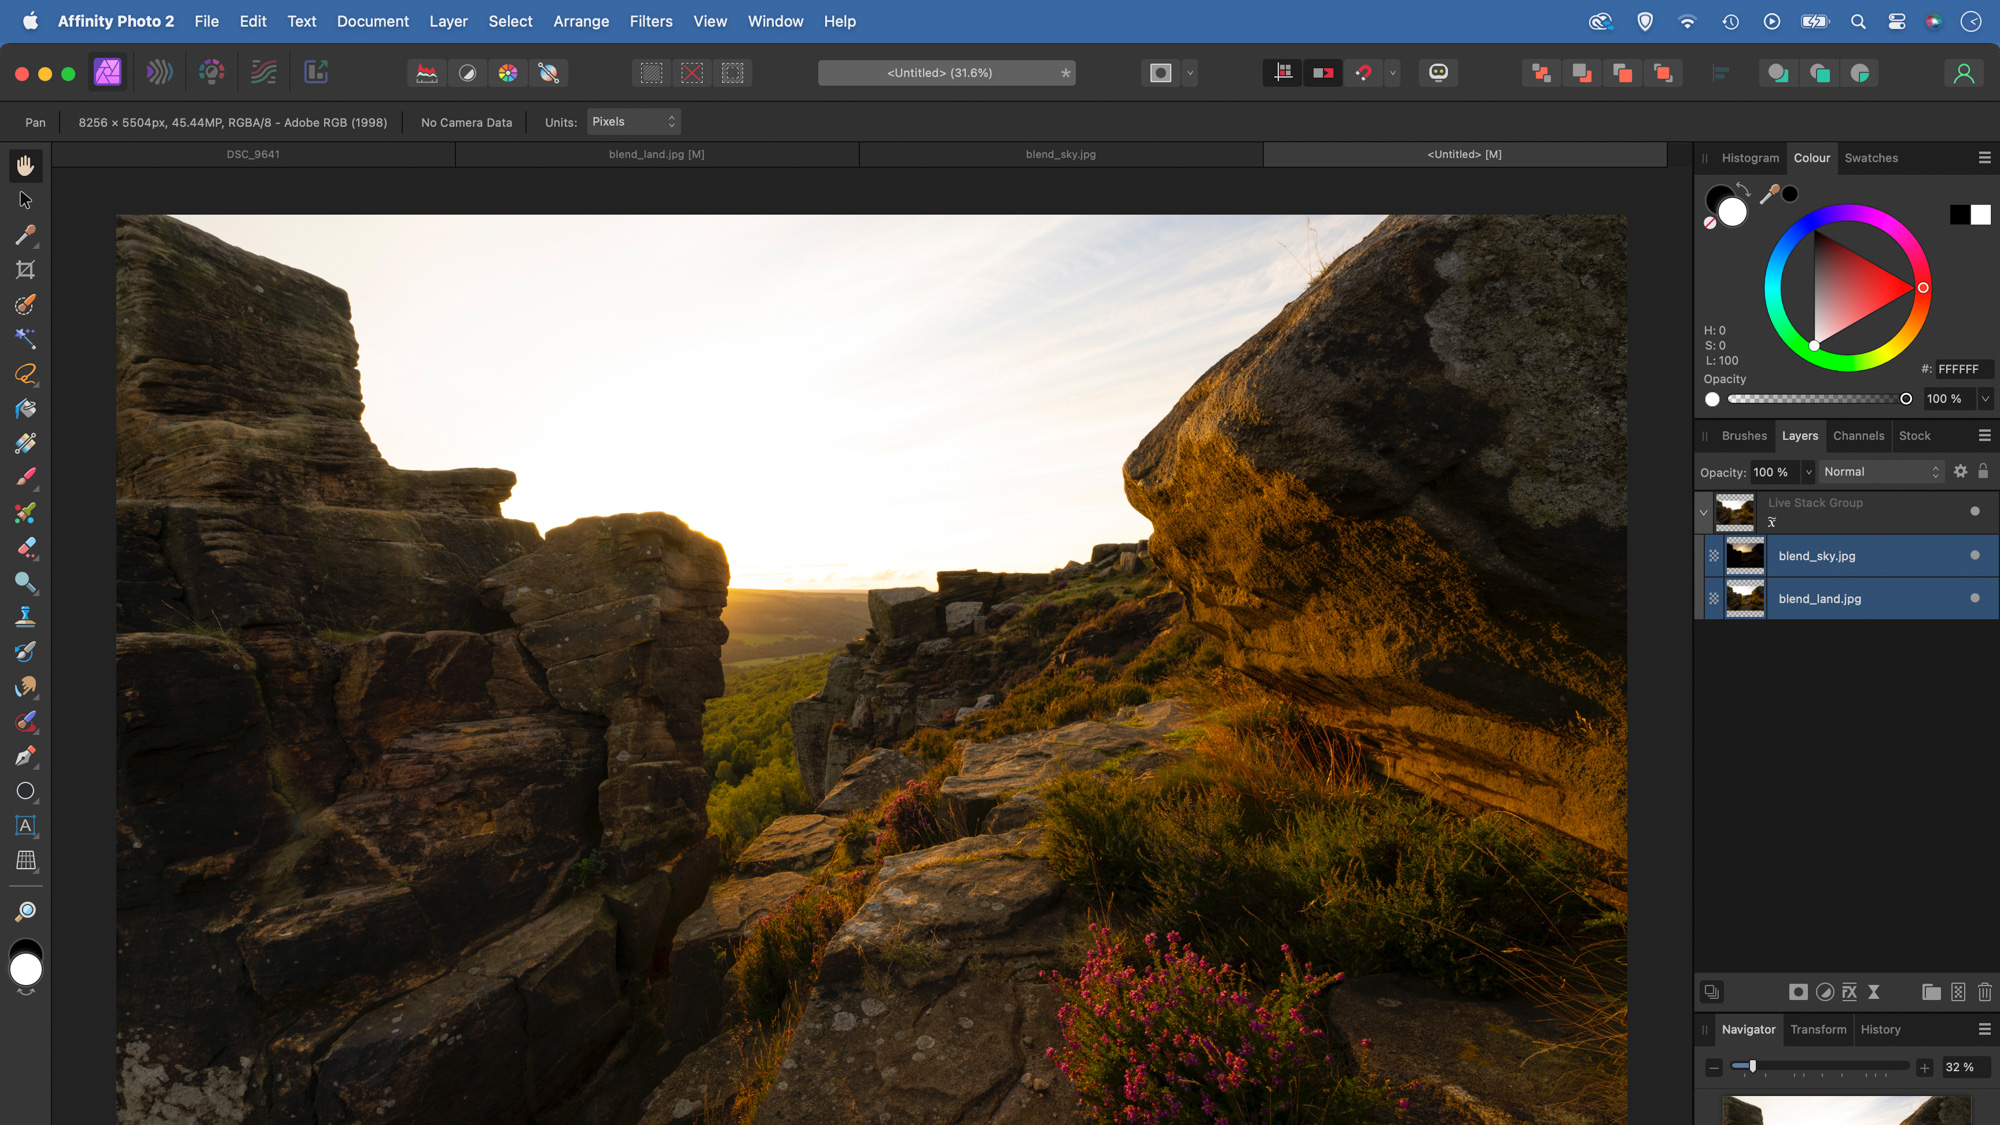
Download the start images (click here). Then, to ensure the two images are perfectly aligned, go to File > New Stack and load in the two images, ensure ‘Auto-align’ is checked and hit OK. Go to the Layers Panel and drag the two layers outside the stack to remove them from the group, then delete the group.
2. Add a Live Mask
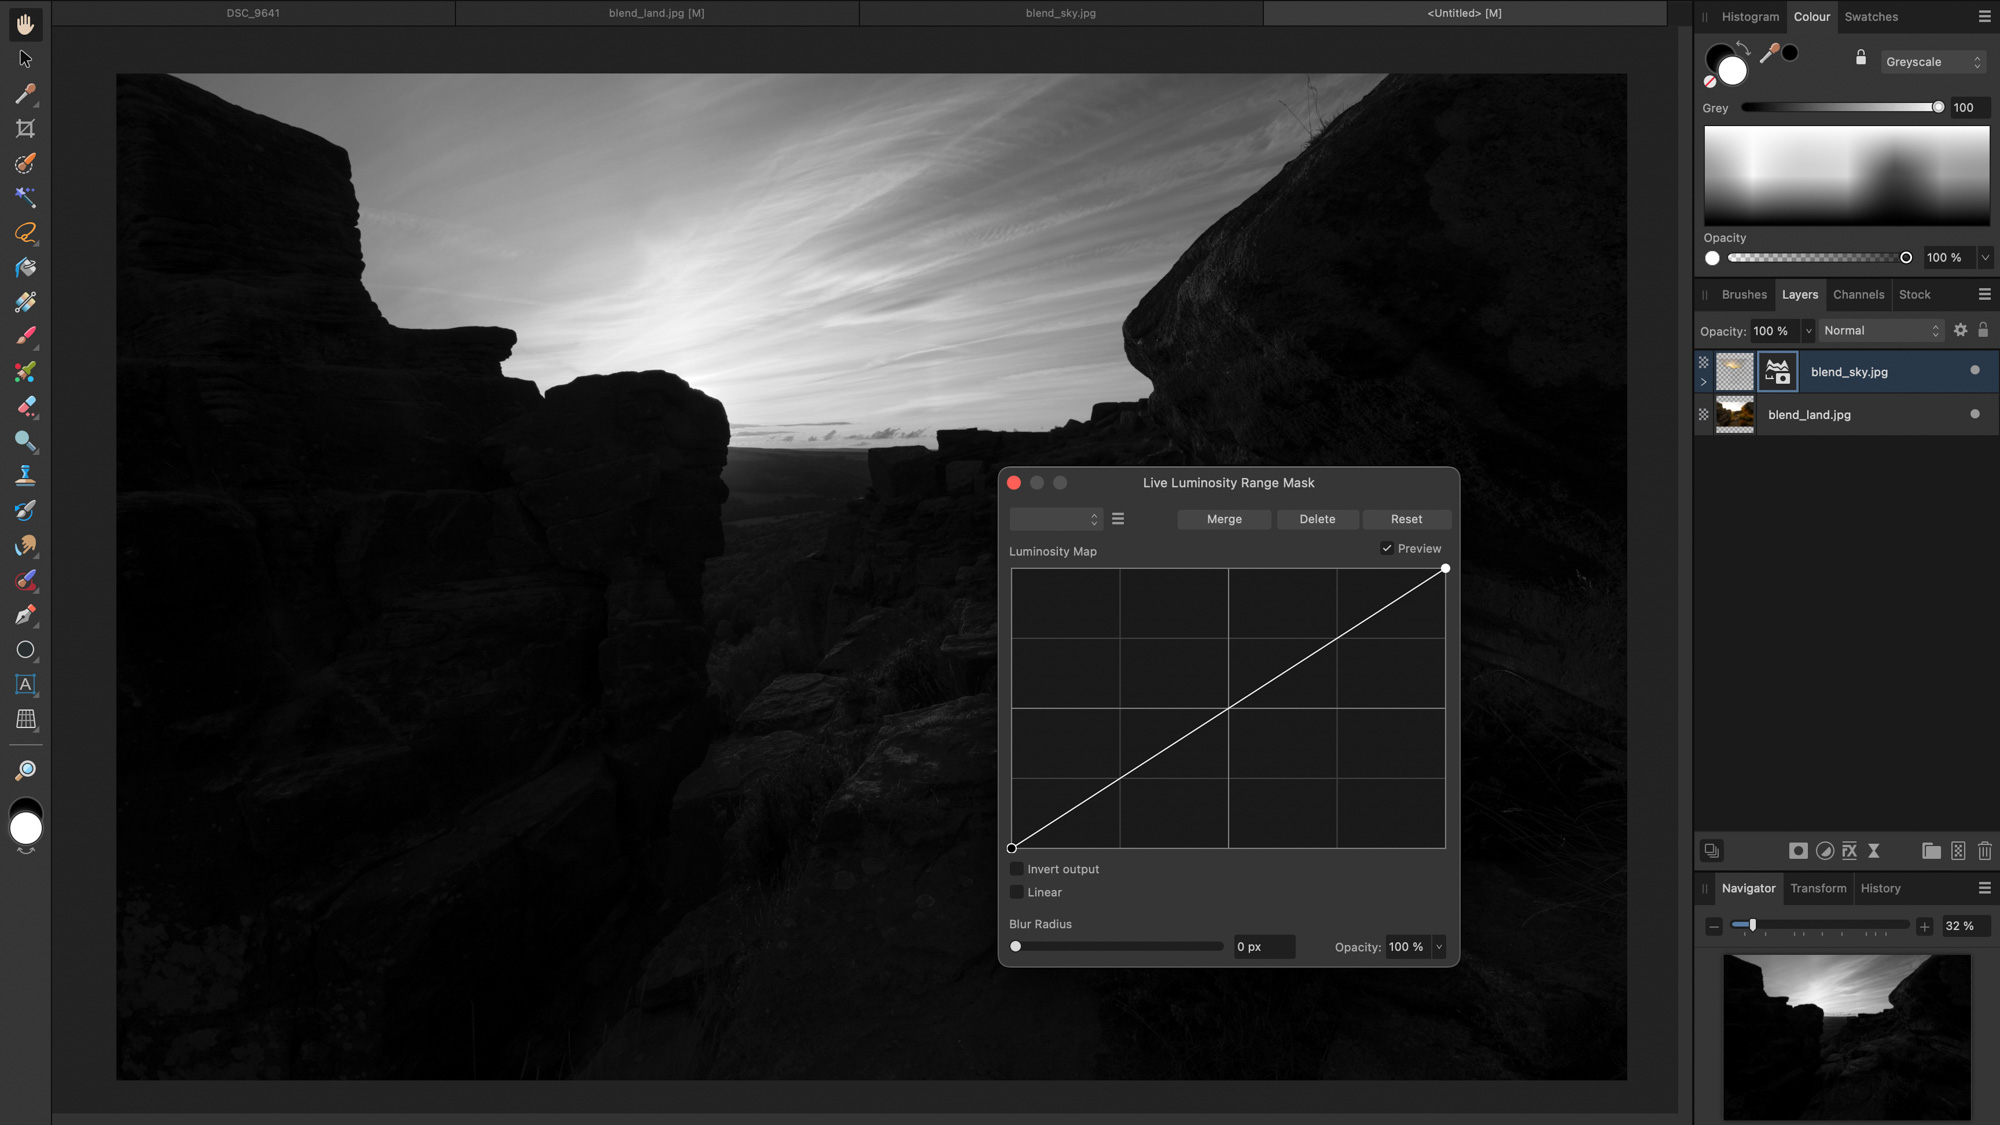
With the darker layer on the top and highlighted, Alt-click the Layer Mask icon and choose Luminosity Range Mask. The left side represents shadows and the right is for highlights. Drag down on the line to make that part of the tonal range more transparent.
3. Fine-tune the blend
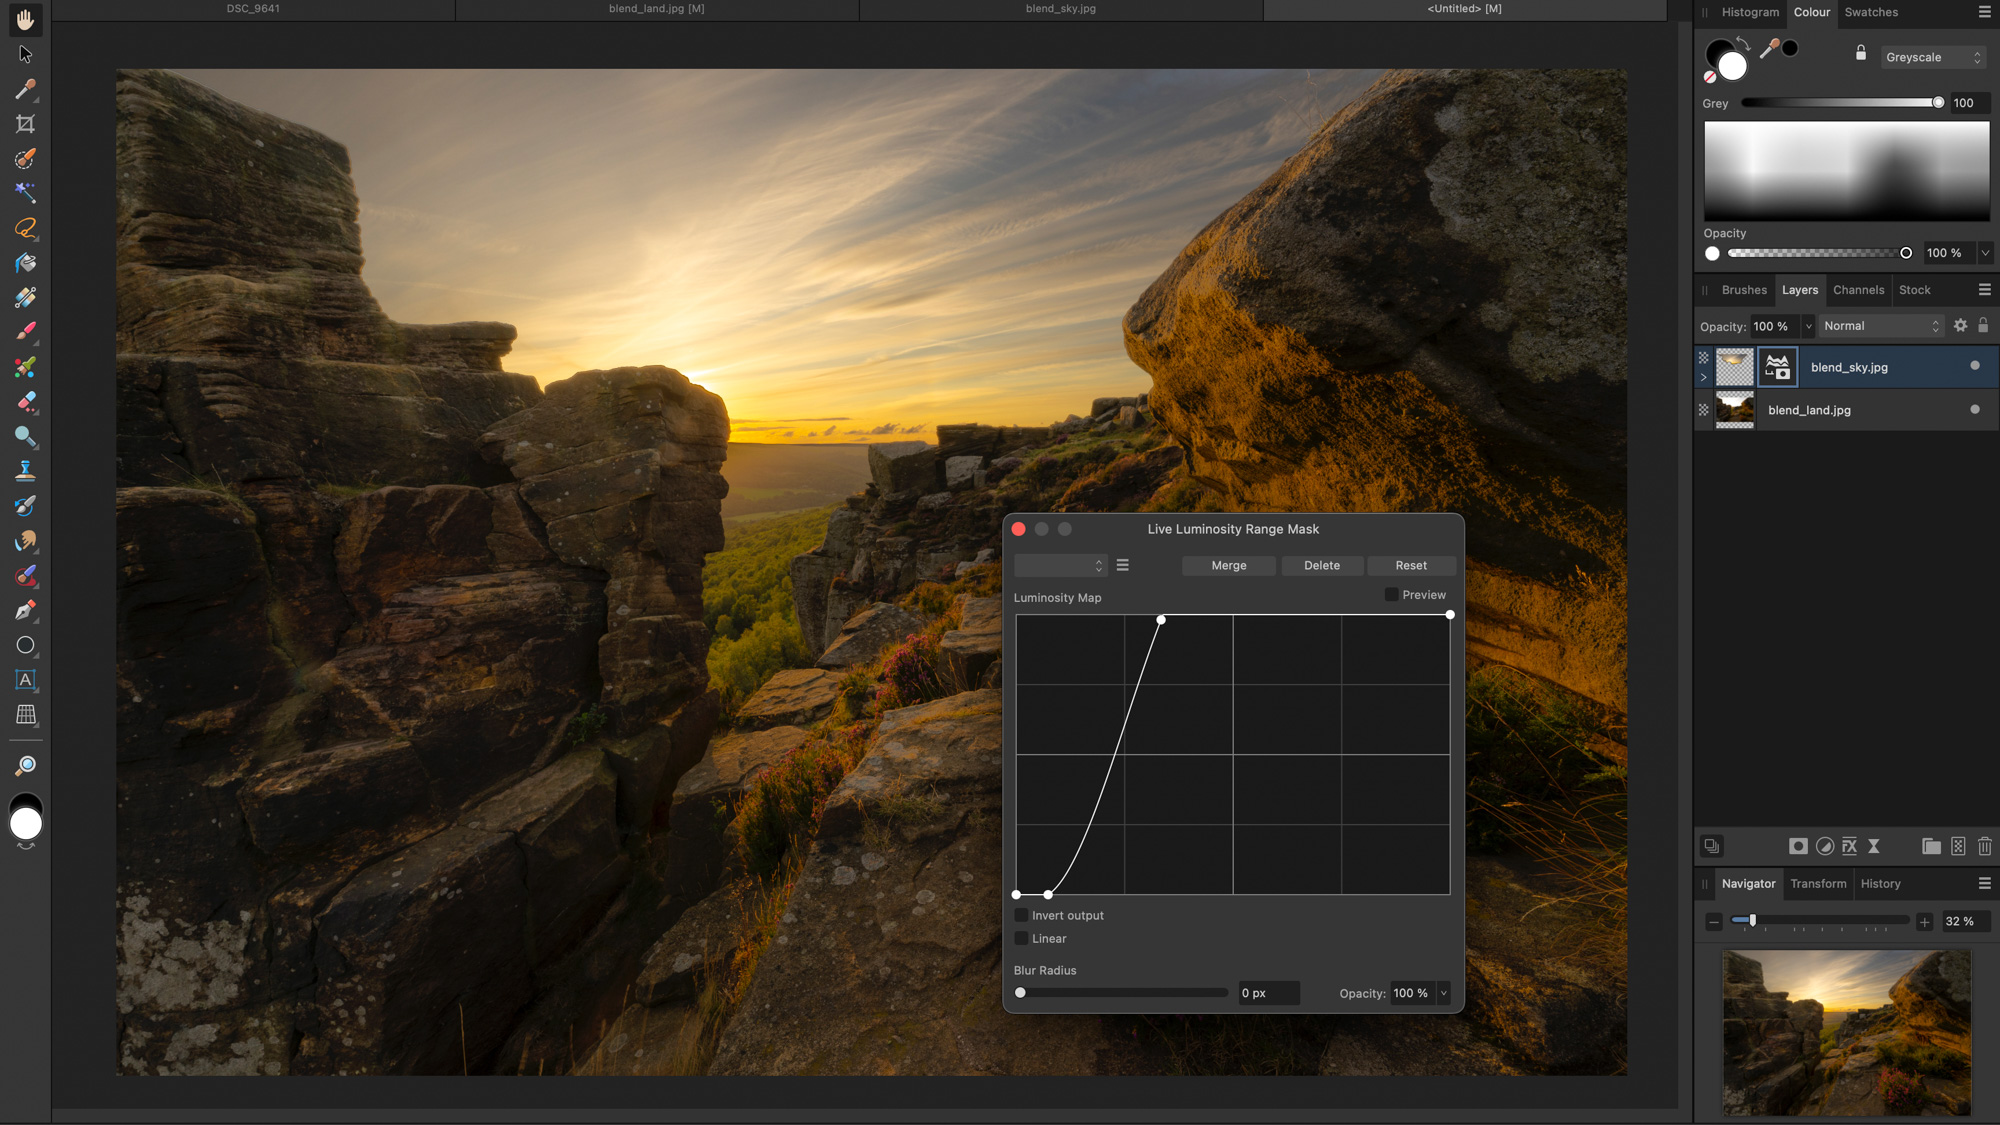
Adjust the line to fine-tune the masking. By making the line steeper, there is less of a gradual transition in the blending. The correct setting will depend on the image, so experiment. Soften the edges to reduce haloes by increasing the Blur Radius slider.
4. Mask the highlights
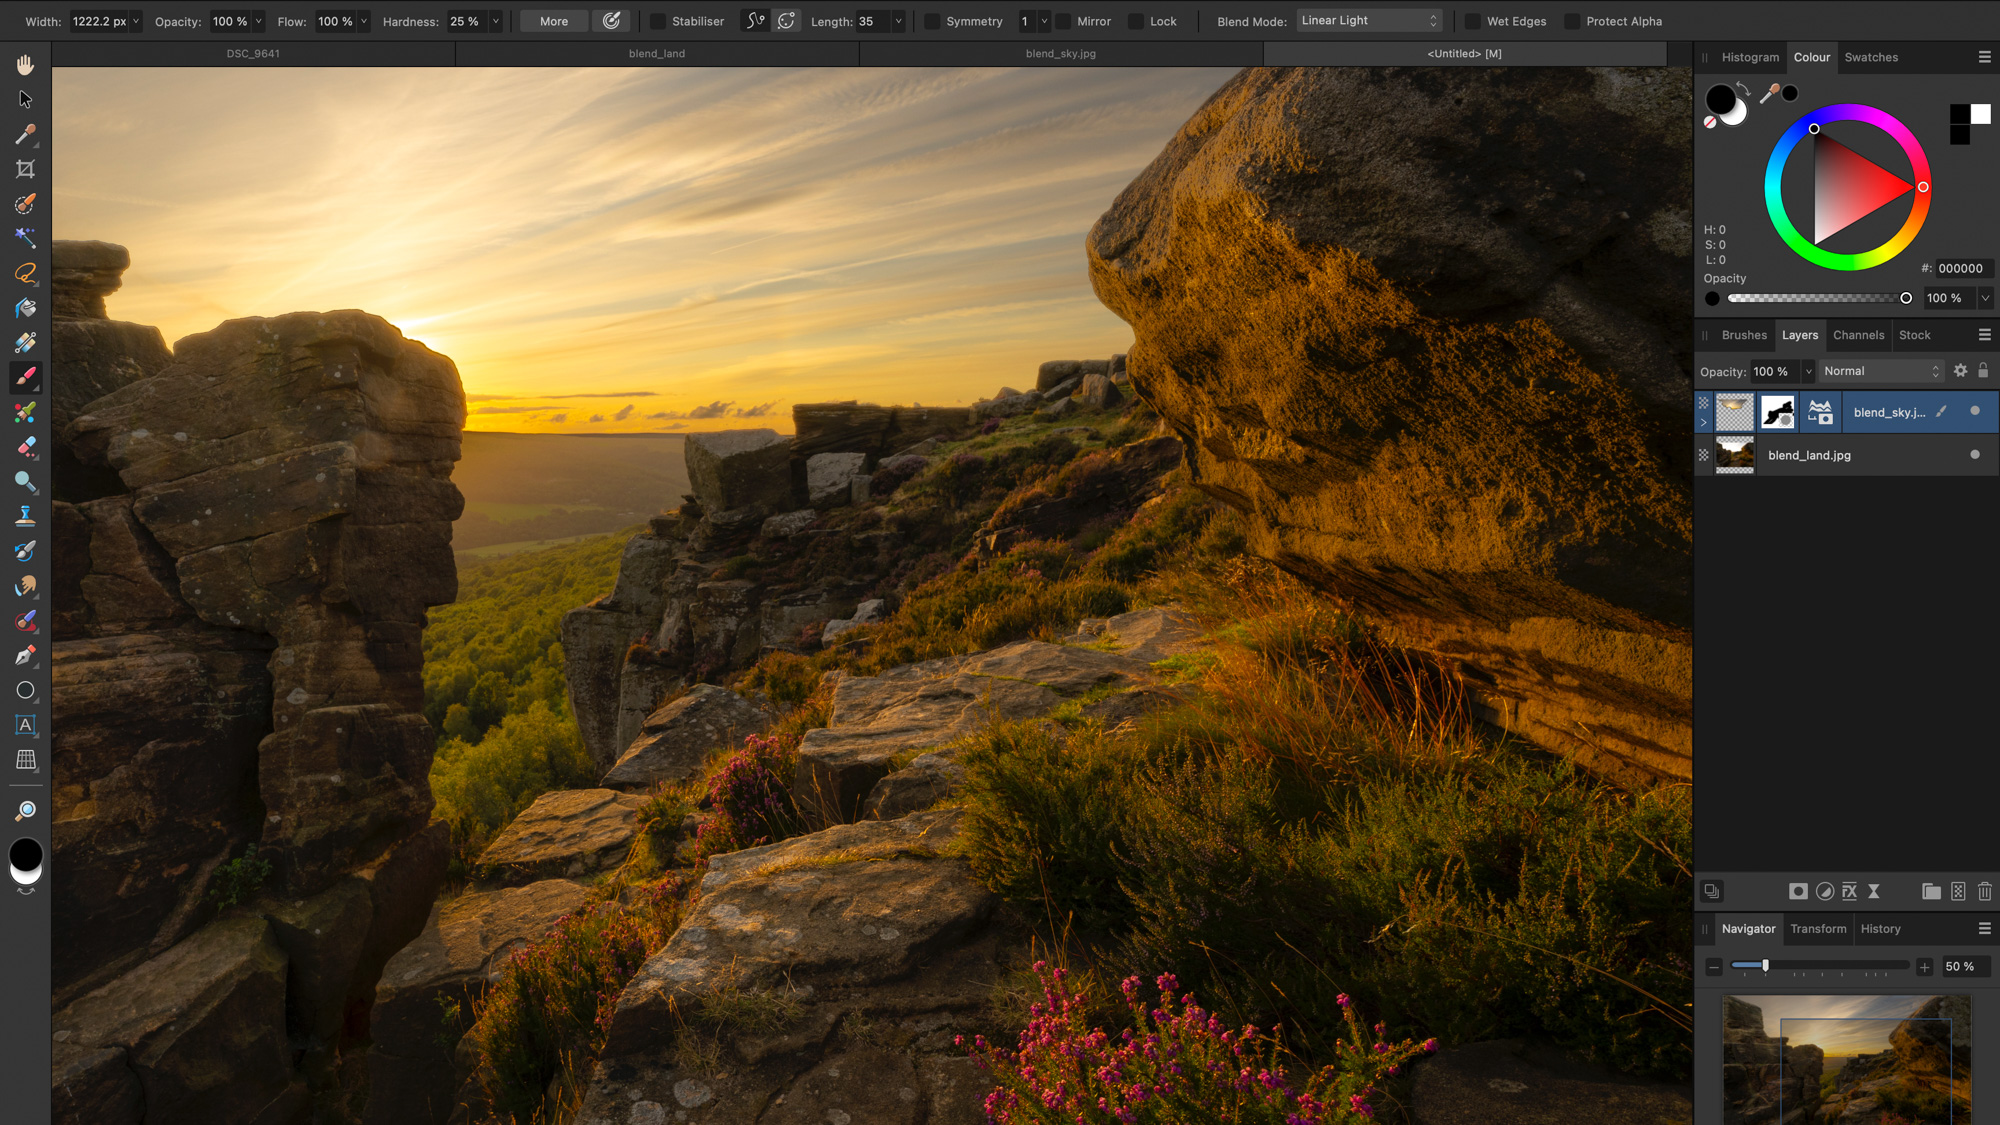
Click the dot icon to toggle the visibility on and off to check how it blends. Here the blend clouds out some of the brighter highlights in the land, so highlight the image thumbnail of the layer then click the mask icon. Paint black to hide parts of the top layer.
5. Boost the flowers
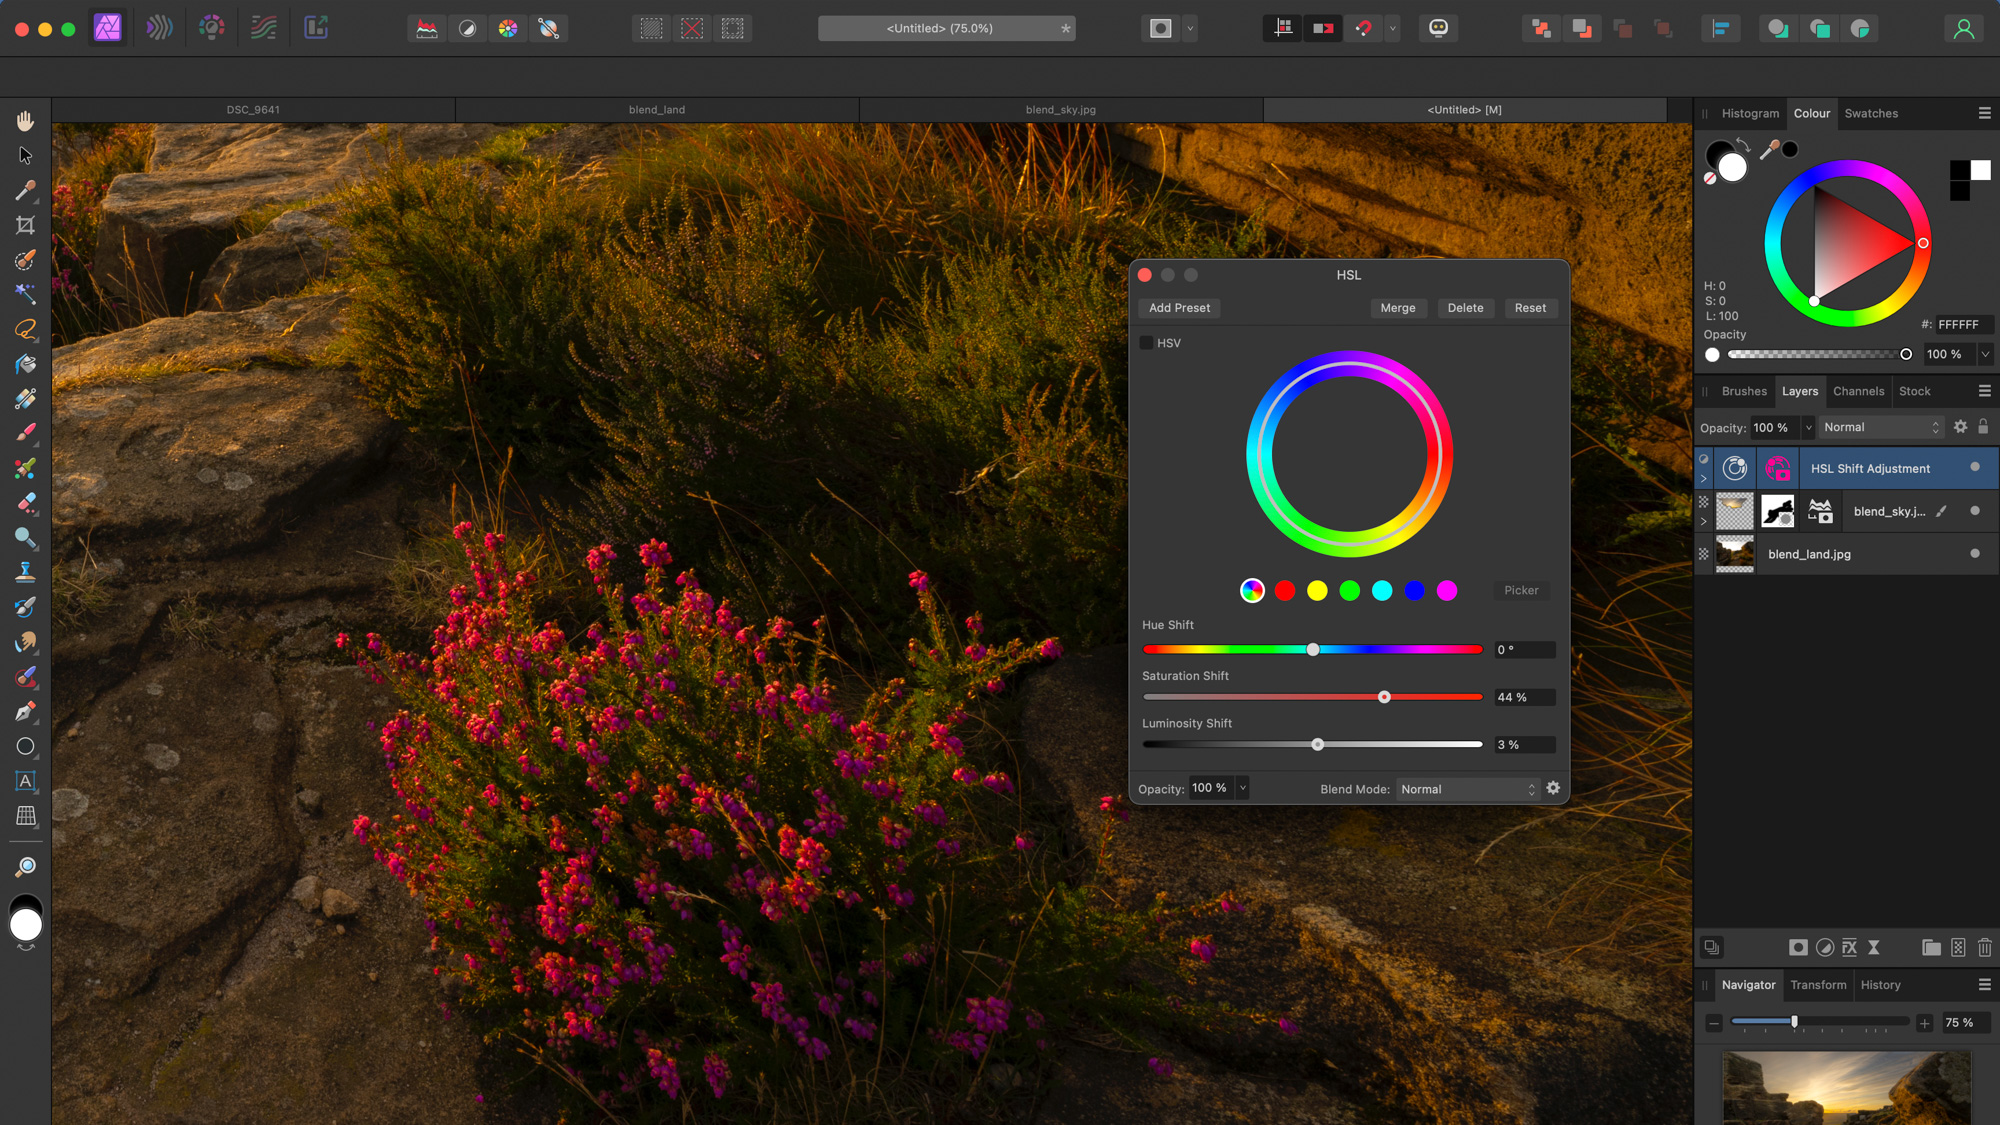
Click the Adjustment icon in the Layers Panel and choose HSL then increase Saturation. Next, Alt-click the Mask icon again and this time choose Hue Range Mask. Check Preview then click the picker and sample the purple flowers. Edit the colour wheel to fine-tune.
6. Clone to tidy
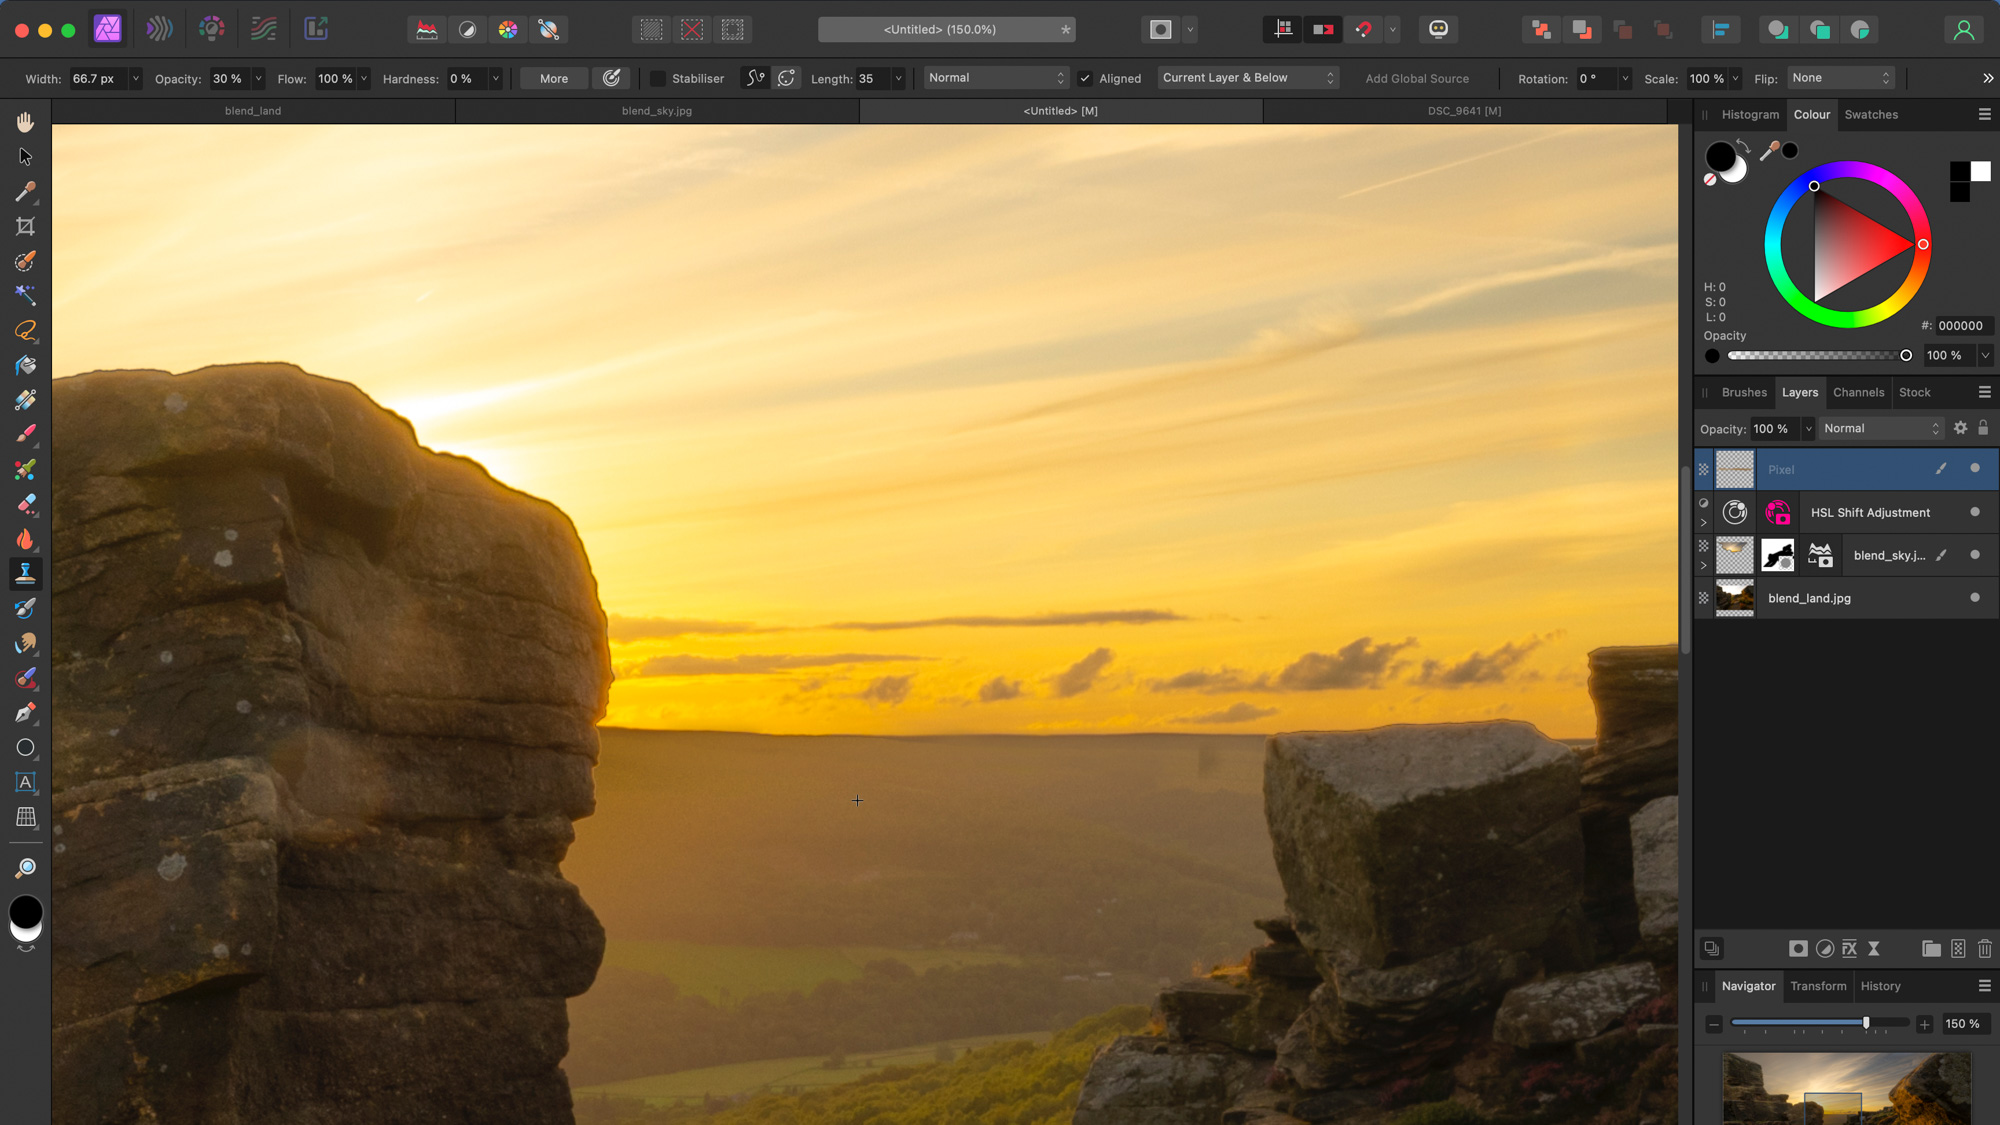
Click the New Layer icon in the Layers Panel to add a new layer at the top of the stack. Grab the Clone Stamp tool and set ‘Current and Below’ in the options at the top. Zoom in close to the horizon, Alt-click to sample a clean source and paint to tidy up any haloes.
Author: James Paterson
Source: DigitalCameraWorld
Reviewed By: Editorial Team