

With the use of a polarization filter, you can get a nicely saturated, dark, blue sky at the point of capture. However, if you use a wide-angle lens or — depending on the camera’s orientation relative to the sun — you might run into problems… But all problems have solutions.
If you end up not being able to use such a filter don’t worry: You can achieve a similar effect using a color range mask in Adobe Lightroom Classic or Photoshop’s Adobe Camera Raw. In the video above I demonstrate the steps listed below with this image as my example:
If you would like to follow along with the exact image I use in this tutorial, I have made the RAW file available for download here.
1. Make Basic Adjustments
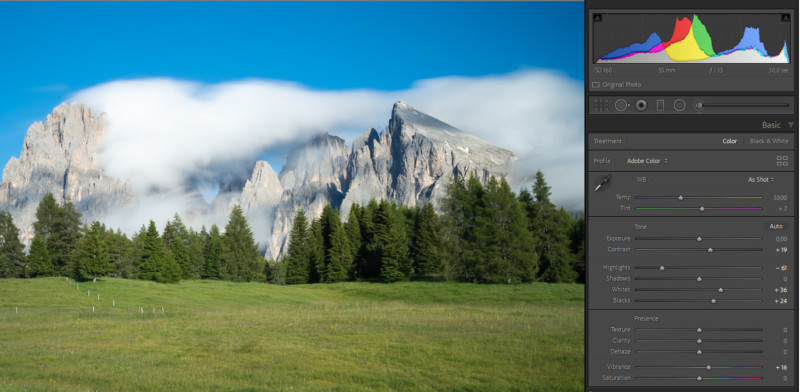
Before I add the polarization effect, I make sure to go through the basic adjustments to get a nicely balanced exposure. In the case of this example photo, that meant dropping the highlights to preserve details in the clouds, raising the blacks to avoid underexposure, and increasing the whites for a little more overall brightness. Finally, I added some vibrance since I like my photos well saturated.
2. Add a Graduated Filter
Since I want to cover the whole sky horizontally, I am using a graduated filter (1) which I drag down from top to bottom (2).
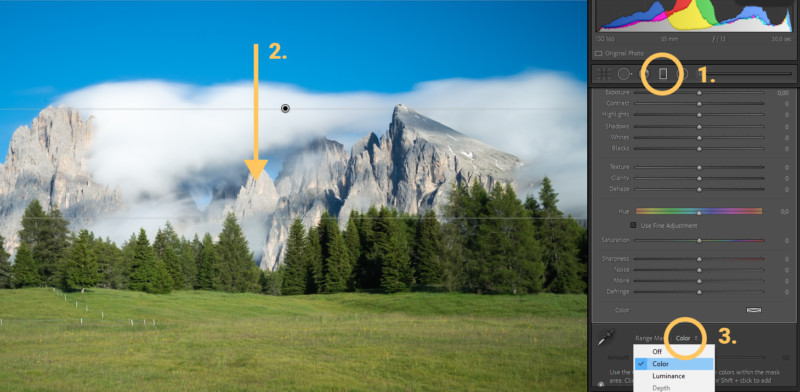
To make sure this filter has a very soft edge I usually start dragging it from the very top of the image until I covered all of the sky. Keep in mind you can even apply those local adjustment filters outside of the actual photo, this way you can get even softer edges if you desire.
With the newly added graduated filter, I only want to change the blue part of the sky; I don’t want the clouds or the mountains to get darker, which means I can’t just drop the exposure. At this point, you can make use of the Color Range Mask (3) which is a little hidden, all the way down in the local adjustment menu.
3. Target the Blue Sky
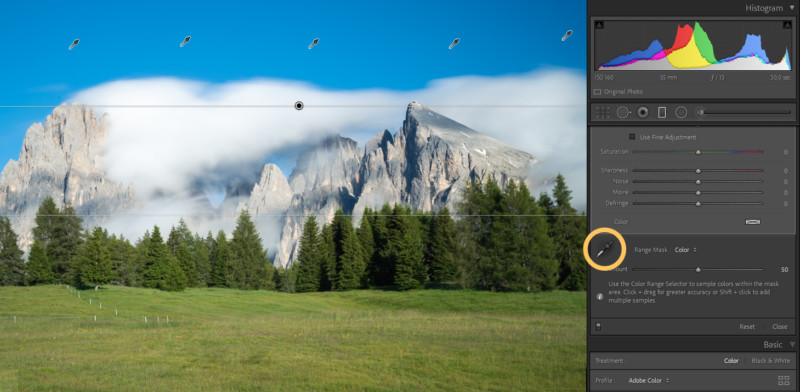
After choosing “color” as the range mask you can use the Color Range Selector (the icon that looks like the eyedropper tool) to pick the color tone you want to change. In this case a blue tone out of the sky. As the color range can be a rather wide-ranging from dark to light blue it might be a good idea to add multiple color range selectors by holding down the ‘Shift’ Key and adding another one by clicking.
4. Adjust the Sky
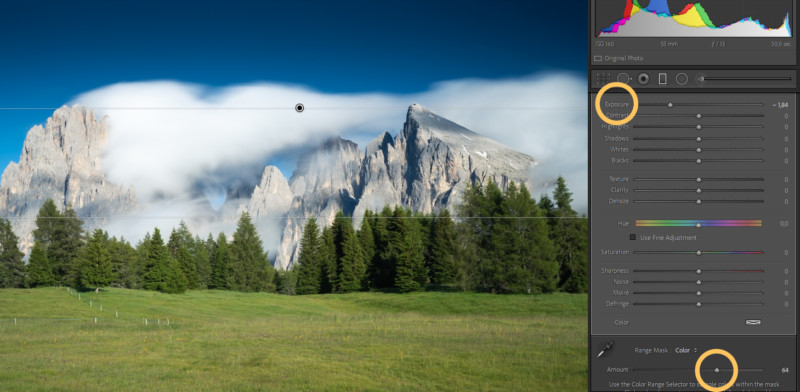
Once the color tones are selected, simply drop the exposure to darken the blue of the sky. If you notice areas changing which shouldn’t be affected, you can try to adjust the color range further using the “Amount” slider under the range mask settings. Hold down the “Alt” key while adjusting the slider to make the range mask visible.
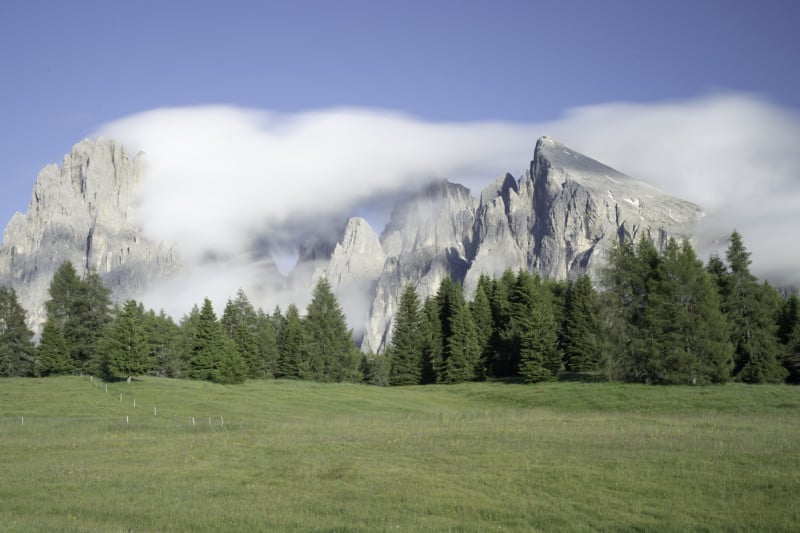
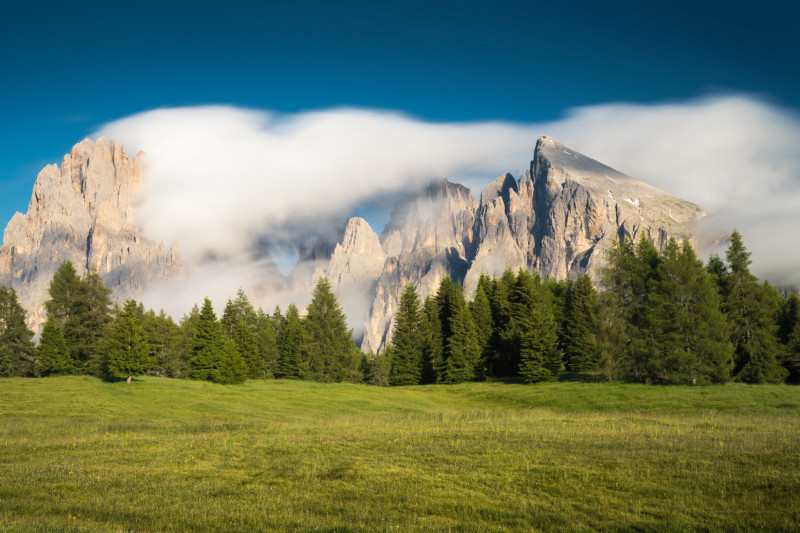
And done! Below is the finished image, which has a much more deep blue sky than the original.
About the author: Christian Möhrle is a professional landscape photographer who has been capturing photos since 2010. Besides photography, he works as a media and motion designer for a living. For more, you can see additional videos on his YouTube Channel as well as his Instagram.
Author: Christian Möhrle
Source: Petapixel
