

Capturing the expanse of the cosmos is one of the most challenging, yet most rewarding, experiences for a photographer. When the sun goes down, the cameras come out.
Find a Location with Little to No Light Pollution!
If you are interested in astrophotography, you probably want to capture faint celestial objects like our Milky Way galaxy. This is only possible in an area that is naturally dark and free of light pollution. Broadly defined, light pollution is any adverse effect of artificial light at night. It comes in three main forms, skyglow: domes of light on the horizon above artificially lit areas, glare: the response of the eye to overly bright light (often causing visual discomfort), and light trespass: light that extends beyond its property line or intended area of illumination. (Think of your neighbor’s porch light coming into your window at night.)
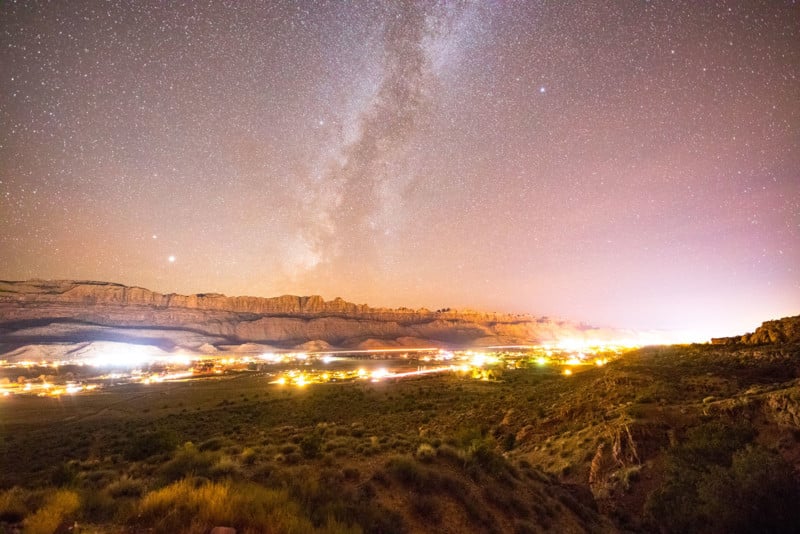
Light pollution can be mitigated simply. Light only where you need it, when you need it, and in the amount needed. This means fully shielding the light, using timers or motion sensors to limit the amount of time the light is on, and using the lowest intensity of light needed to accomplish the task. Color of light is also important; select warm/amber fixtures with a low correlated color temperature (CCT).
Looking for a place to shoot some dark skies? You can find the nearest International Dark-Sky Parks, Communities, Sanctuaries, or Reserves with the interactive map available on the DarkSky website!
Or, check out the handy light pollution map.
Know the Basics
Some basic tips for astrophotography that you should keep in mind are to use a sturdy tripod and a camera with a wide-angle lens that has an aperture that can open to f/2.8 or lower. That said, don’t let that stop you if you don’t have a fast lens, you can still capture great night sky images with lenses that open to f/3.5 like a typical kit lens.
Be sure to shoot in RAW to capture the most amount of data. Use manual focus; to find the correct focus, roughly pre-set your lens to infinity and enable live view (seeing the image on the screen of the camera). Center the brightest celestial object, or something distant and bright. Use the camera display zoom (not on your lens!) to zoom in as far as possible. Adjust your focus until the bright object you selected becomes as small as possible. A good sign that you are approaching focus is if you see dim stars appearing in the viewfinder. One last tip: use a two-second timer to reduce vibration and keep your image crisp!
If you are looking for a place to start, here are some basic settings to try in a dark sky place:
- Shutter speed: 20 seconds
- ISO: between 1,600 and 6,400
- Aperture: f/2.8 or lower
- White balance: Daylight, or 5,600K
- Good focal length: My favorite for astrophotography is 24mm or 14mm.
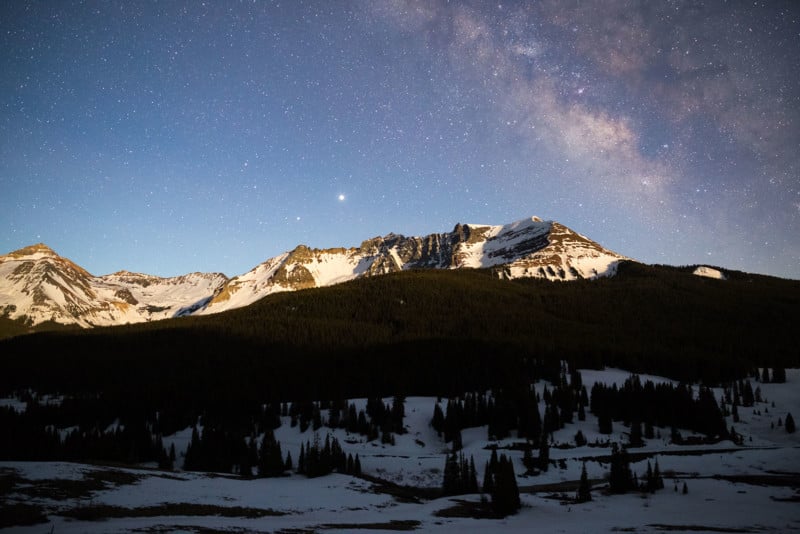
Use Moonlight or Blue Hour to Illuminate Your Foreground with Natural Light
As dark sky advocates, we don’t like to add unnecessary artificial light to a dark environment, and there are great ways to illuminate your foreground without a headlamp!
A phenomenon called blue hour happens when the sun is sun 12 to 18-degrees below the horizon. Blue hour photos show the stars against a rich blue sky still faintly illuminated by the setting sun. It happens quickly, so you have to plan for it. You can calculate the sun’s position using the free desktop app, Stellarium.
Planning around the moon phase is essential for astrophotography. Light from the moon may seem dim, but it actually can dramatically alter the scene that your camera will capture. During a full moon, your image will appear to be a sunny mid-day afternoon, but with stars. Moonlight is bright!
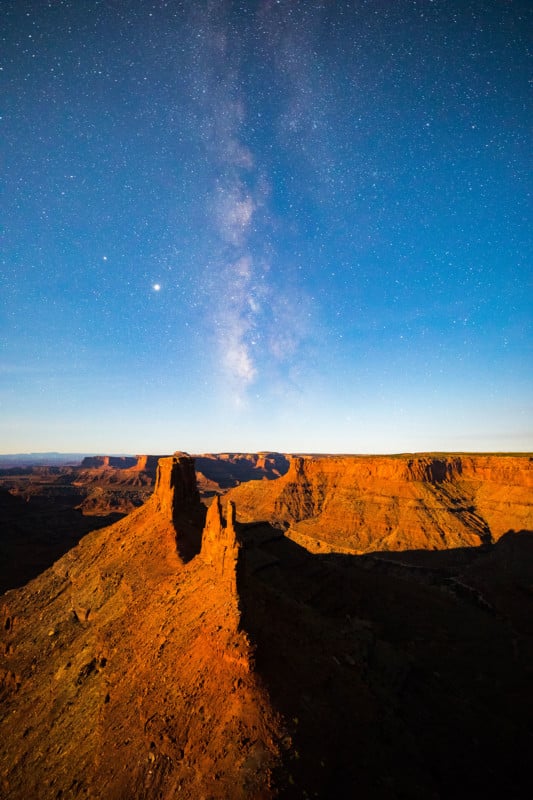
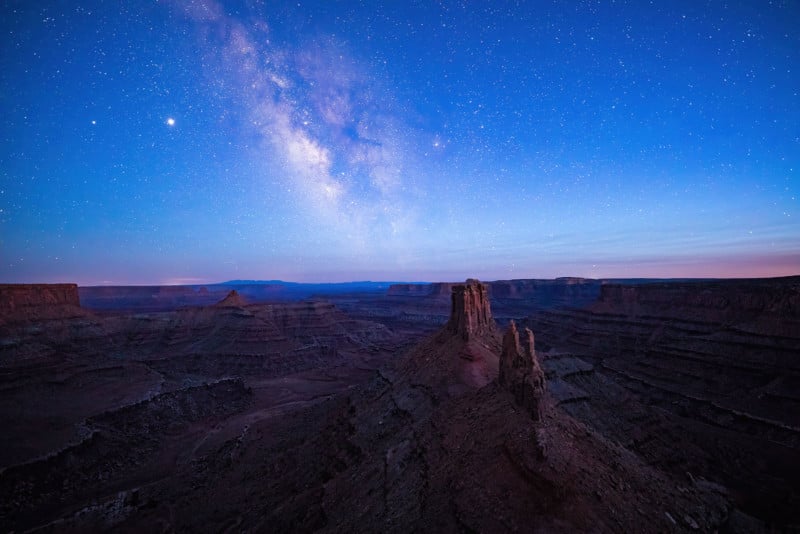
The new moon is the best time to capture faint celestial objects that can be washed out by moonlight, like the Milky Way and faint stars. A moonless night is also the best time to capture dark silhouettes against a bright night sky. These shots can also be achieved if the moon has set.
My favorite moon phase to shoot is a crescent. This amount of moonlight provides enough light to capture your foreground but is still dim enough not to overpower faint celestial objects. You can calculate the moon’s illumination with a number of online websites. I like this one!
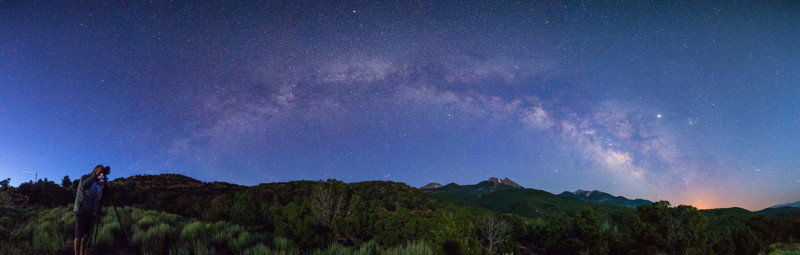
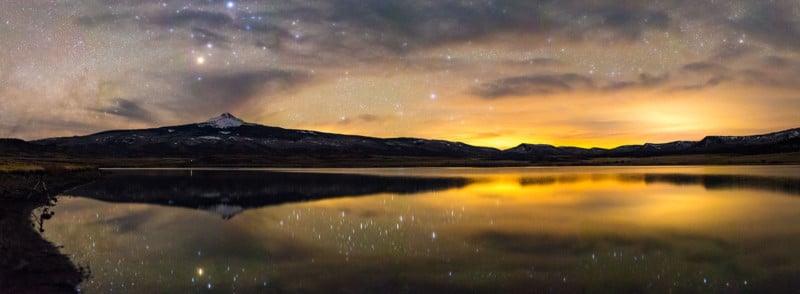
Shoot Panoramas to Enhance your Image Quality and Capture More of the Sky
Panoramas are created by stitching together vertical images to capture more of the scene than you would normally be able to in a single exposure. Panorama stitching can be done in many programs, I find Lightroom to be simple, easy, and effective.
To take a panorama, rotate your camera to shoot a vertical image; you may need a ball head or L-bracket for this. Also, make sure that your tripod is level. Take a series of images with a 50% overlap, then use software to merge them. In Lightroom, select all of your images in the develop module, right-click, and choose photo merge, panorama. Make sure you edit your panorama after you stitch the images together because it’s easier for your software to combine RAW image files that have not been altered. Then you can edit the panorama as one photo, not multiple.
Use Software to Stack Your Images to Reduce Noise
Stacking multiple images with software like Photoshop or Starry Landscape Stacker (my personal favorite) will dramatically reduce digital noise (grain and hot pixels) in your night sky images. Take 10 to 15 shots one after another and then load them in the program to stack them.
Get to Know the Night Sky to Plan Your Best Shot
Earth is located in the outer spiral arm of the spiral galaxy we call home. We can visualize our galaxy shape like a fried egg, basically flat but with a bulge in the center (the galactic core). This egg is 100,000 light-years across! Every star you can see with the unaided eye is located within the milky way. The only objects you can see in the sky outside of the Milky Way are the Andromeda Galaxy and Large and Small Magellanic Clouds.
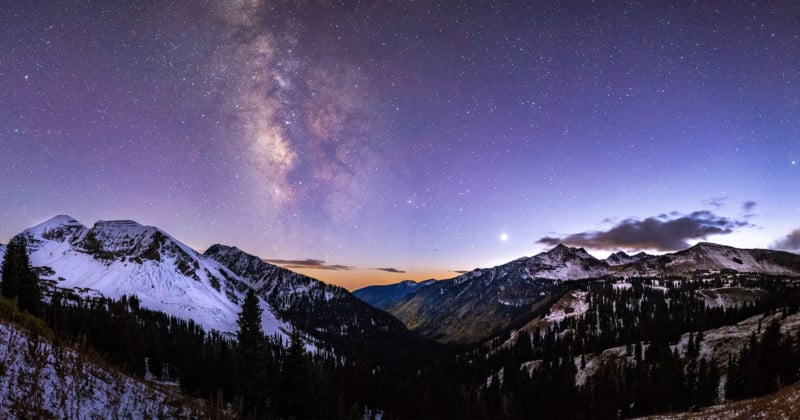
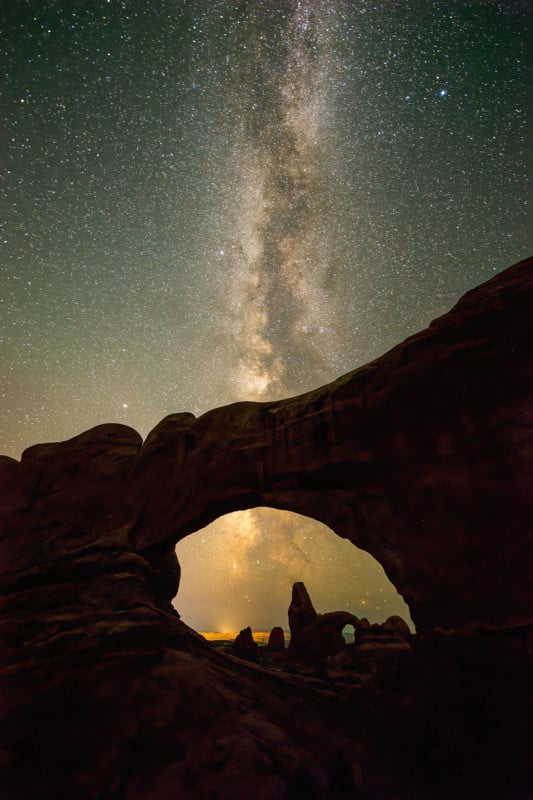
Summer is prime time to capture the Milky Way galactic center. During the summer, the earth at night (in the northern hemisphere) is looking toward the center of our galaxy, home to the highest concentration of stars. The combined starlight makes it the most luminous part, too. You can find it in the constellation of Sagittarius, low on the southern horizon (in the northern hemisphere). The brightest stars in the constellation of Sagittarius make a starry teapot, and the Milky Way rises like steam from the spout.
The Milky Way galactic core will shine in the sky from March to November. In the spring (March through May), the galactic core will first become visible a few hours before sunrise. During the summer (June to August) you can view the Milky Way as soon as the sun sets for most of the night. By fall (September to November) the Milky Way will be best seen in the early evening. In winter (November to February) the core will not be visible in the northern hemisphere.
The Milky Way core will always be generally south on the horizon (in the northern hemisphere). The orientation of the Milky Way differs throughout the year as well. In spring, the Milky Way is horizontal, sweeping across the horizon and reaching only 35-degrees into the sky. This is the best time of year to capture arching panoramas of the milky way.
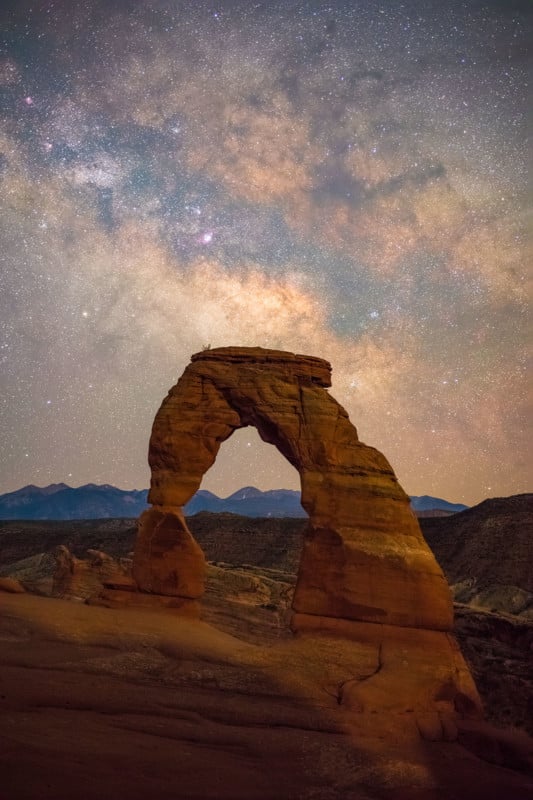
During the late summer, the Milky Way will be almost completely vertical reaching up to 85 degrees into the sky, almost directly above you.
The Winter Milky Way shows us the outside edge of our galaxy. With fewer stars, the wintertime Milky Way will appear more subtle than its summer counterpart. Composition, foreground, and knowledge of some of the brighter constellations (like Orion) will assist in composing a striking image. Winter is also a great time to shoot night skies because the typically dry winter air makes for clearer shots (and you can get out much earlier in the evening!).
You can use apps to visualize this as well as to plan your shot. Examples of popular apps that help you do this are Photopills and the Photographer’s Ephemeris.
Meteor showers are also a super fun time to shoot! There are many throughout the year.
Experiment with an Intervalometer for Star Trail Images and Timelapses
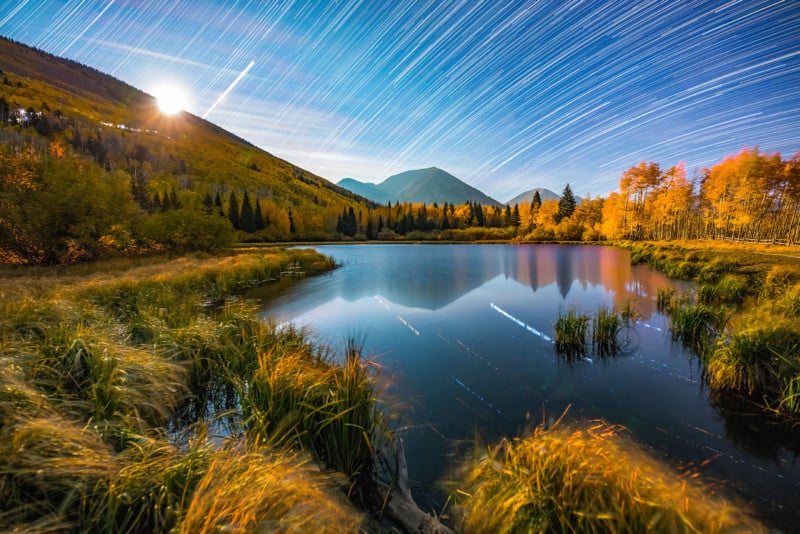
Star trails
Layering consecutive night sky images will give you the effect of star trails. I typically shoot 25 to 30-second shots one after another using an intervalometer, for about an hour. Some people take single long exposures with a lower ISO to achieve the same effect, but I like the method of stacking as it reduces digital noise. A great free program to help you do this is called Star Stax.
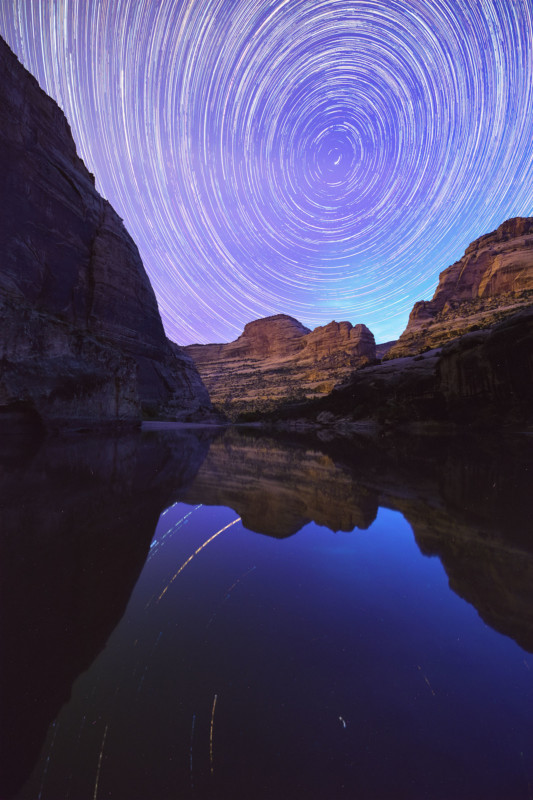
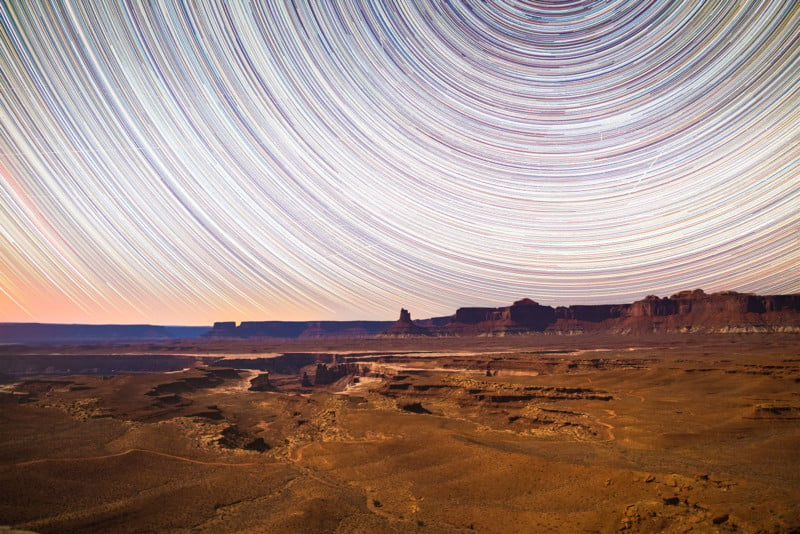
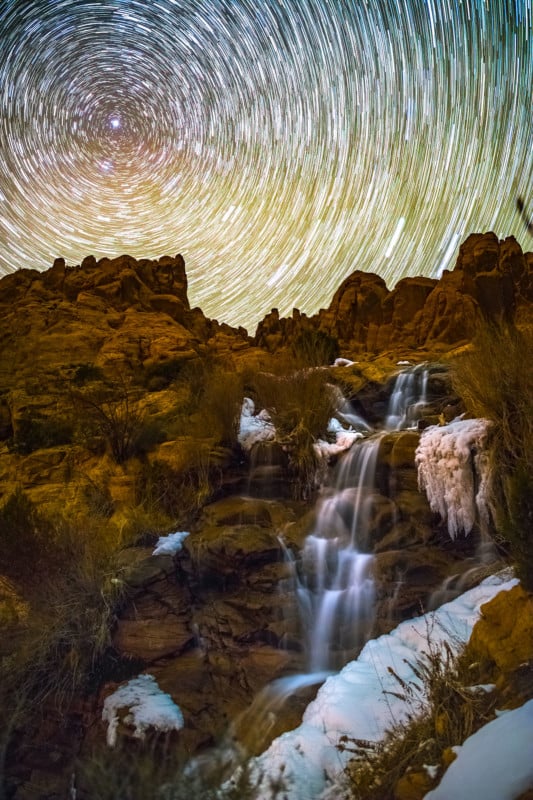
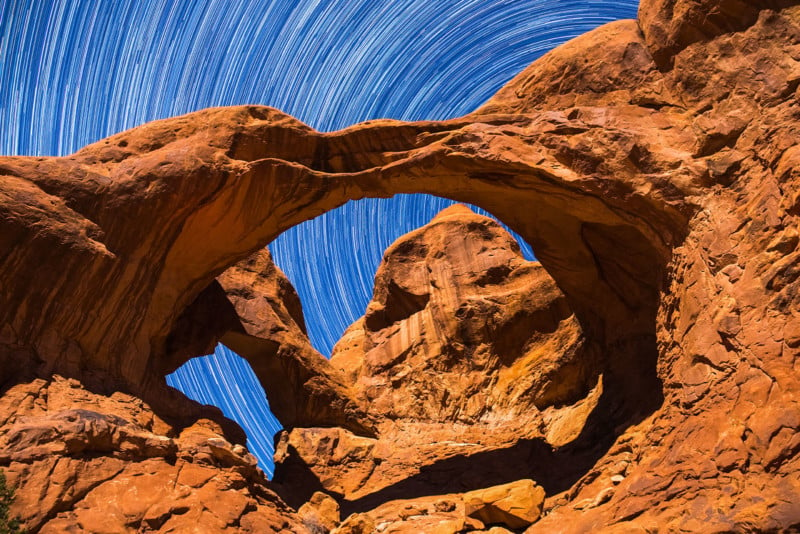
Shooting north, your star trails will create concentric circles around our North Star. Shooting in other directions will give you large arcs of stars.
Timelapses
Timelapses are created using an intervalometer to capture multiple images, one after another, much like the technique used for star trails. Timelapses need at least 24 frames to create one second of video. With such long exposure times, capturing timelapses of the night sky can take a lot of time.
When you have your series of images, I recommend 125-150 for at least five seconds of footage, you can create the timelapse in many different ways. There’s a great program called LR Timelapse that creates the time lapses for you and allows you to adjust your editing throughout different portions of your sequence.
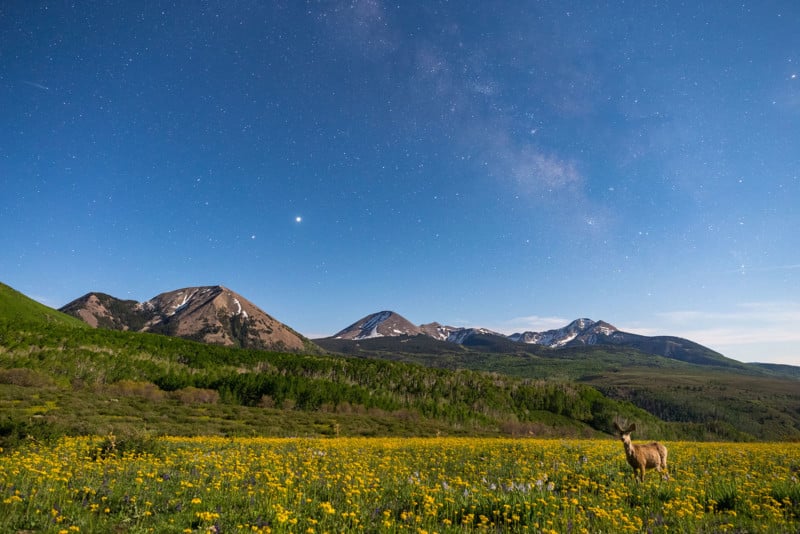
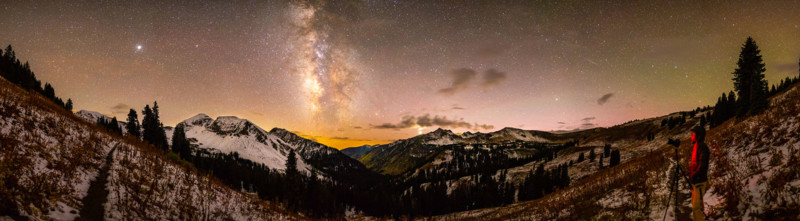
Add People into Your Shots to Add a Sense of Scale
Foreground elements are really important in astrophotography. A night sky is always beautiful, but it is extra amazing to look at when paired with something interesting in the foreground to draw your eye in.
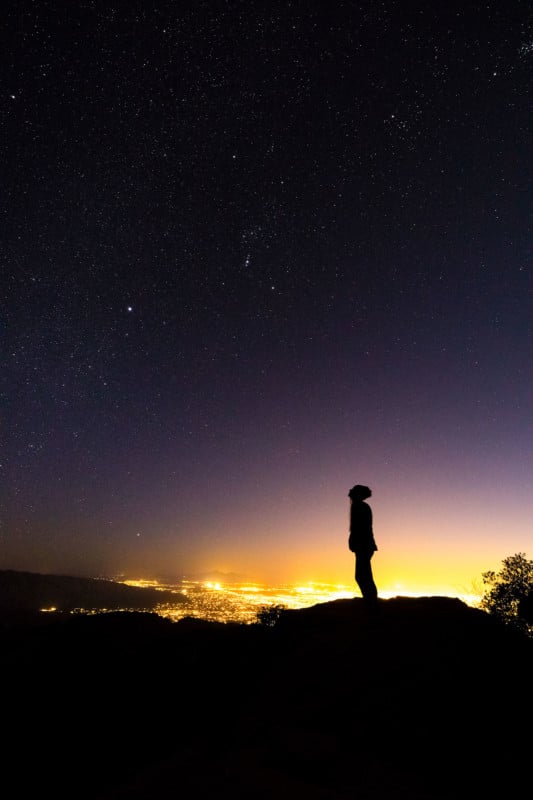
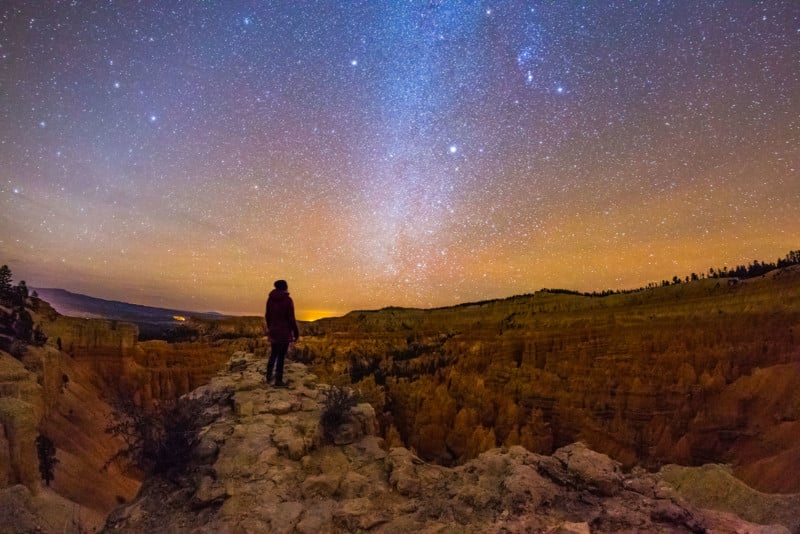
A great way to add interest in your foreground is to have the silhouette of a person. It really helps you see how big the night sky is!
Be safe and practice good shooting etiquette
Below are some final tips you should keep in mind before heading out:
- Always scout your location during the day before exploring unknown terrain in the dark.
- To preserve your night vision, use a red headlamp and turn your camera’s LCD display brightness down.
- Bring warm clothes — warm days can be followed by cold nights!
- Tell someone where you are going and when you plan to return.
- Review all regulations about photography on protected lands and access after-hours if shooting in a park area.
- Remember to check the weather. Clear Sky Chart provides forecast information relevant to astronomical observing.
- If there are other astrophotographers in the area you are shooting, ask them before you start light painting or using artificial light to see what you are doing. Even small amounts of stray light can be a detriment to an image of the night sky.
Finally, and most importantly, have fun! Let your passion for the night sky inspire others.
Image credits: All photos provided courtesy of Bettymaya Foott, International Dark-Sky Association.
About the Author: Bettymaya Foott is an astrophotographer and the International Darksky Association’s Director of Engagement. This story was published to help celebrate International Dark-Sky Week, a world-wide celebration inviting people to discover the night and get involved in protecting dark skies.
“It may seem harmless, but light pollution has far-reaching consequences that are harmful to all living things. Effective outdoor lighting reduces light pollution, leading to a better quality of life for all. The dark sky movement is working to bring better lighting to communities around the world so that all life can thrive.”
Author: Bettymaya Foott
Source: Petapixel
