

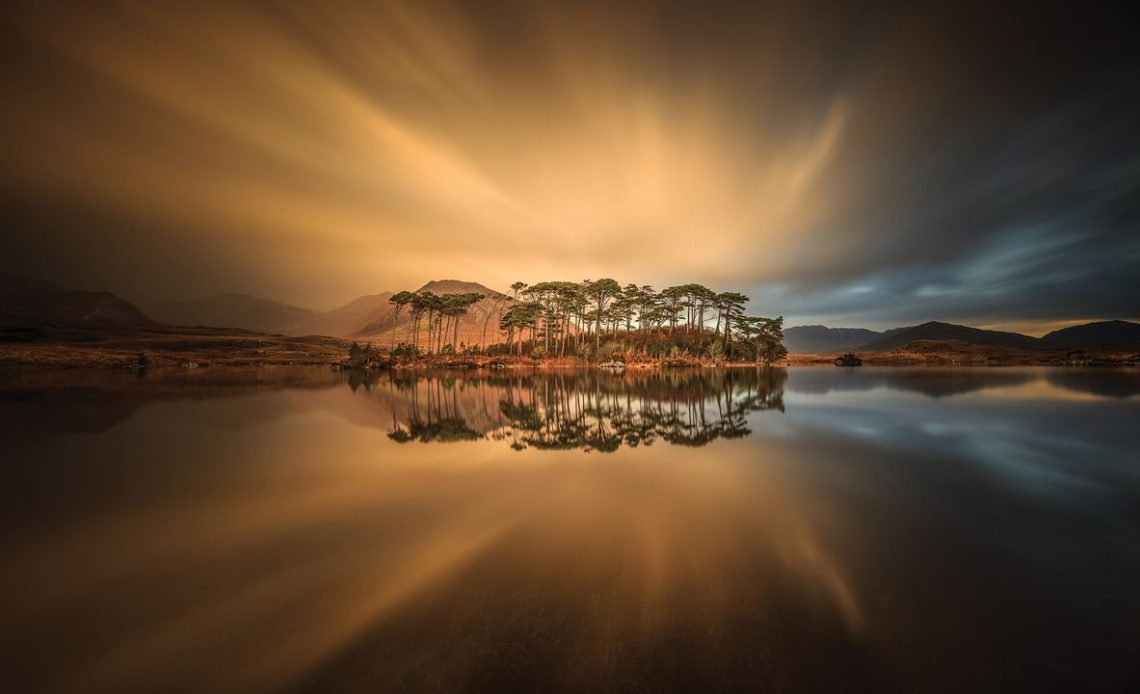
We’ve all seen the magic of long exposure photography – those dreamy, slow-shutter shots where waterfalls turn into silk, clouds streak across the sky and the ocean looks like sheets of glass. This technique has long been one of the most captivating and talked-about forms of visual storytelling.
“Using long exposures transforms ordinary scenes, adding a calm and ethereal aesthetic to images,” says award-winning photographer Ryszard Lomnicki. To truly capture the mood and movement of a scene – to bend light, time and motion into something surreal – you need to understand more than just your camera settings; just slowing down your shutter speed is not getting you these results.
That’s why I turned to Ryszard, a master of landscape and long exposure photography. He shared his technical knowledge about creating long exposure shots last leave lasting impressions. For more insights, read here on how to become a slow shutter speed expert.
Place & Time
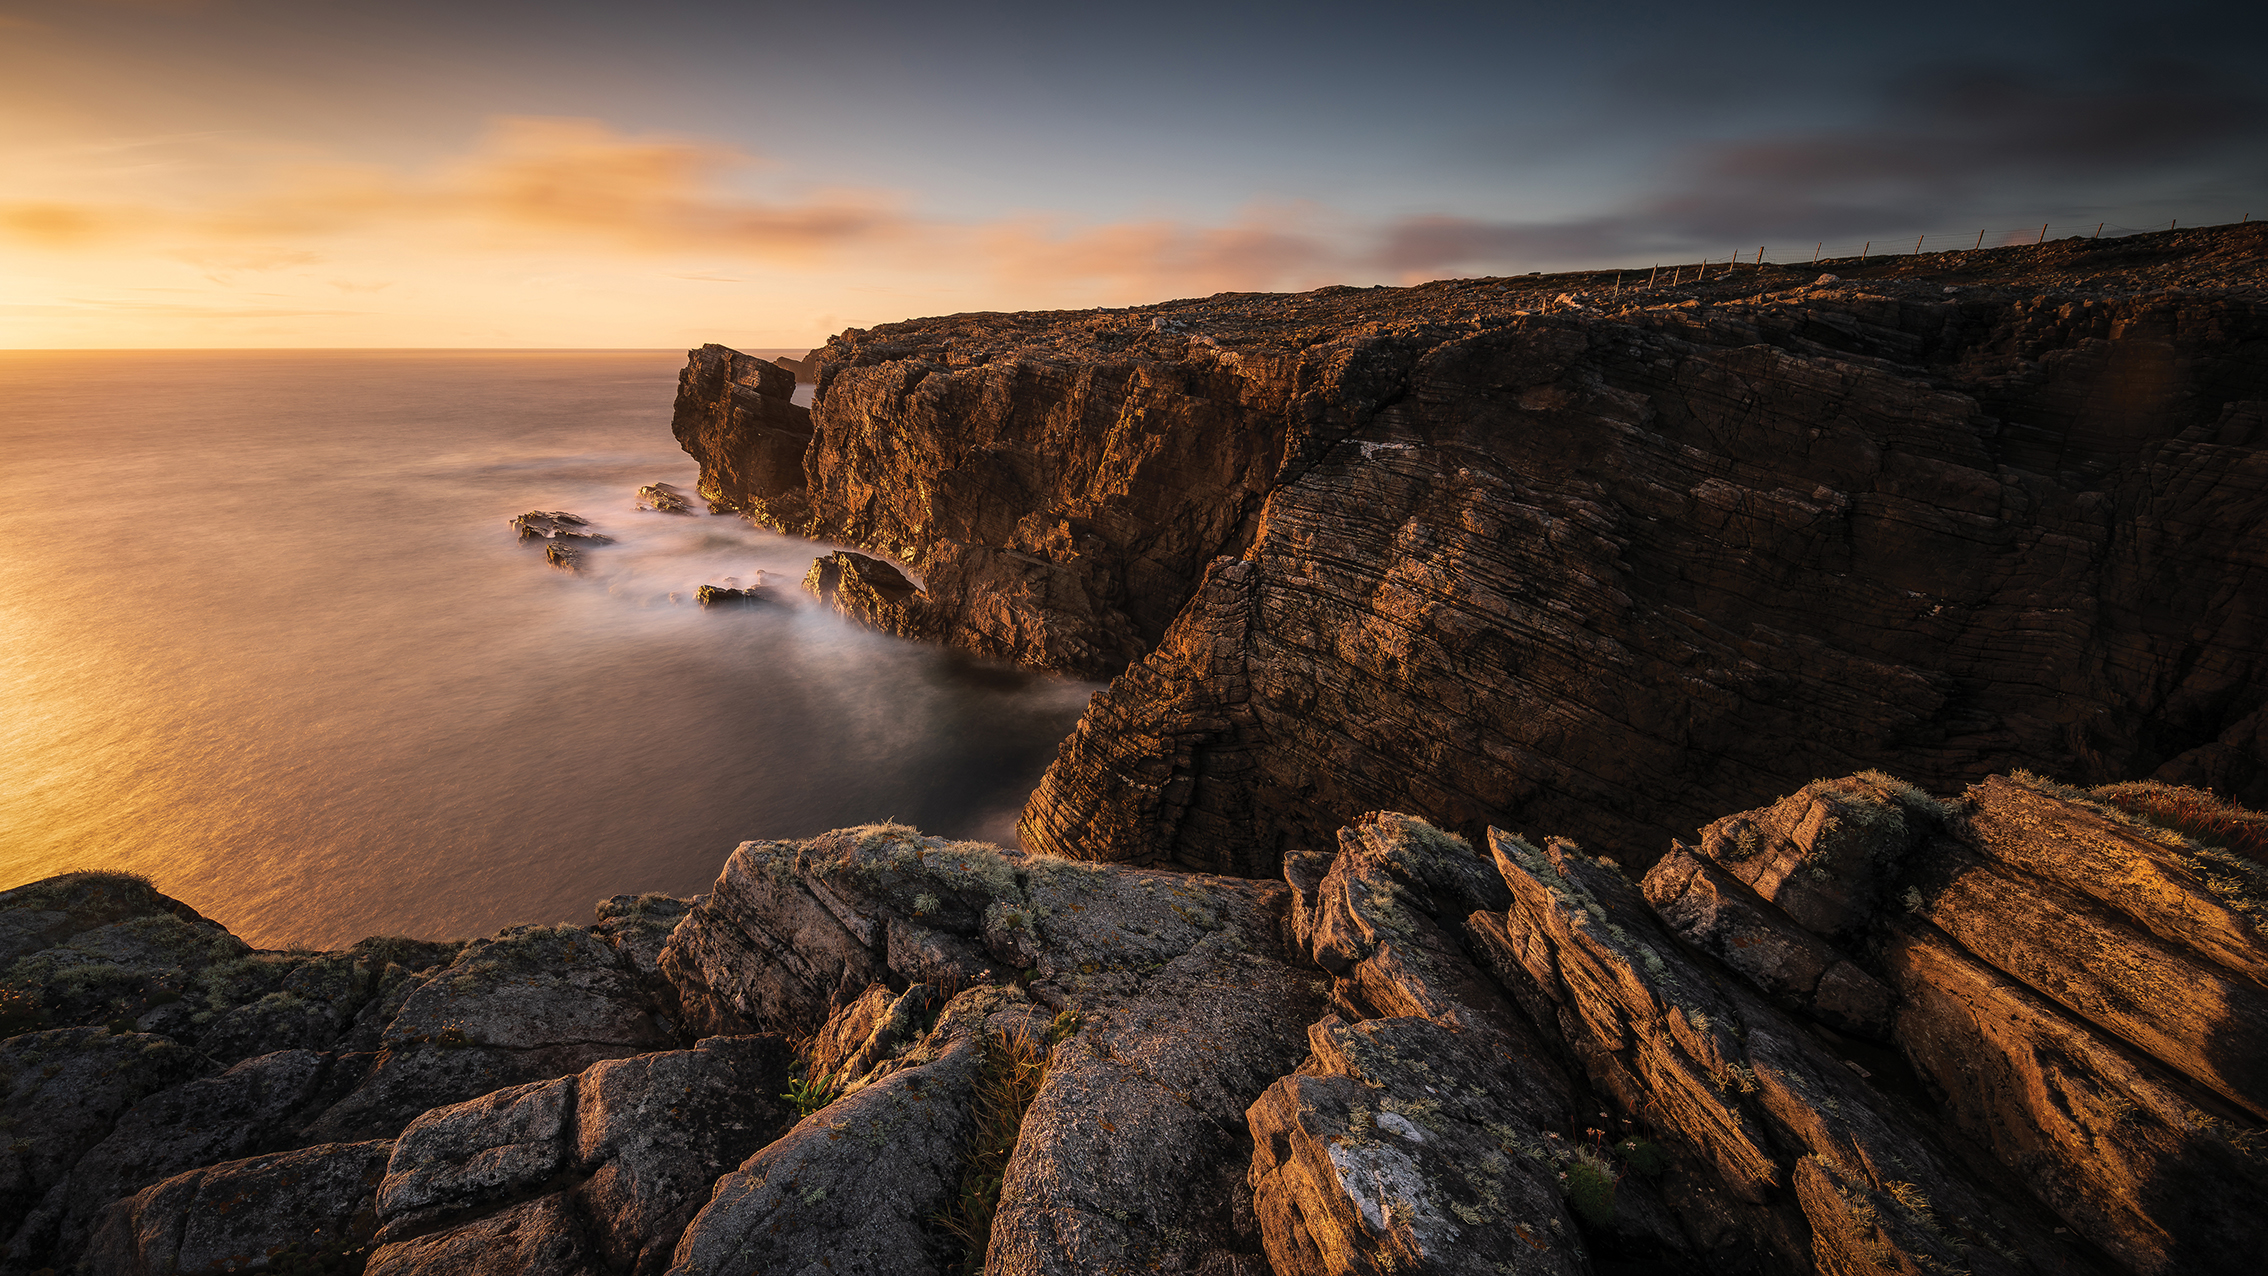
Choosing the place and time of the day, as well as reading the expected weather forecast, are important. The best conditions for landscapes are during sunrise, golden hour and sunset. If you want soft, warm light that will add depth and texture to your landscapes, check how the light will fall during sunrise, sunset and golden hour.
Compose your shot with subdivisions and guidelines to create an immersive visual story. A well-composed frame gives a harmonious and balanced image that is natural to the eye.
Filters
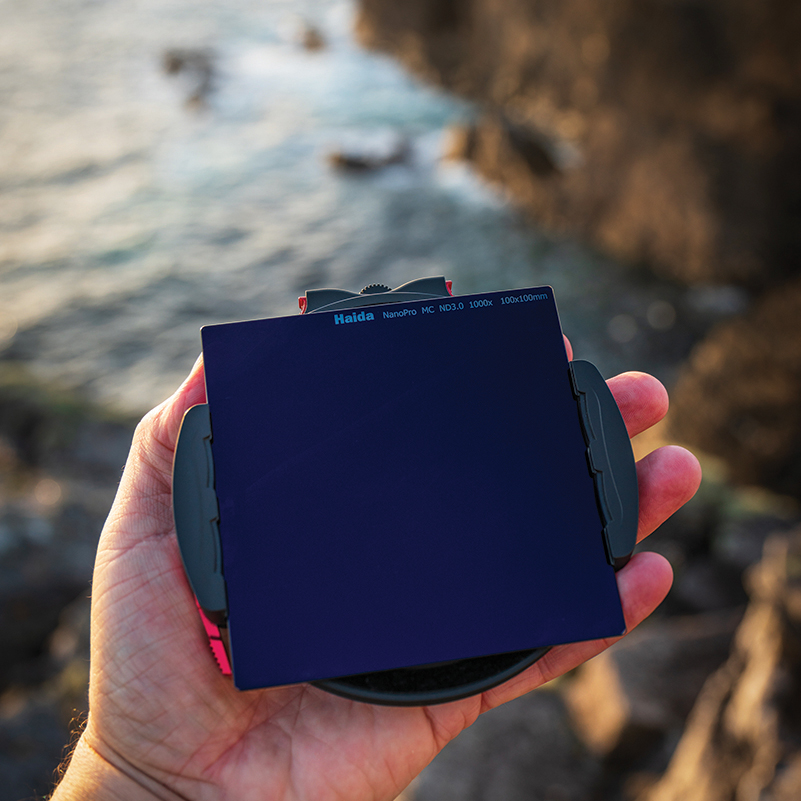
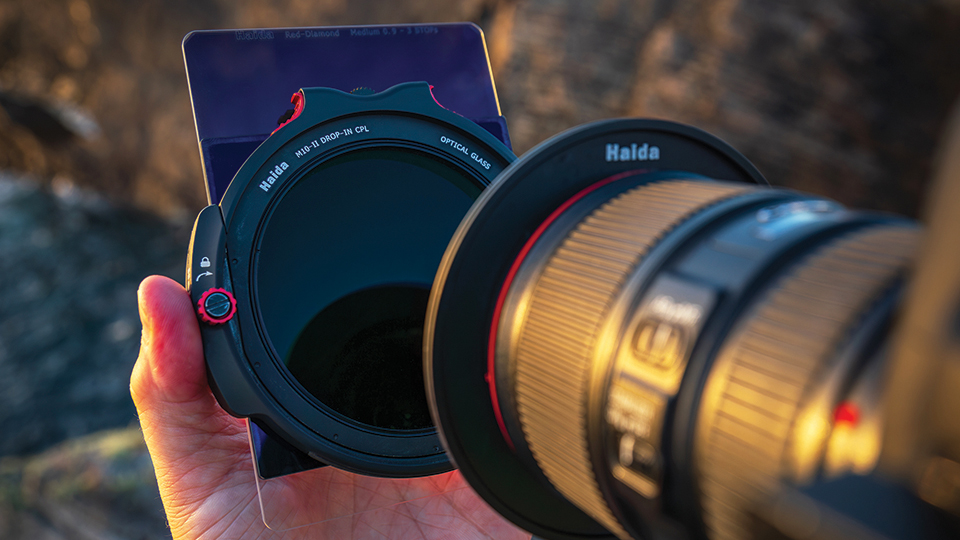
The basic tool for long-exposure photography is a filter. ND (neutral density) filters and GND (graduated ND) filters give you the ability to control the incoming light. The ND filter reduces the light entering the lens throughout the frame, extending exposure time, depending on the density of the filter.
Hard, medium and soft GND filters reduce the light incrementally to balance the exposure in high-contrast scenes, as GND filters have different densities. Filters with a hard transition are used when taking seascapes, where the horizon is clear. Soft filters can be used in mountain photography, for example, where the horizon is less defined.
Select the density of the full filter depending on the effects you want to achieve and the conditions. When referring to ND filters, ‘stops’ means the level of light reduction – the more ‘stops’ an ND filter has, the longer exposure times we can achieve. The most universal ND filter values are 1.8 and 3.0. The best way to calculate the exposure time is to use a template added to the filters or a smartphone app designed for this purpose.
I believe that square filter systems are better than round filters. They offer greater convenience, versatility and precise light control. To use them you need a filter holder, which is an additional cost, but the benefits of using it are invaluable. I use a Haida Filter holder and filters to ensure high quality. The Haida M10-II holder also enables me to use a series of drop-in filters along with square filters, which significantly extends its possibilities and convenience.
Long exposure photography tutorial
Pro tip
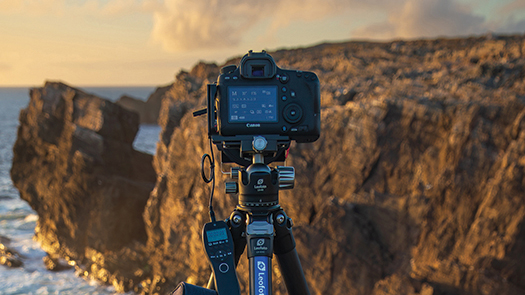
When photographing with long exposure times, it’s important to get a stable camera position. That means you will need a solid tripod with a good head that is resistant to weather conditions, ND filters to reduce the amount of light entering the lens and a timed remote control trigger.
1. Use a sturdy tripod
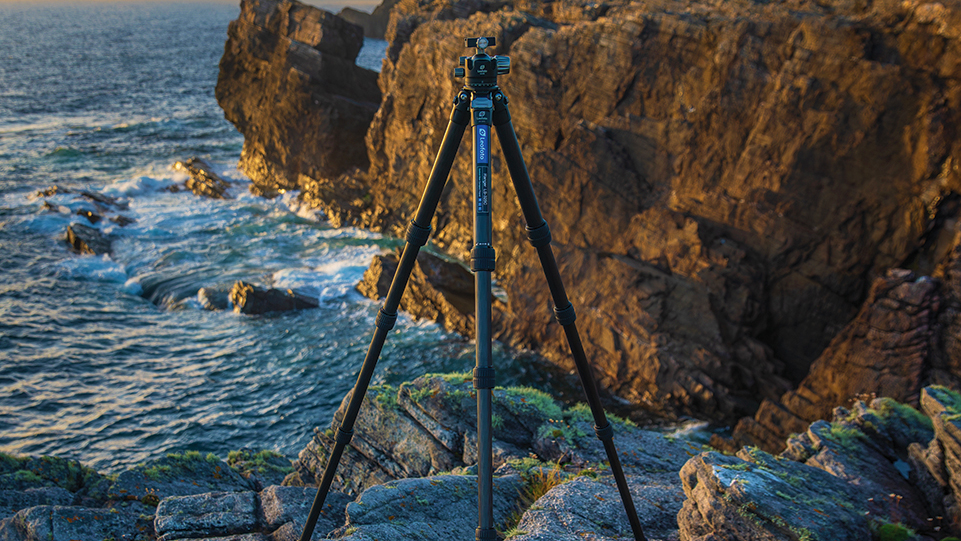
Mount the camera on a tripod. Make sure that it is level and stable to get sharp photos. This is especially important when working with long exposures that last a few minutes.
2. Shoot in manual
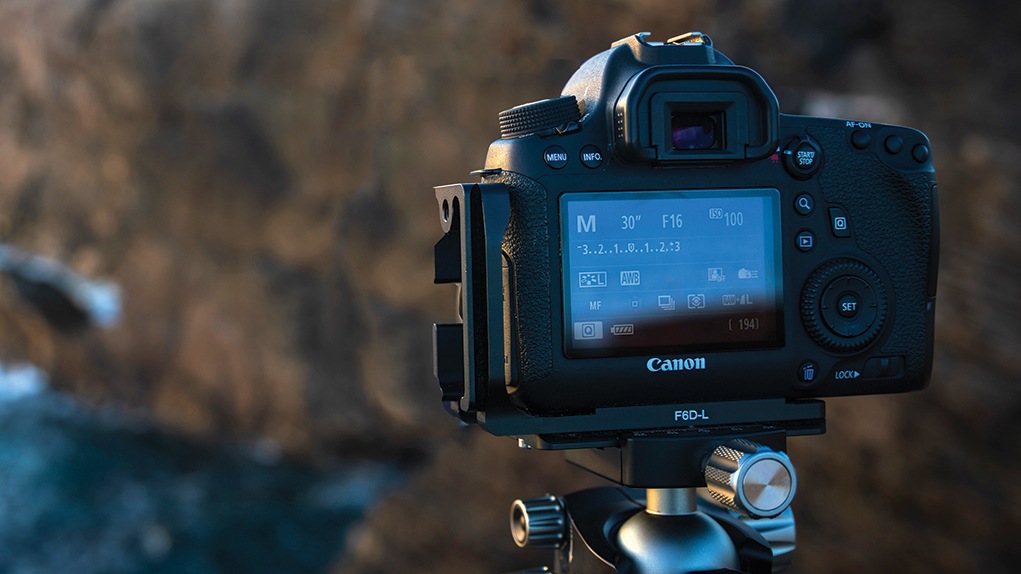
Switch to manual mode, then choose a narrow aperture (a high f-number) for greater depth and a lower ISO setting to reduce the amount of image noise during long exposures.
3. Mount the filter
Attach the holder with a filter and extend the exposure time. Calculate the time based on stops and lighting conditions, using the conversion table with the filter or phone app.
4. Attach remote release
Now it’s time to press the shutter button to start the exposure. Use the self-timer function or a remote release to minimize camera shake when taking the photo.
Author: Kim Bunermann
Source: DigitalCameraWorld
Reviewed By: Editorial Team
