Apple brings some advanced features to iCloud with iOS 15, including iCloud Private Relay, the ability to use more cameras with HomeKit Secure Video, and total control to keep your email private. Let’s look at the latter — here’s how to use Hide My Email with iPhone and iPad now that it’s officially launched with iOS 15.2.
Apple first started offering a way to hide your email with its Sign in with Apple feature back in 2019. This year with iOS 15.2 and iCloud+, the email privacy aspect of that is being offered as a standalone feature called “Hide My Email” with manual control.
Here’s how Apple describes it:
Keep your personal email address private by creating unique, random addresses that forward to your personal inbox and can be deleted at any time.
If you haven’t used Sign in with Apple, Hide My Email offers privacy, flexibility, and control so you can feel good about who does and doesn’t know your actual email address. Let’s dive into how it works on iPhone and iPad.
How to Hide My Email with iPhone and iPad in iOS 15.2
Hide My Email comes with iCloud+, which is what Apple has rebranded all of the paid iCloud plans. You won’t get Hide My Email or the other iCloud+ features with the free 5GB iCloud tier.
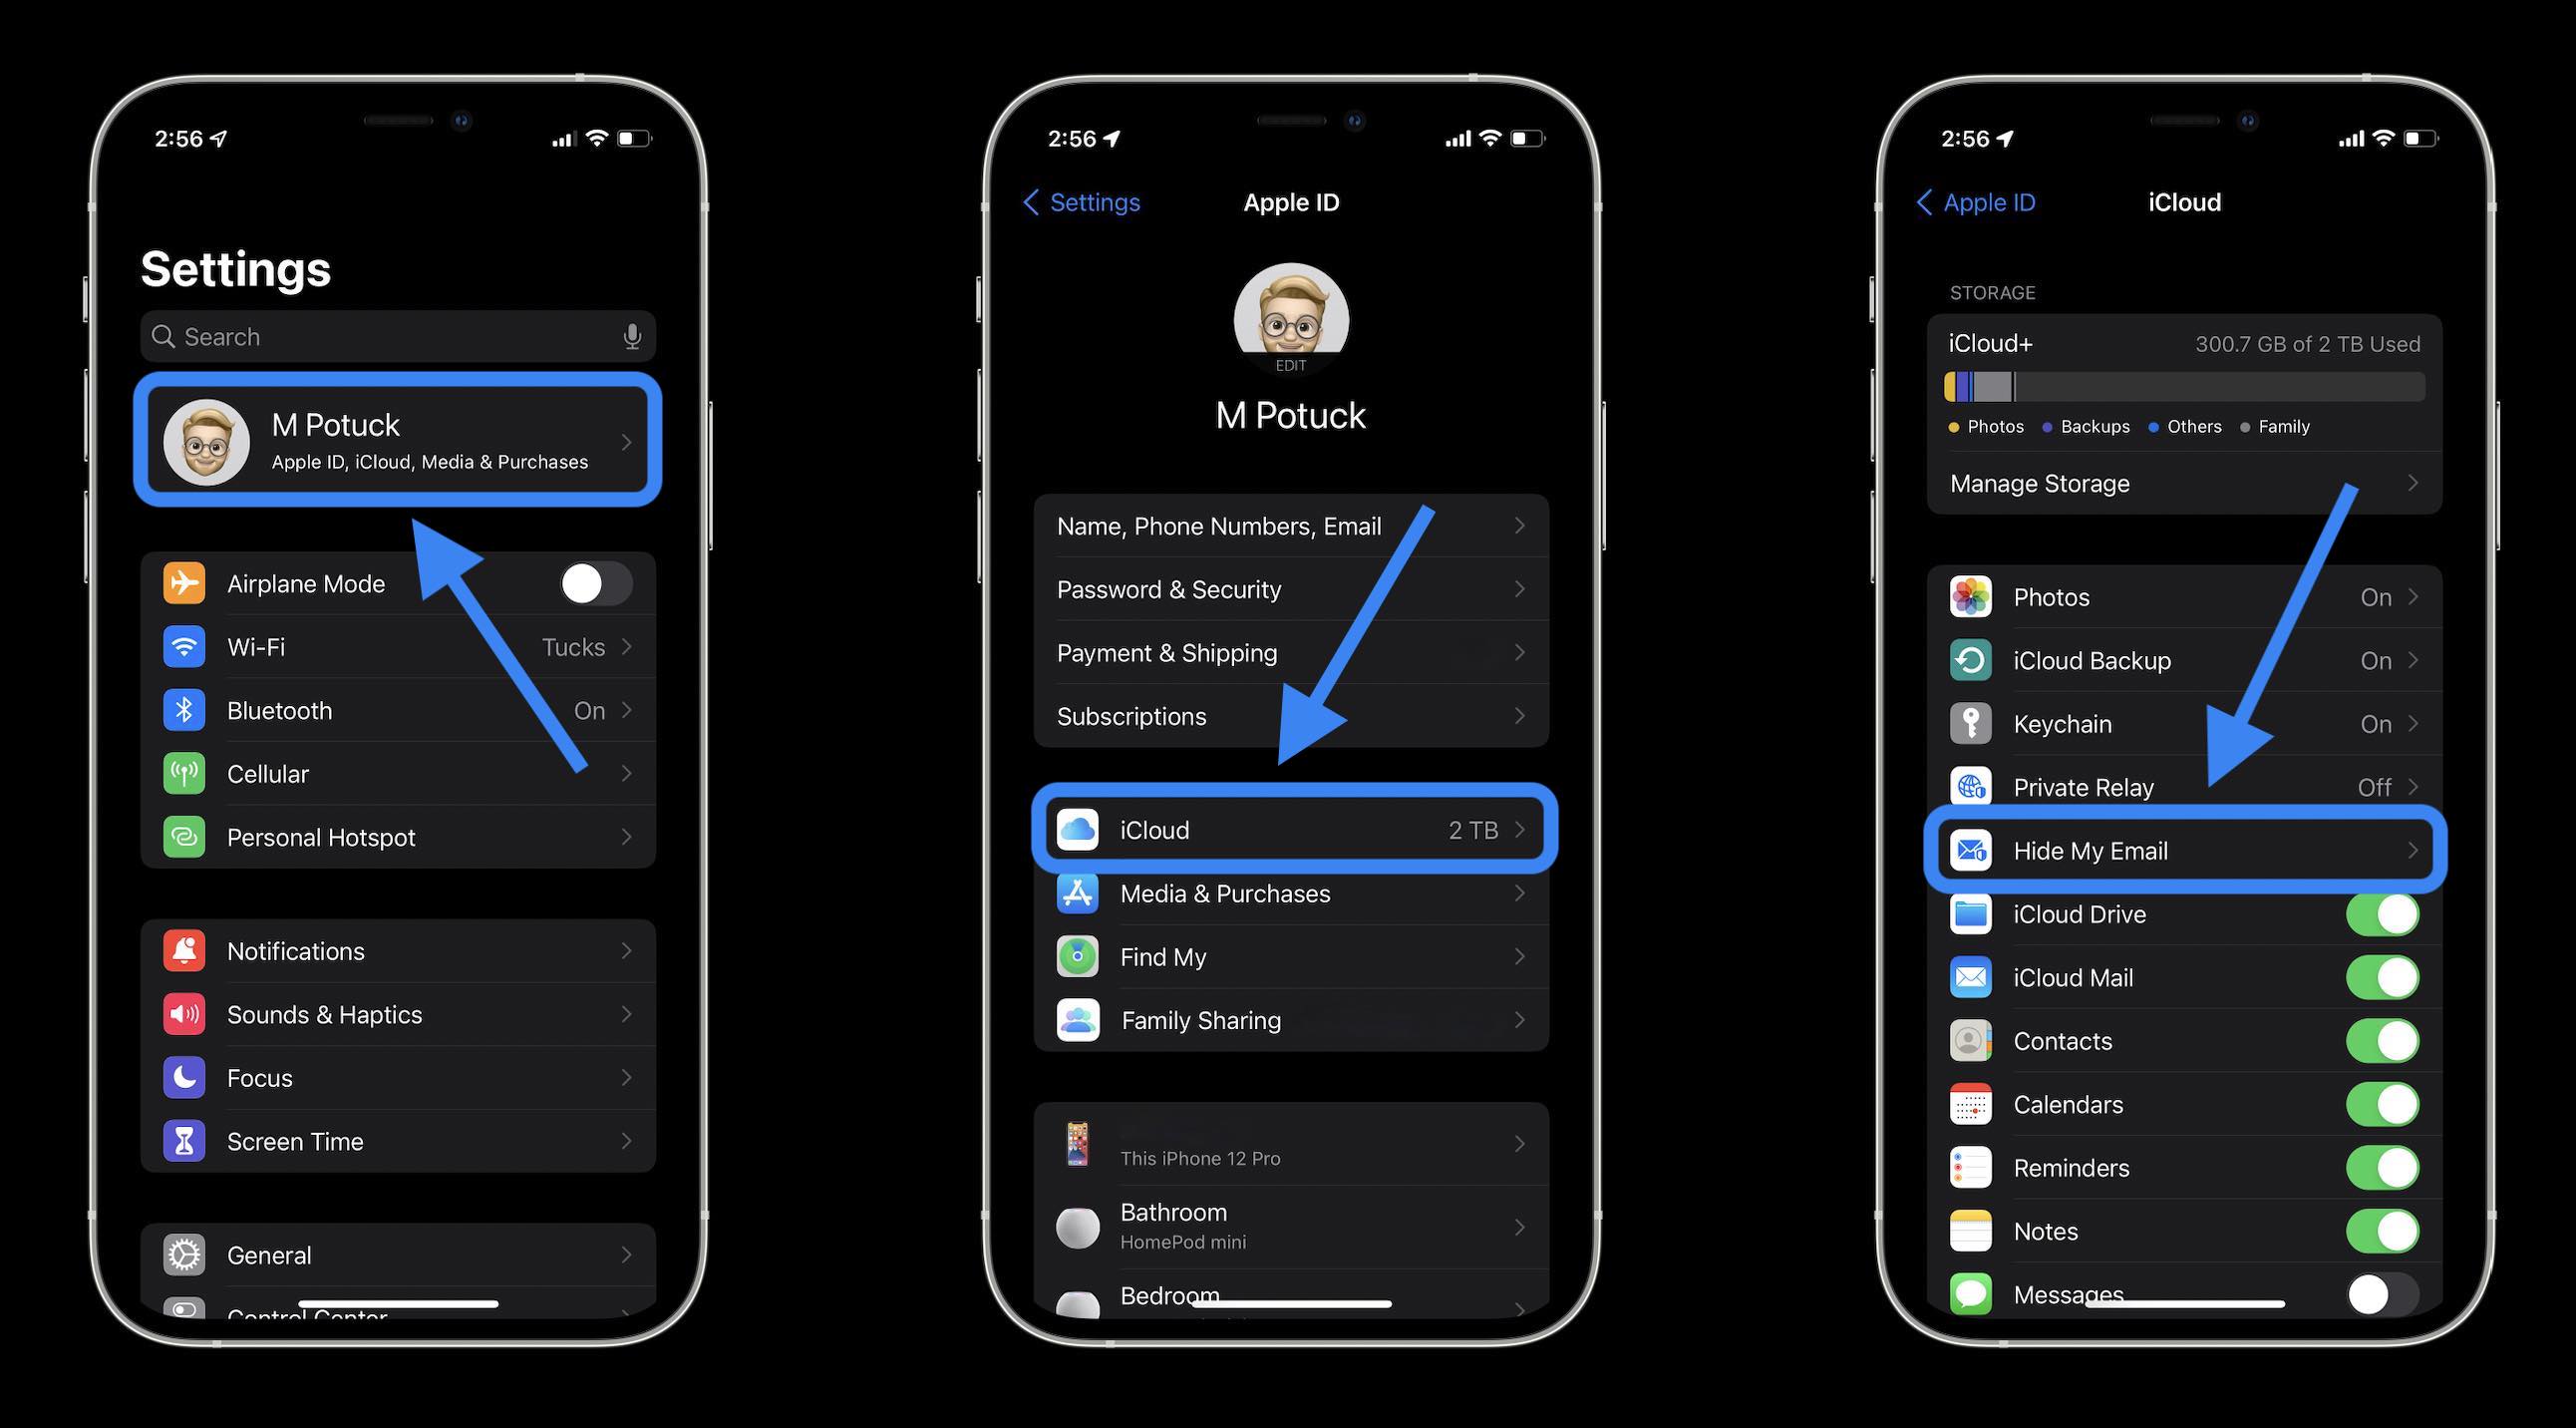
- On iPhone or iPad running iOS 15.2, open the Settings app
- Tap your name at the top
- Choose iCloud
- Now tap Hide My Email
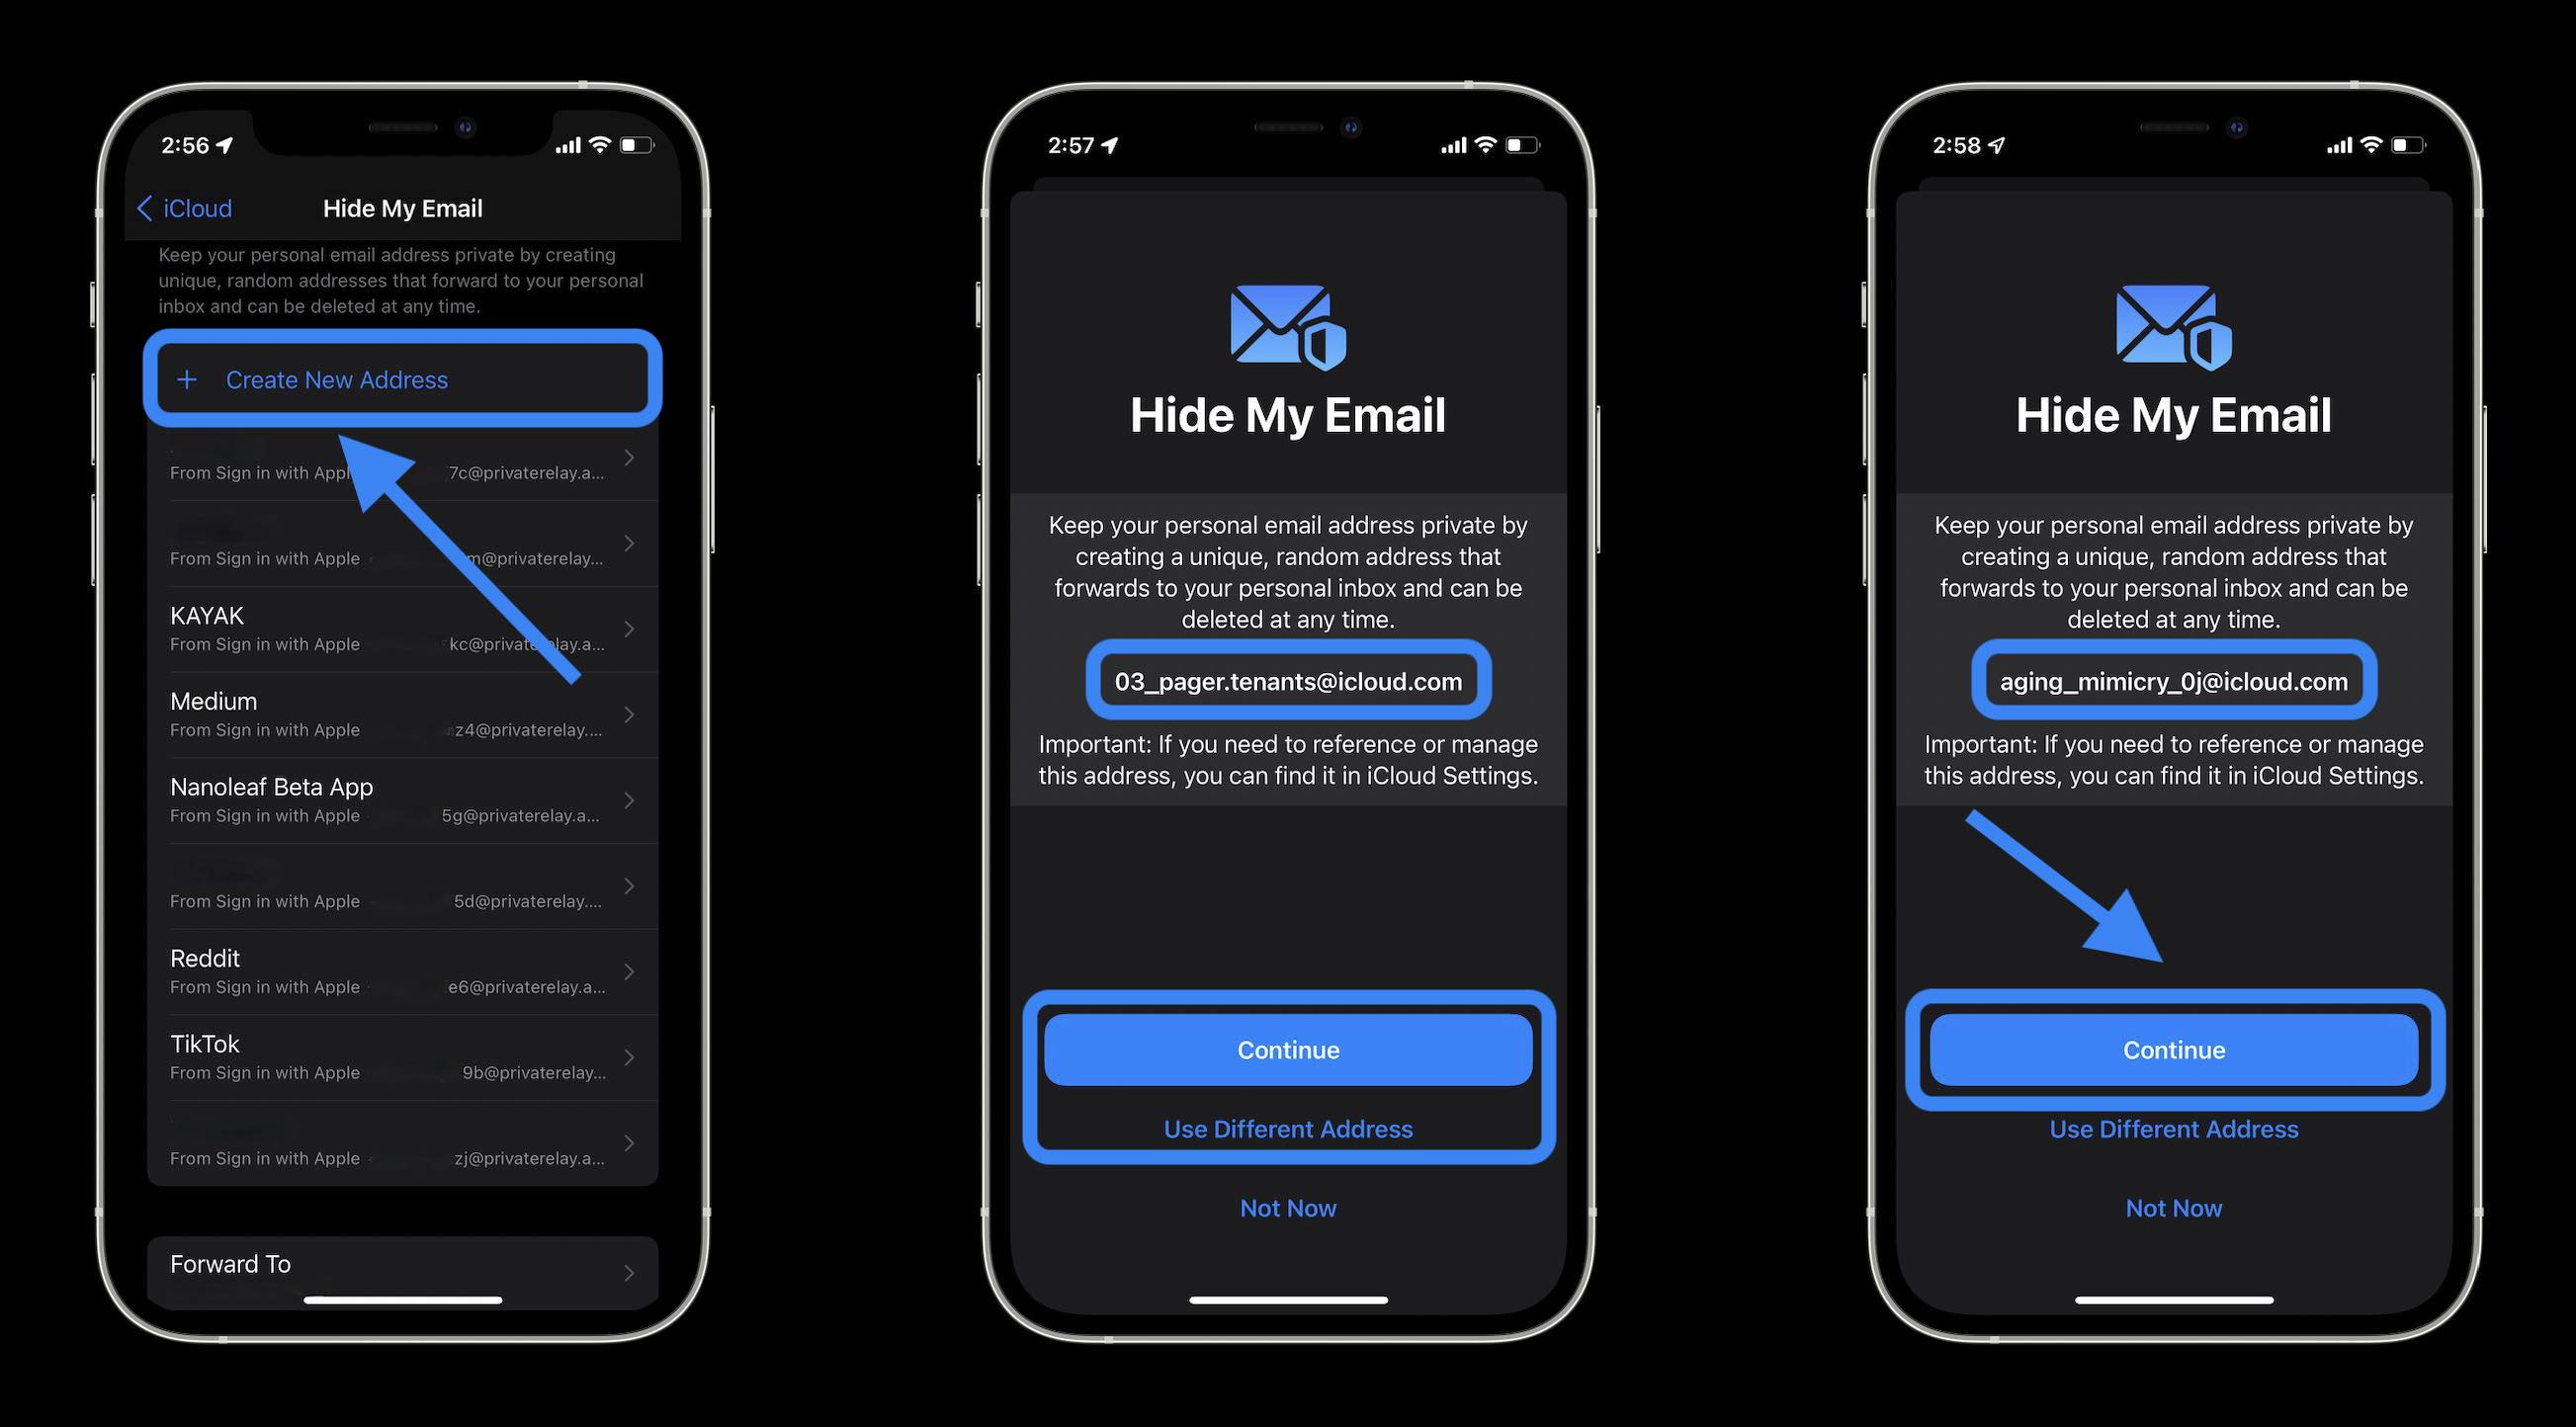
- Choose + Create New Address
- You’ll also see all of your currently used alias emails from Sign in with Apple, tap one to manage it
- At the bottom you can manage where the random alias emails forward to

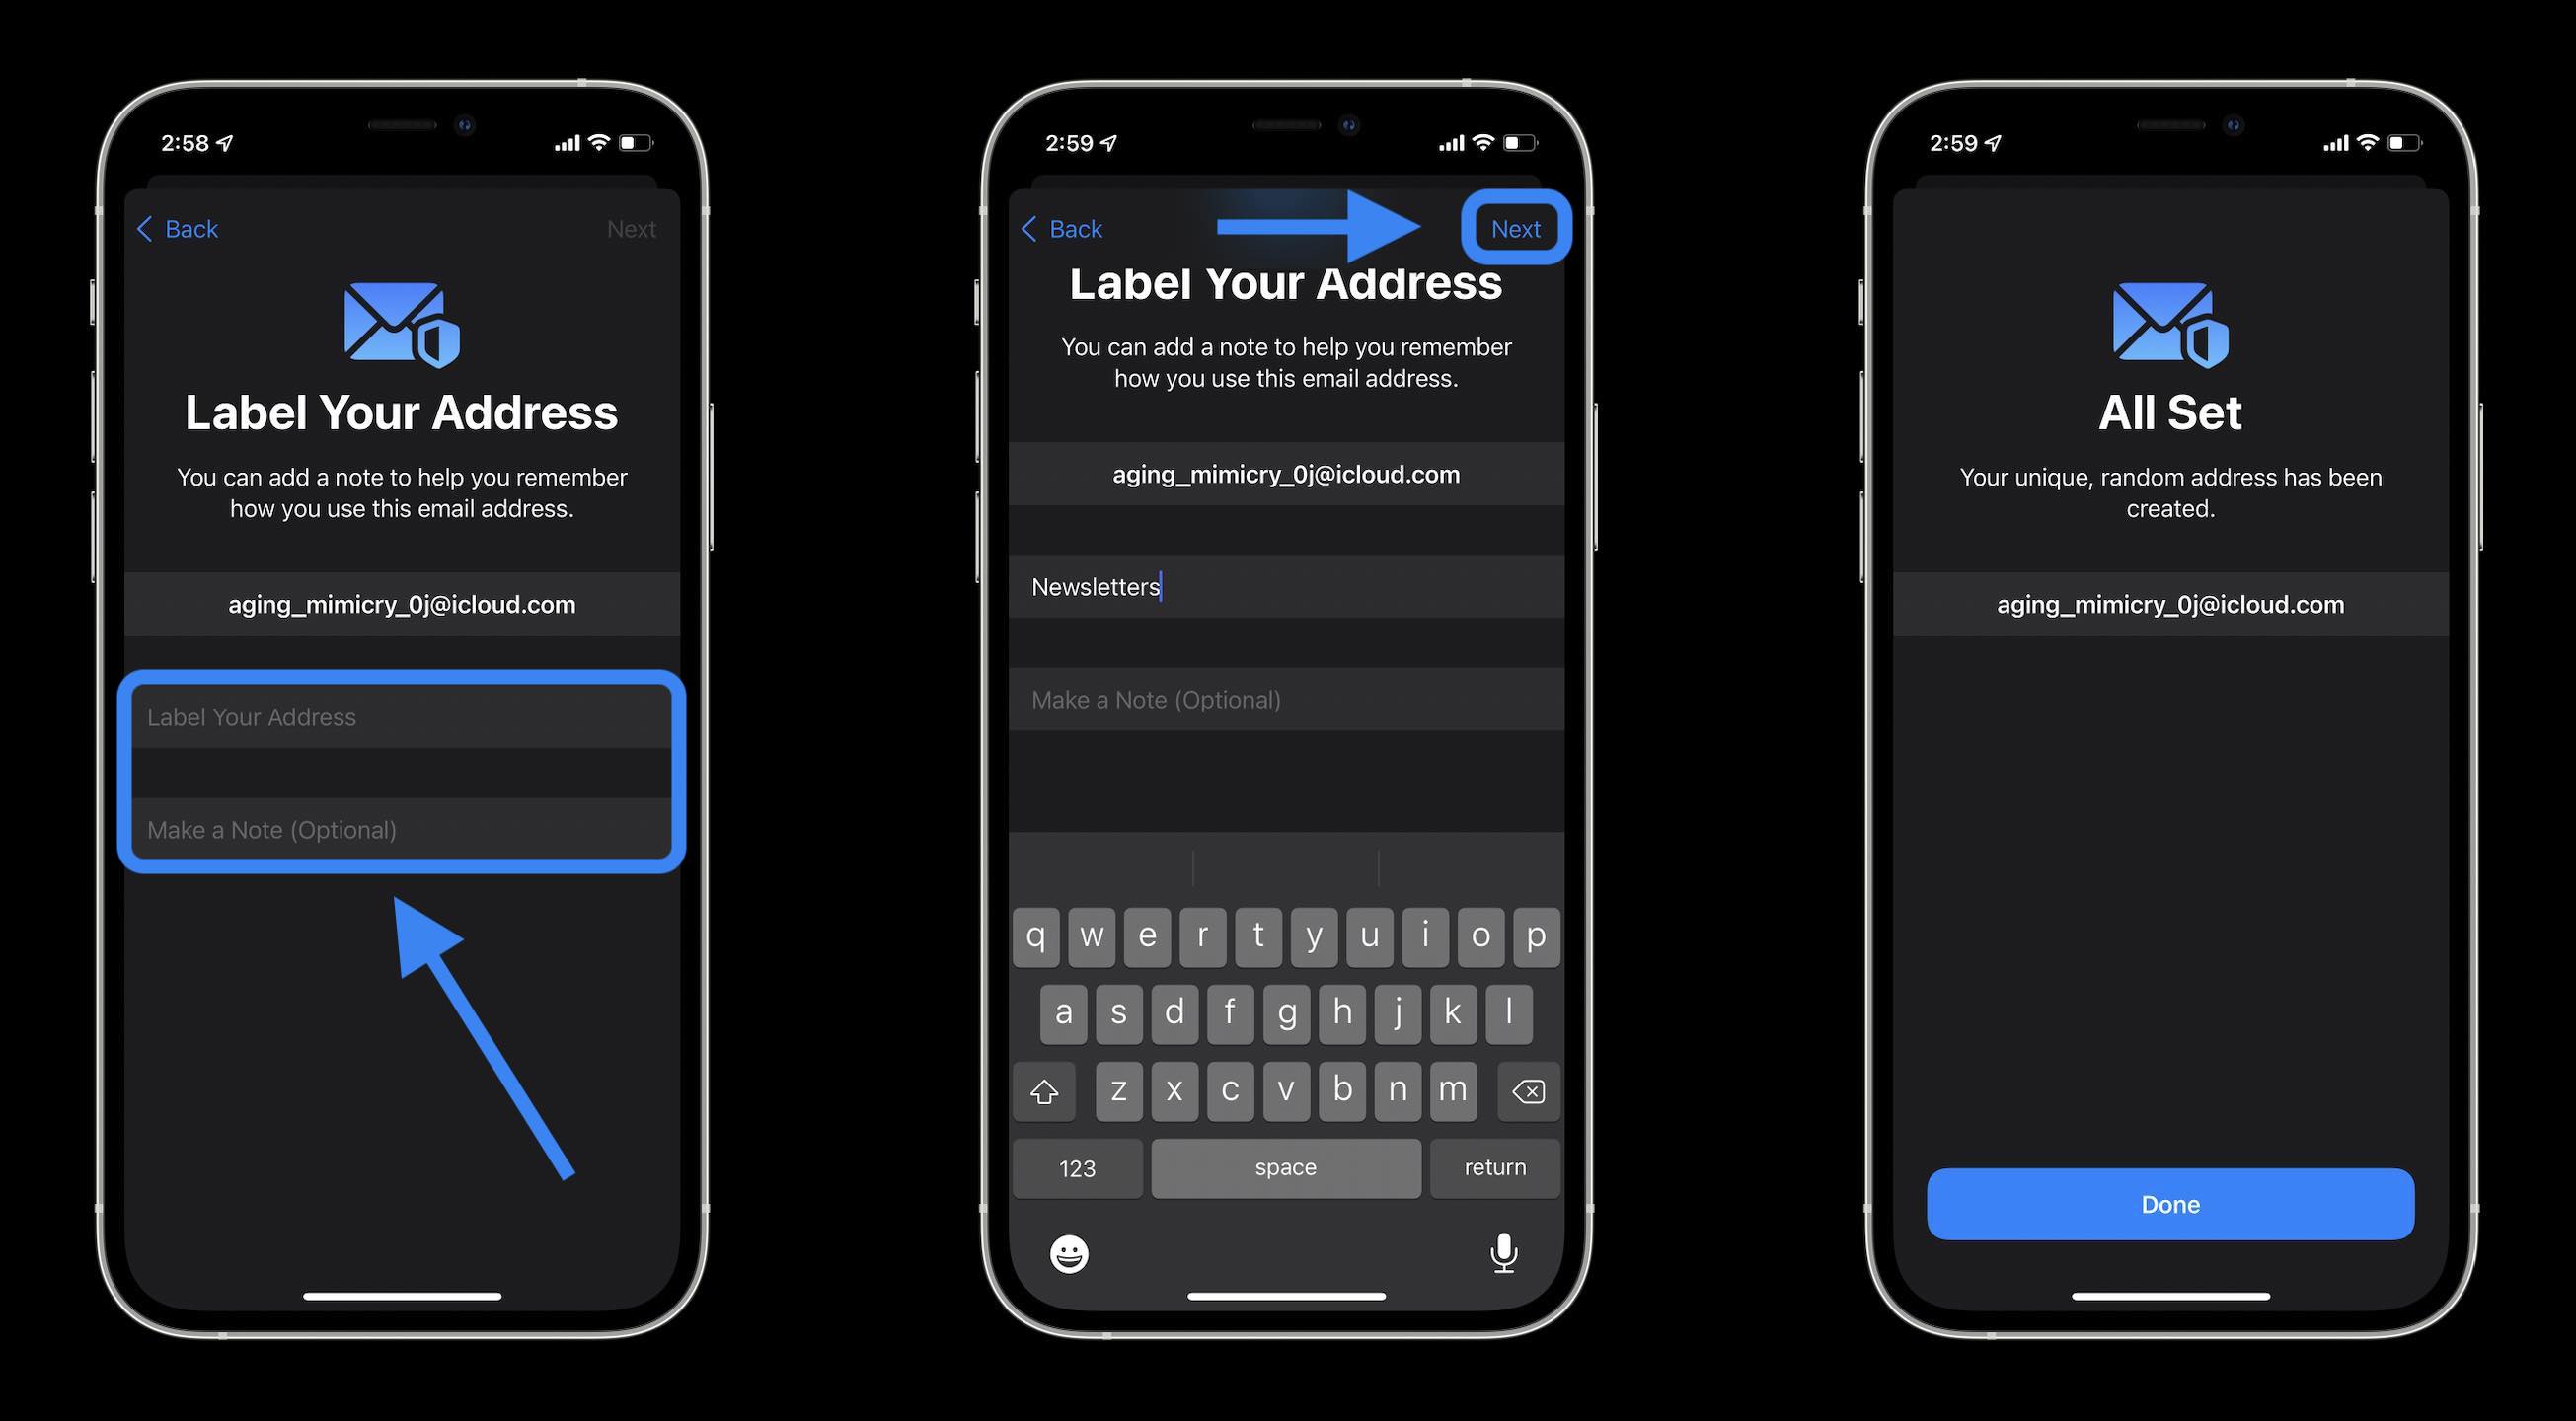
When you create a new random email alias, you can use the first one by tapping “Continue” or choose “Use Different Address” to generate another random one.

To keep things organized, you’ll need to label your address with the option to add notes. Tap “Done” when finished.

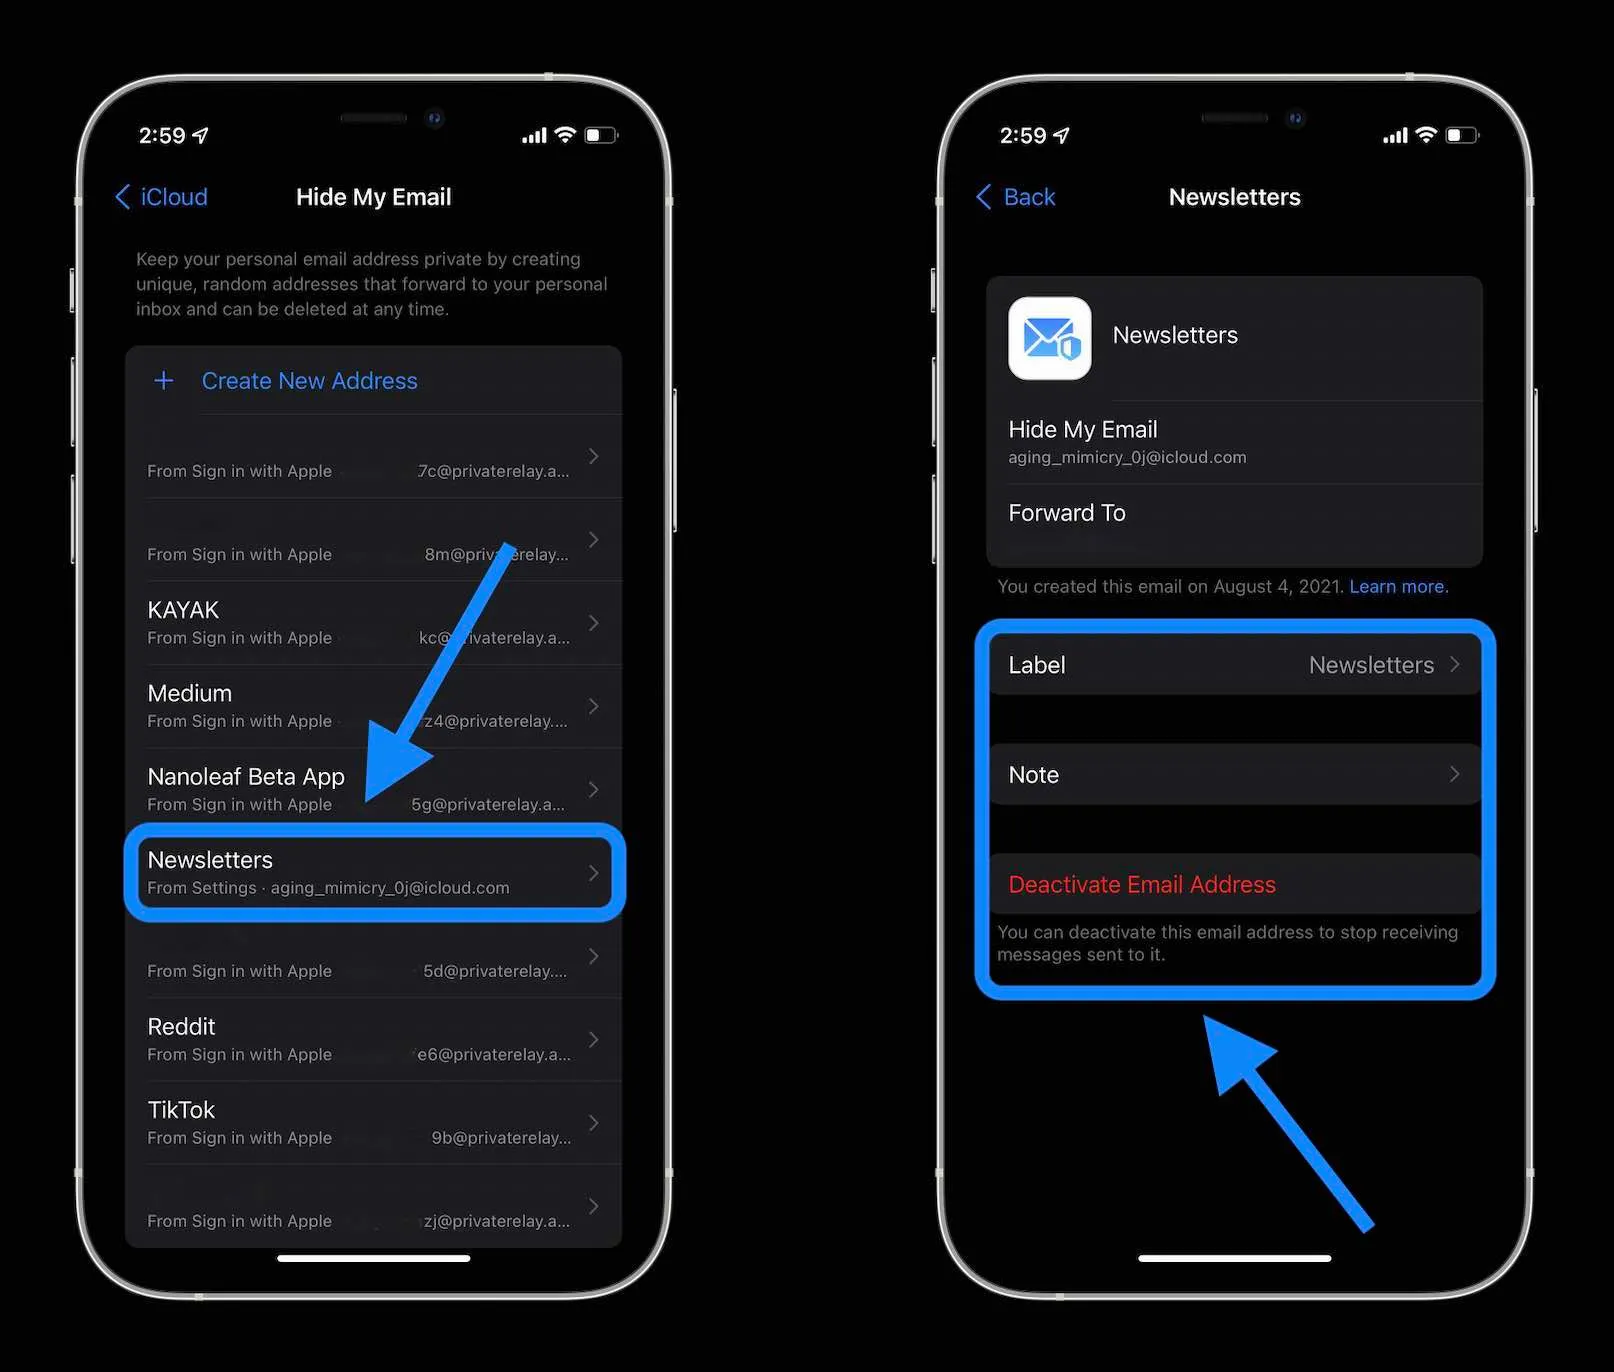
Now you’ll see the new address you’ve made that’s ready to use. Each alias will also be labeled as either coming from Sign in with Apple or “From Settings” for manually created ones.

You can tap on manually created aliases to change the label, notes, or deactivate them.
To edit and deactivate aliases made with Sign in with Apple, tap one, then choose “Manage Sign in with Apple Settings.”
- Hands-on: Here’s how Background Sounds work in iOS 15
- Hands-on: Here’s how the all-new Safari in iOS 15 works
- Hands-on: Here’s how the new iPhone Focus mode works in iOS 15
- iPhone: How to enable and disable iCloud Private Relay in iOS 15
- iOS 15 brings new Announce Notifications feature for Siri, here’s how it works
Author: Michael Potuck
Source: 9TO5Google


