
One of the features debuting with iOS 13 and iPadOS 13 that hasn’t received much attention since its announcement at WWDC is the ability to use custom fonts on iPhone and iPad. The feature is limited for now, but follow along for how to get going with custom fonts on iOS and iPadOS.
Apps have existed for quite some time that offer a workaround to bring custom fonts to iOS and specific apps. But with iOS 13, Apple is officially supporting font installation and management on iPhone and iPad, and it works system-wide (limited for now).
Below, we’ll cover two options to download, install, and use fonts in iOS 13. However, at the time of writing, using custom fonts in iOS and iPadOS is only supported in Pages, Keynote, Mail, and limited third-party apps.
This means you can’t use any font in any app you’d like (Messages, Facebook, Instagram, Snapchat, etc.) You can download third-party keyboards and/or apps for those specific apps to use custom fonts, but those are different from the ability to use system-wide compatible fonts in iOS 13. Even though this support is limited for now, compatibility will increase over time.
iOS 13: How to use custom fonts on iPhone and iPad
Option 1:
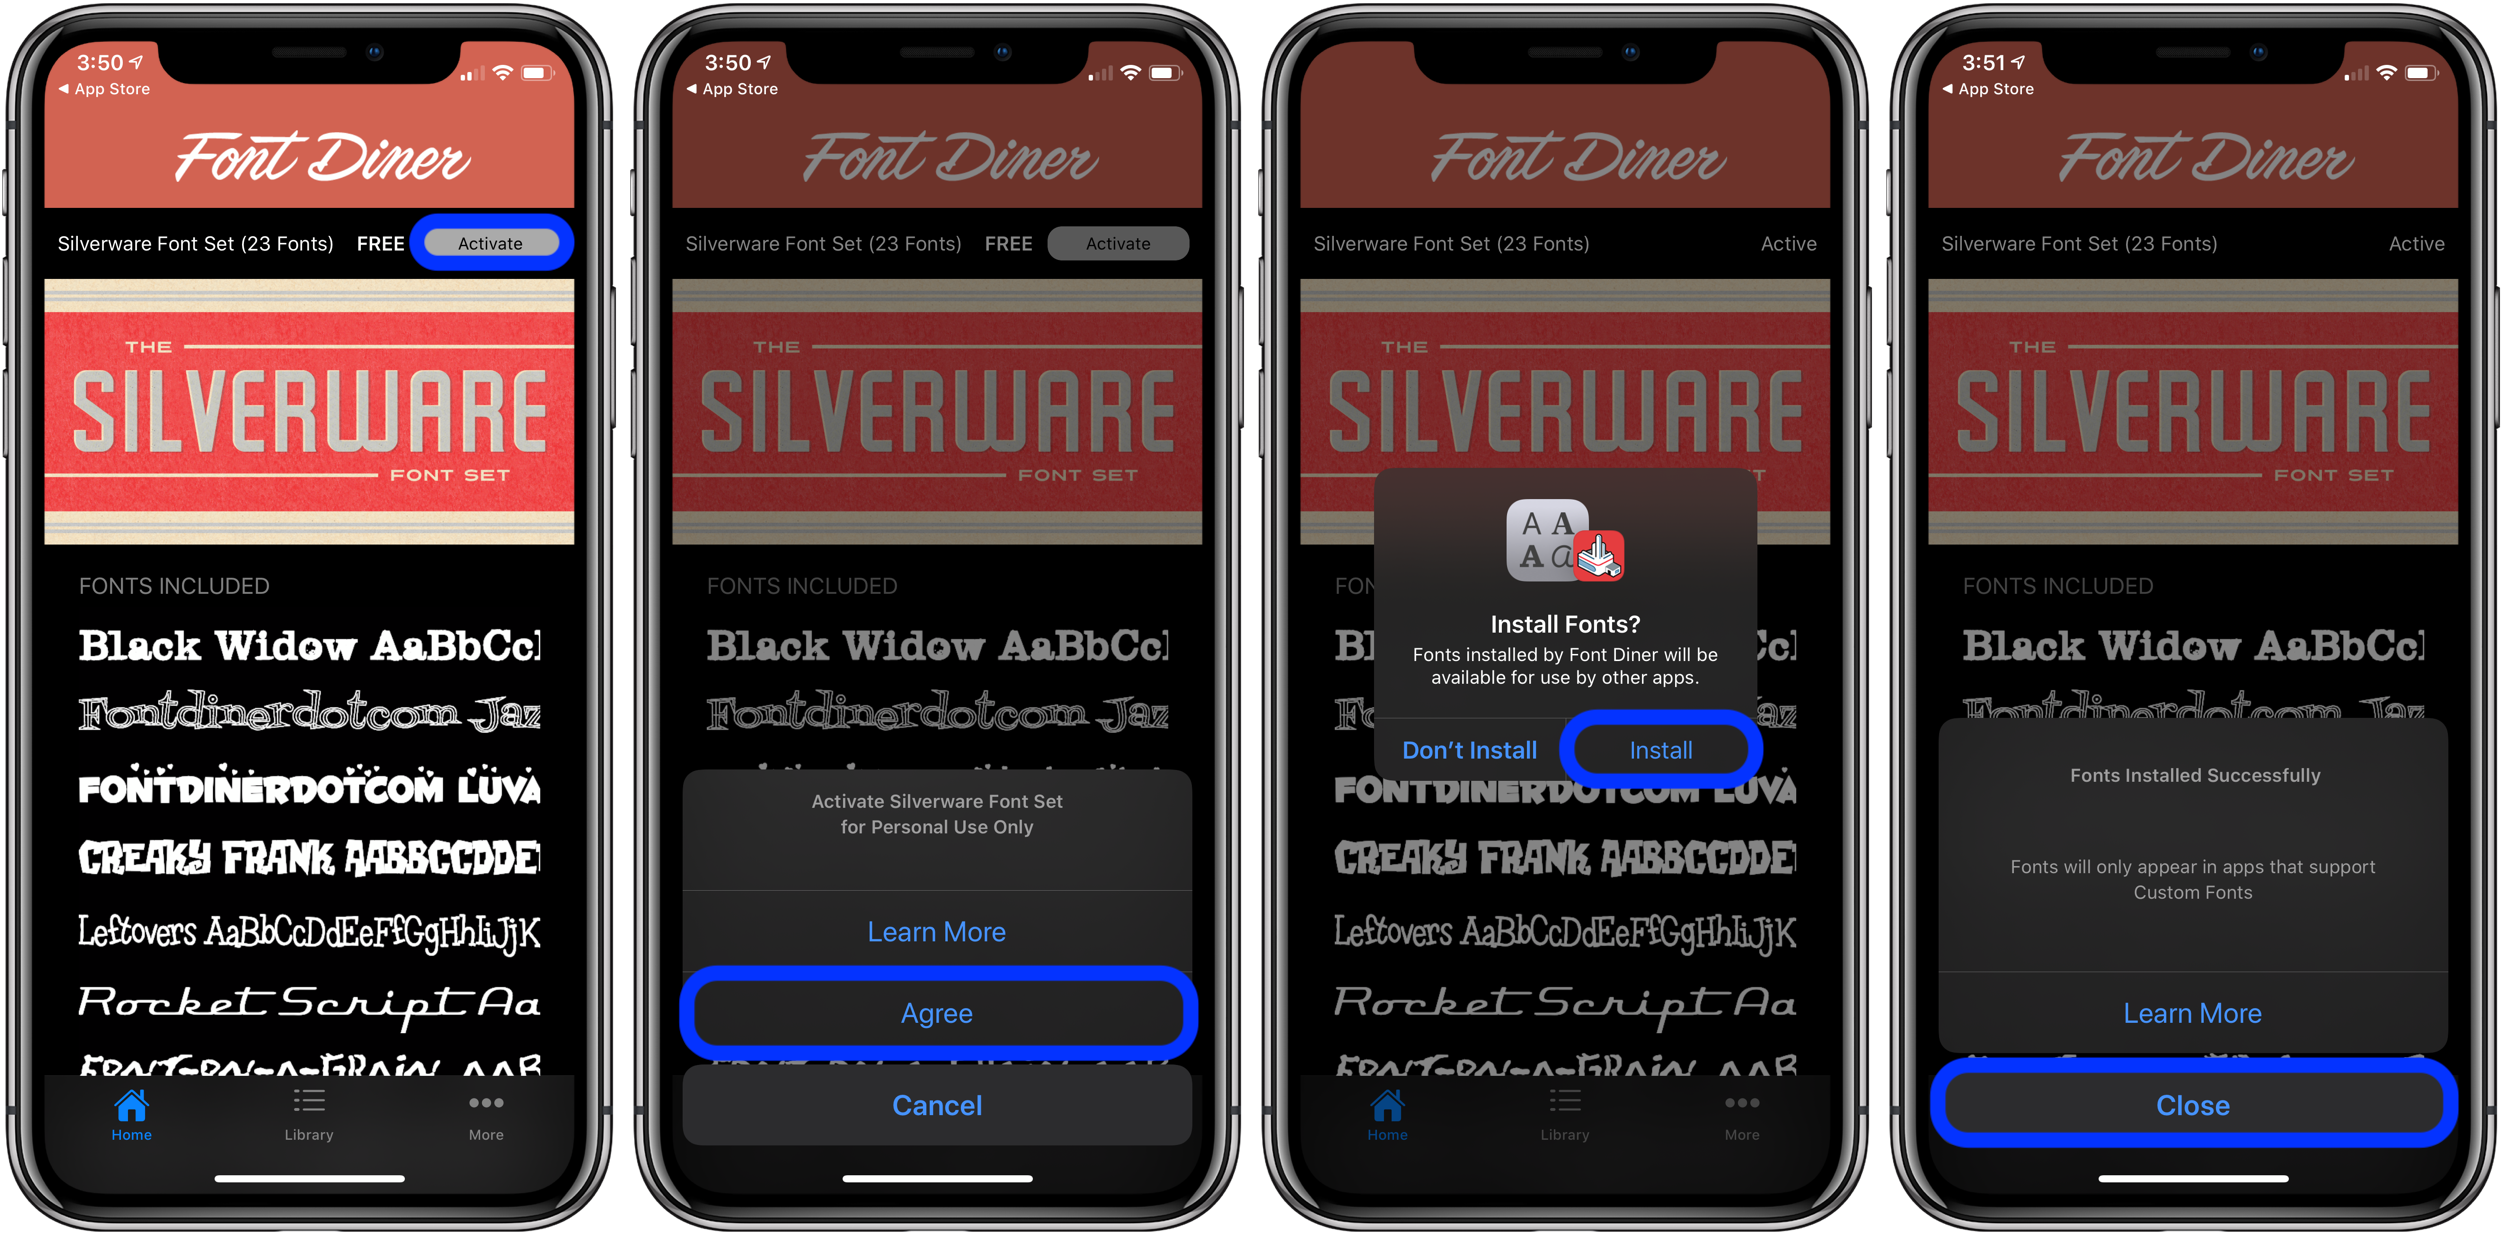
- Font Diner is one of the first free apps to officially work with custom system-wide fonts in iOS 13 without a workaround
- After downloading it, open it and tap in the top right corner (gray button)
- Tap , then
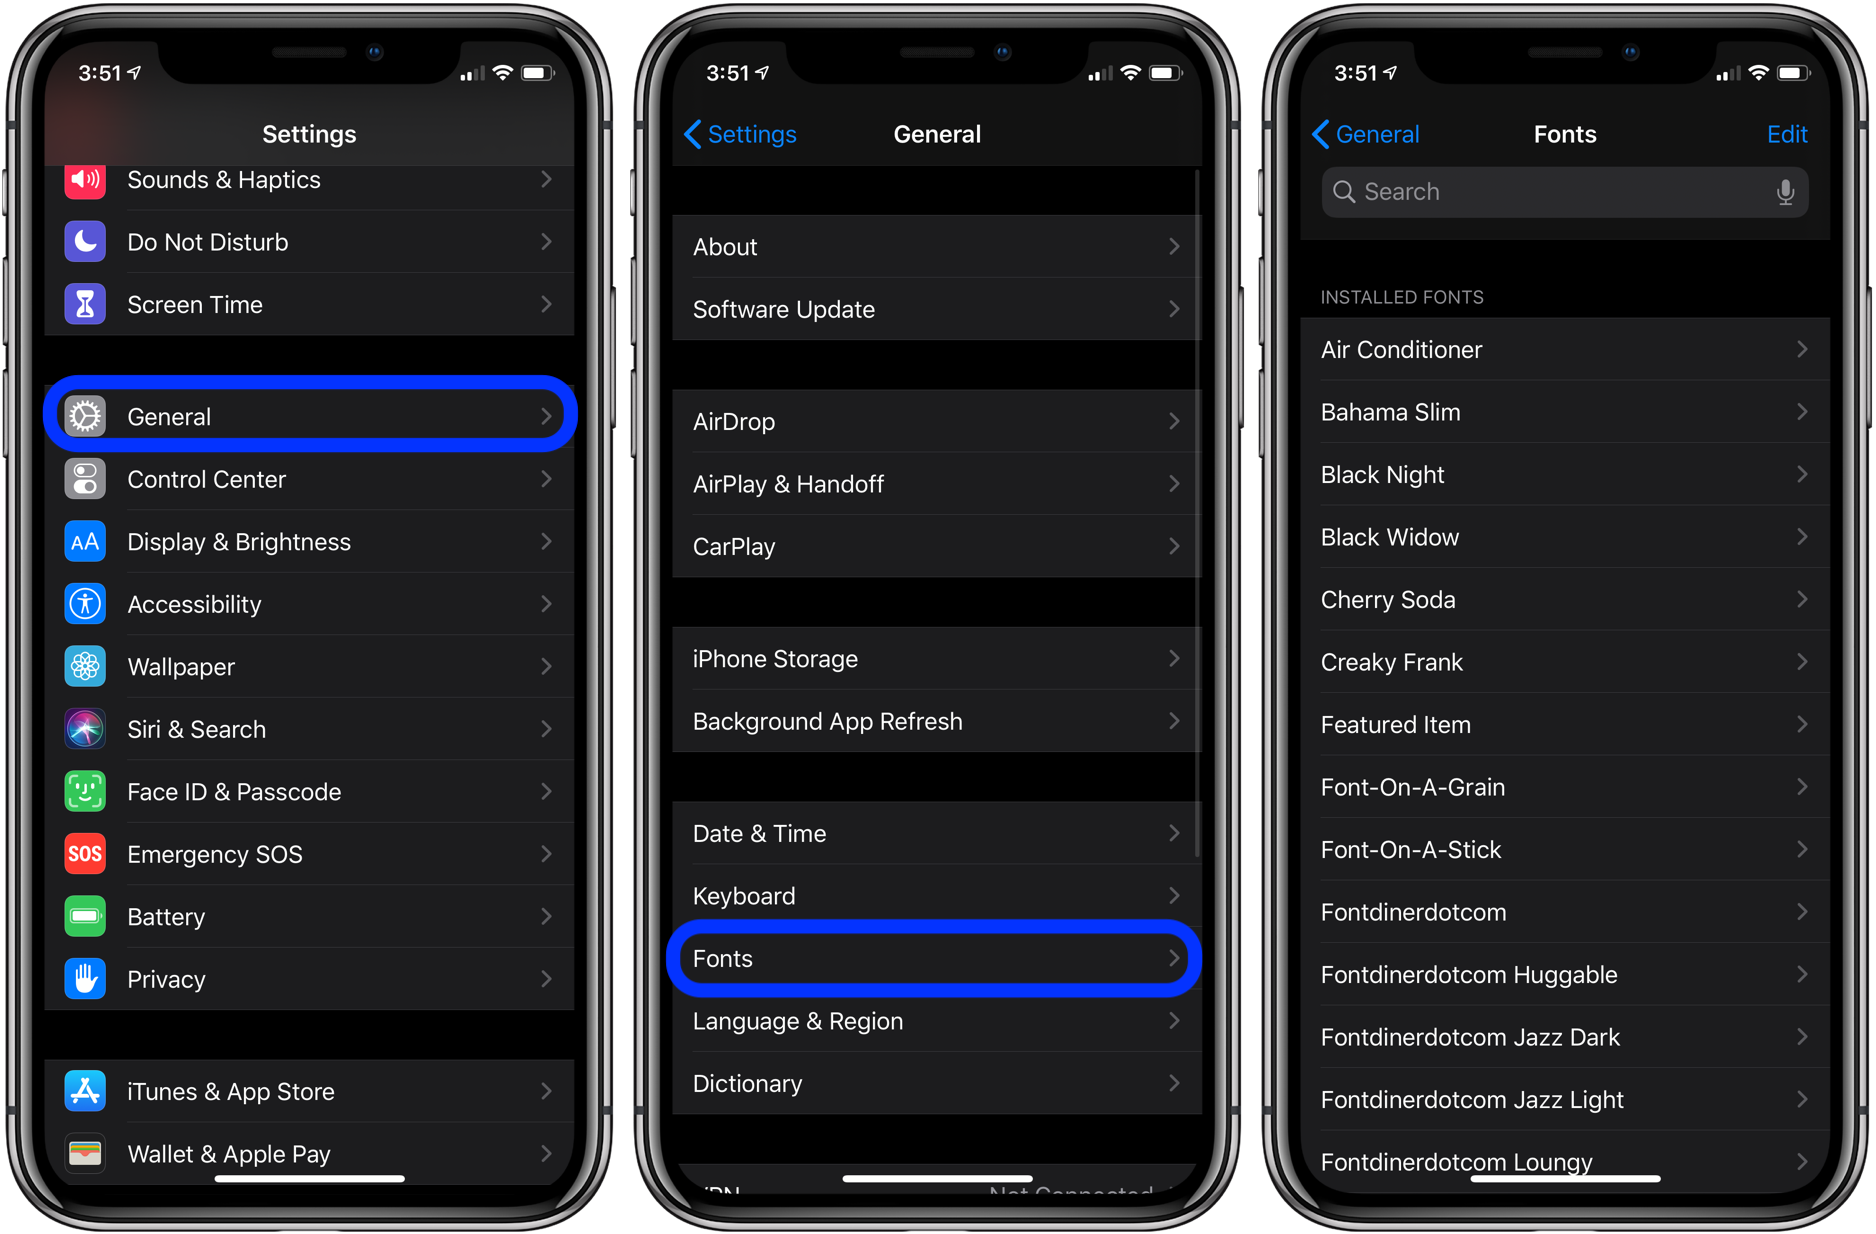
- You can see all the installed custom fonts by heading to Settings > General > Fonts
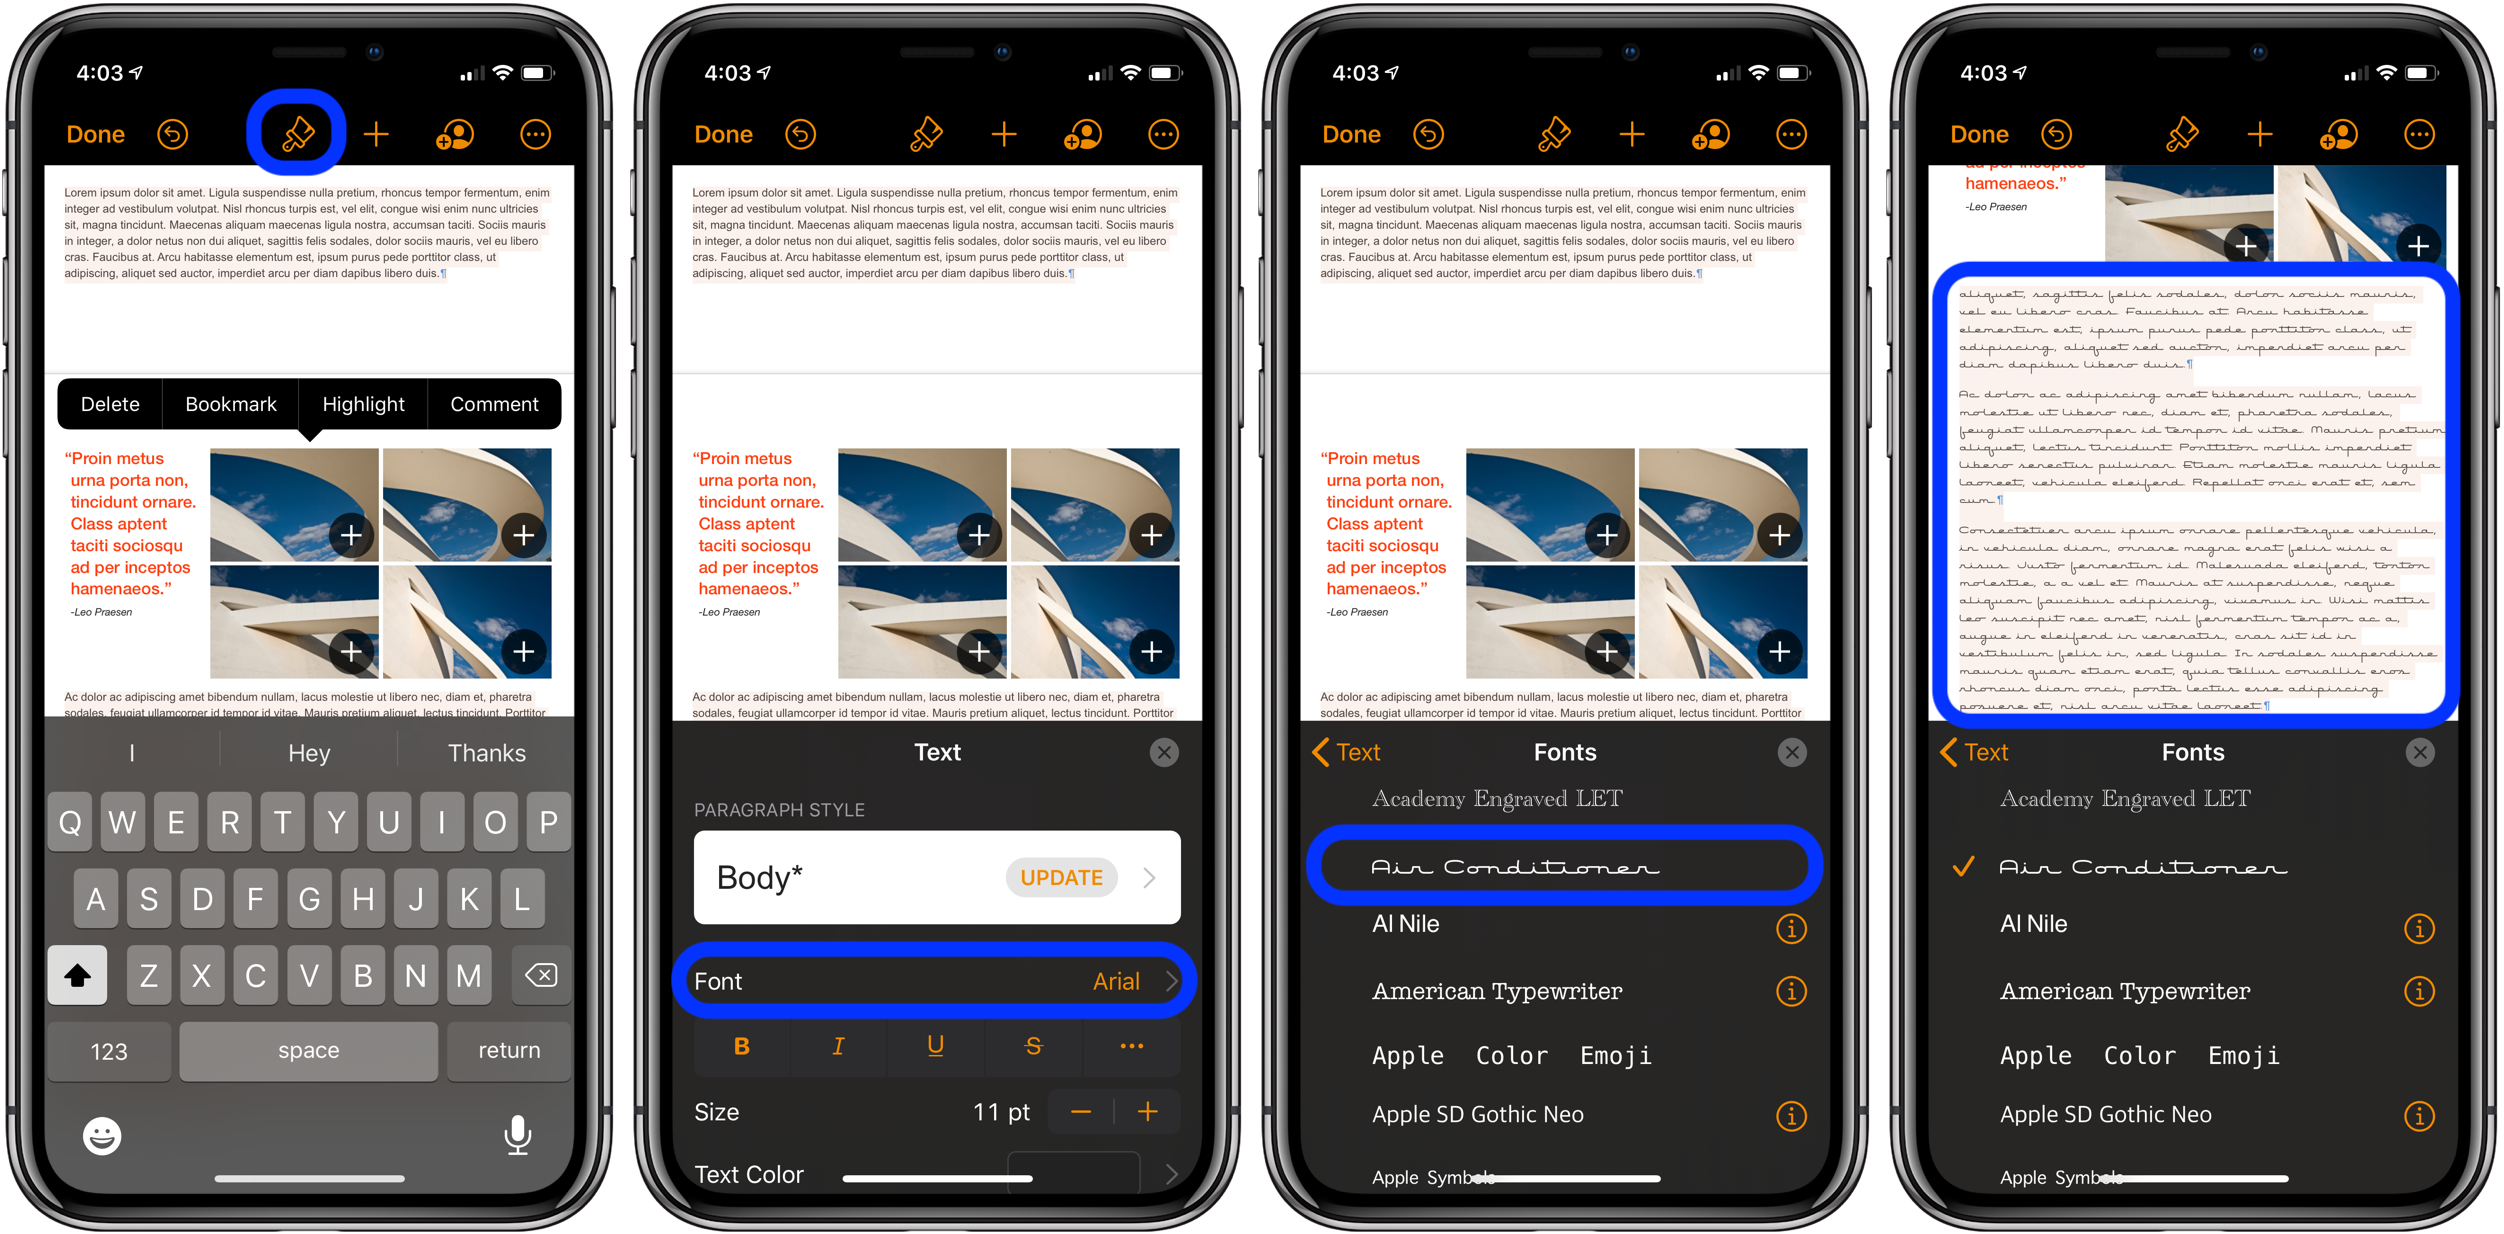
- Now open a custom font compatible app like Pages, Keynote, or Mail
- Type new text or select existing text, head to the editor, look for your new custom fonts
Here’s how these steps look:
Now that the fonts have been installed, they can be seen in Settings > General > Fonts and are available to be used with compatible apps like Pages, Keynote, and Mail.
Here’s what it looks like to use the new fonts in Pages:
Option 2:
There are apps that have been around for some time that allow loading of custom fonts, including from your own collection from iCloud Drive and Dropbox to work with iPhone and iPad.
One thing to keep in mind here: You’re taking a risk in trusting the developers of these apps and creators of the fonts as they work via an unsigned profile that needs to be installed. However, there are some benefits even though the process is clunkier.
You can use the fonts installed with this method in more apps than just those allowed with the official iOS 13 and iPadOS 13 feature, as well as install apps from iCloud Drive, Dropbox, and more.
- Choose an app like AnyFont or iFont (using the iFont for this example)
- Tap in the bottom right corner
- Choose a font provider from the list
- Pick a font and tap load it into iFont
- Once it’s in iFont, tap Install next to it
- Head to Settings > General > Profile > tap the new font
- Choose in the top right corner
- Enter your passcode if required
- Tap Install again
- Open a compatible app and you should see the new font
Here’s how the slightly complicated process looks ?:
The first step is to choose in the bottom right corner of iFont, then pick a font provider. I’m using Fontspace in the steps below.
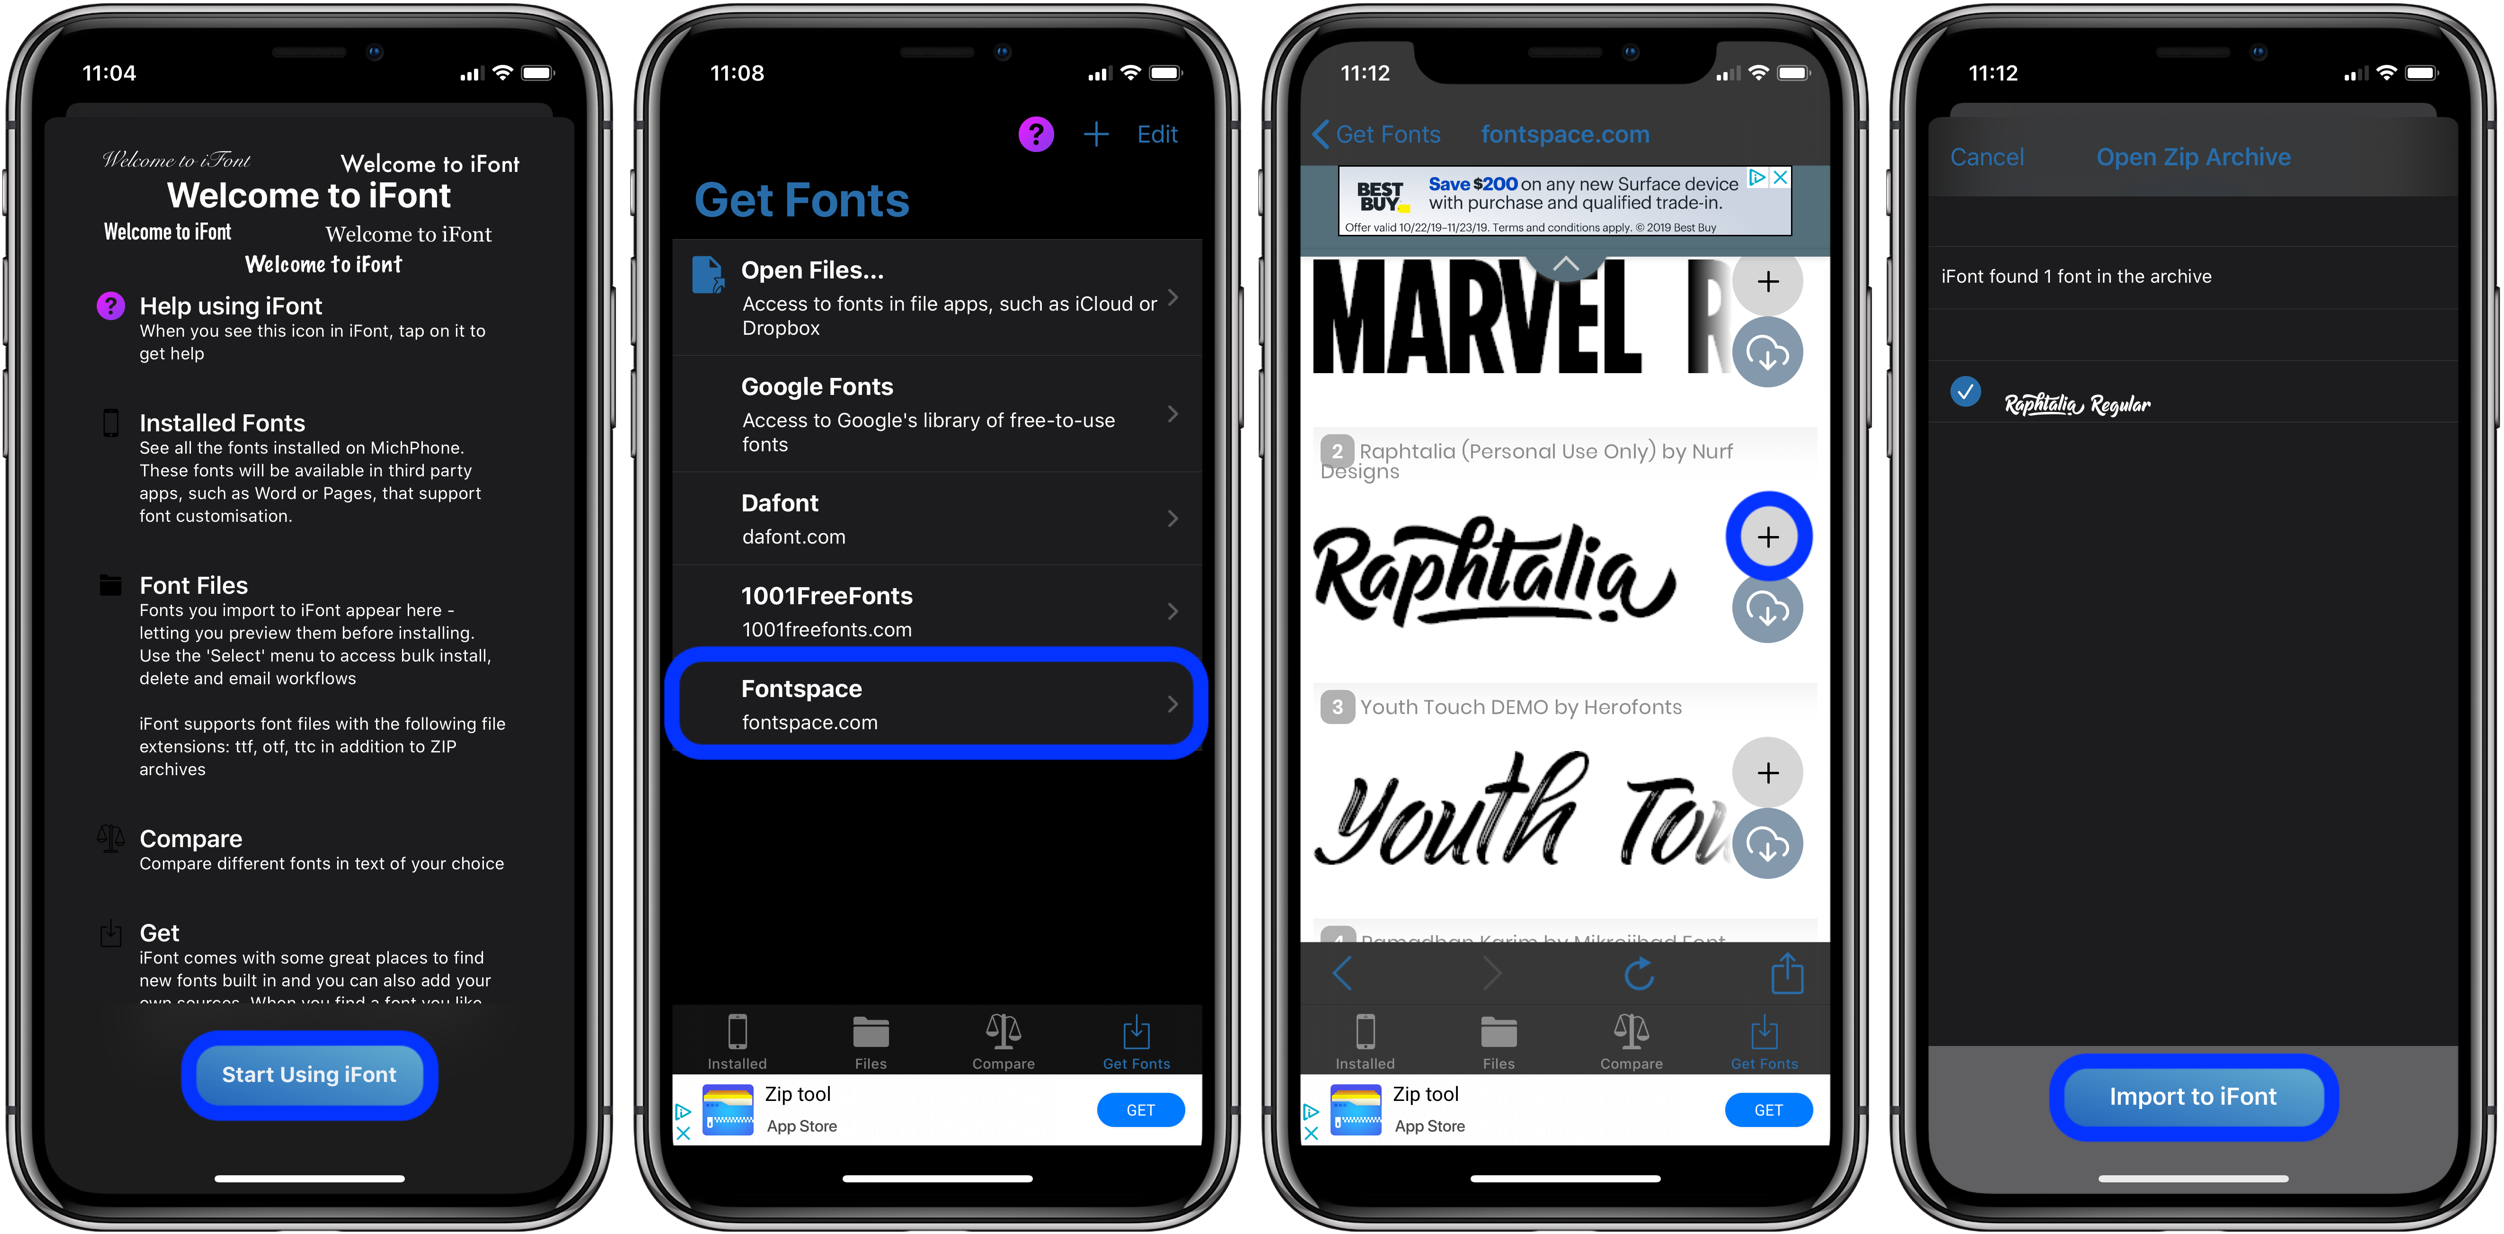
After you pick and import it to iFont, download, and install it. Now you’ll need to head to Settings > General > Profile > and tap the new font.
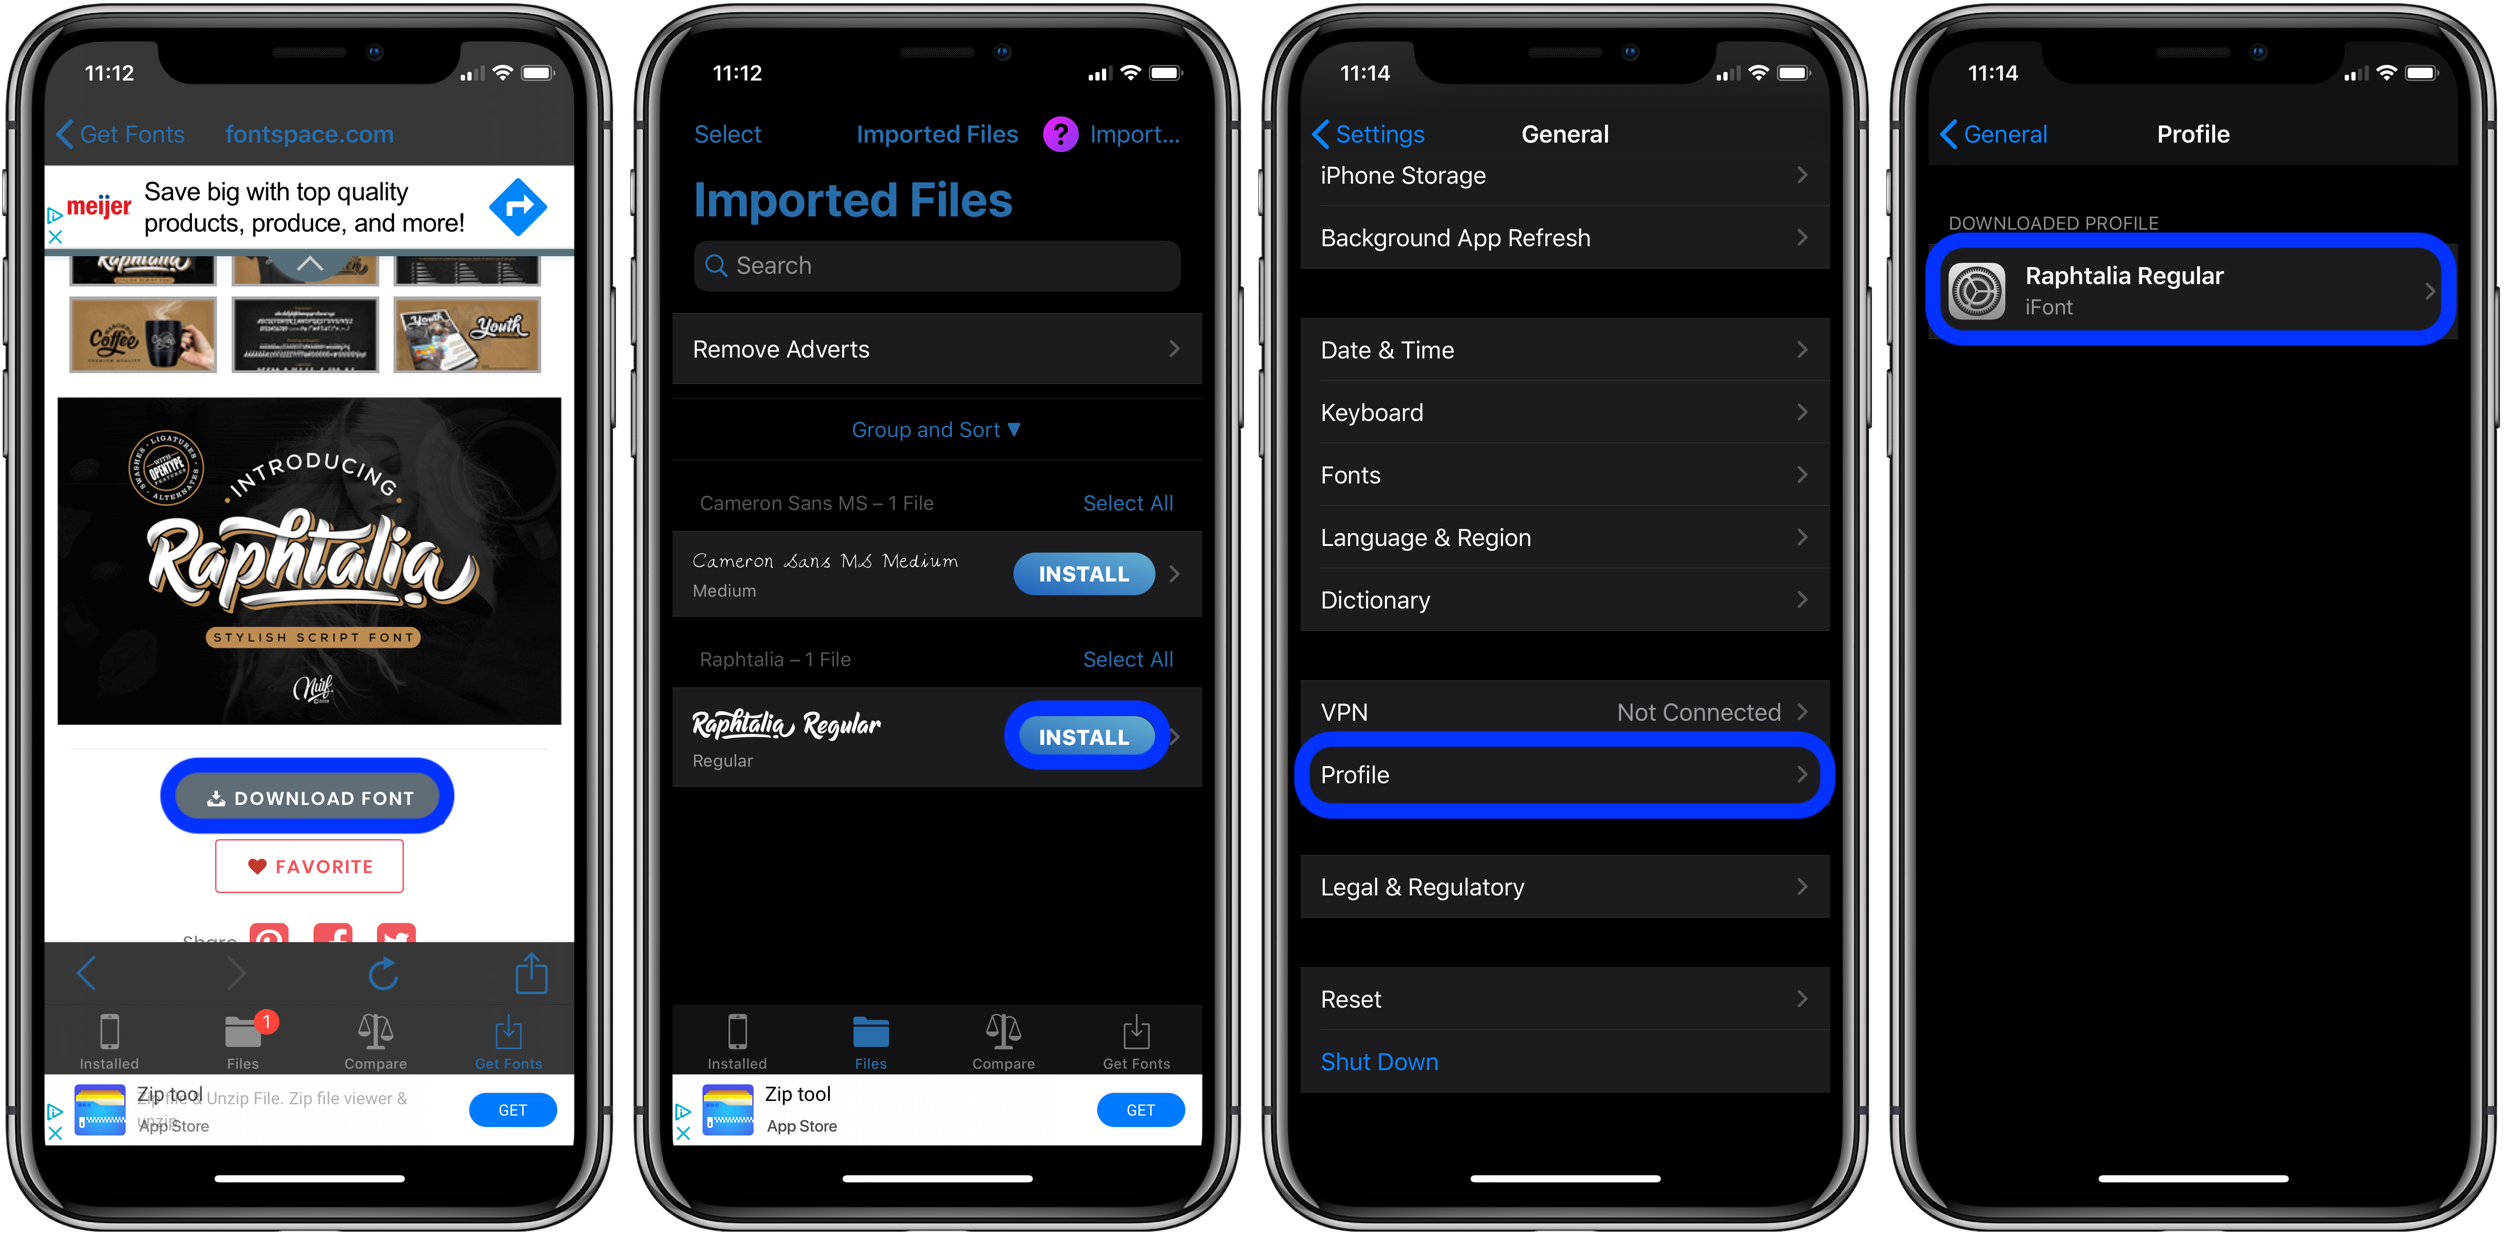
Install the font via the profile at your own risk.
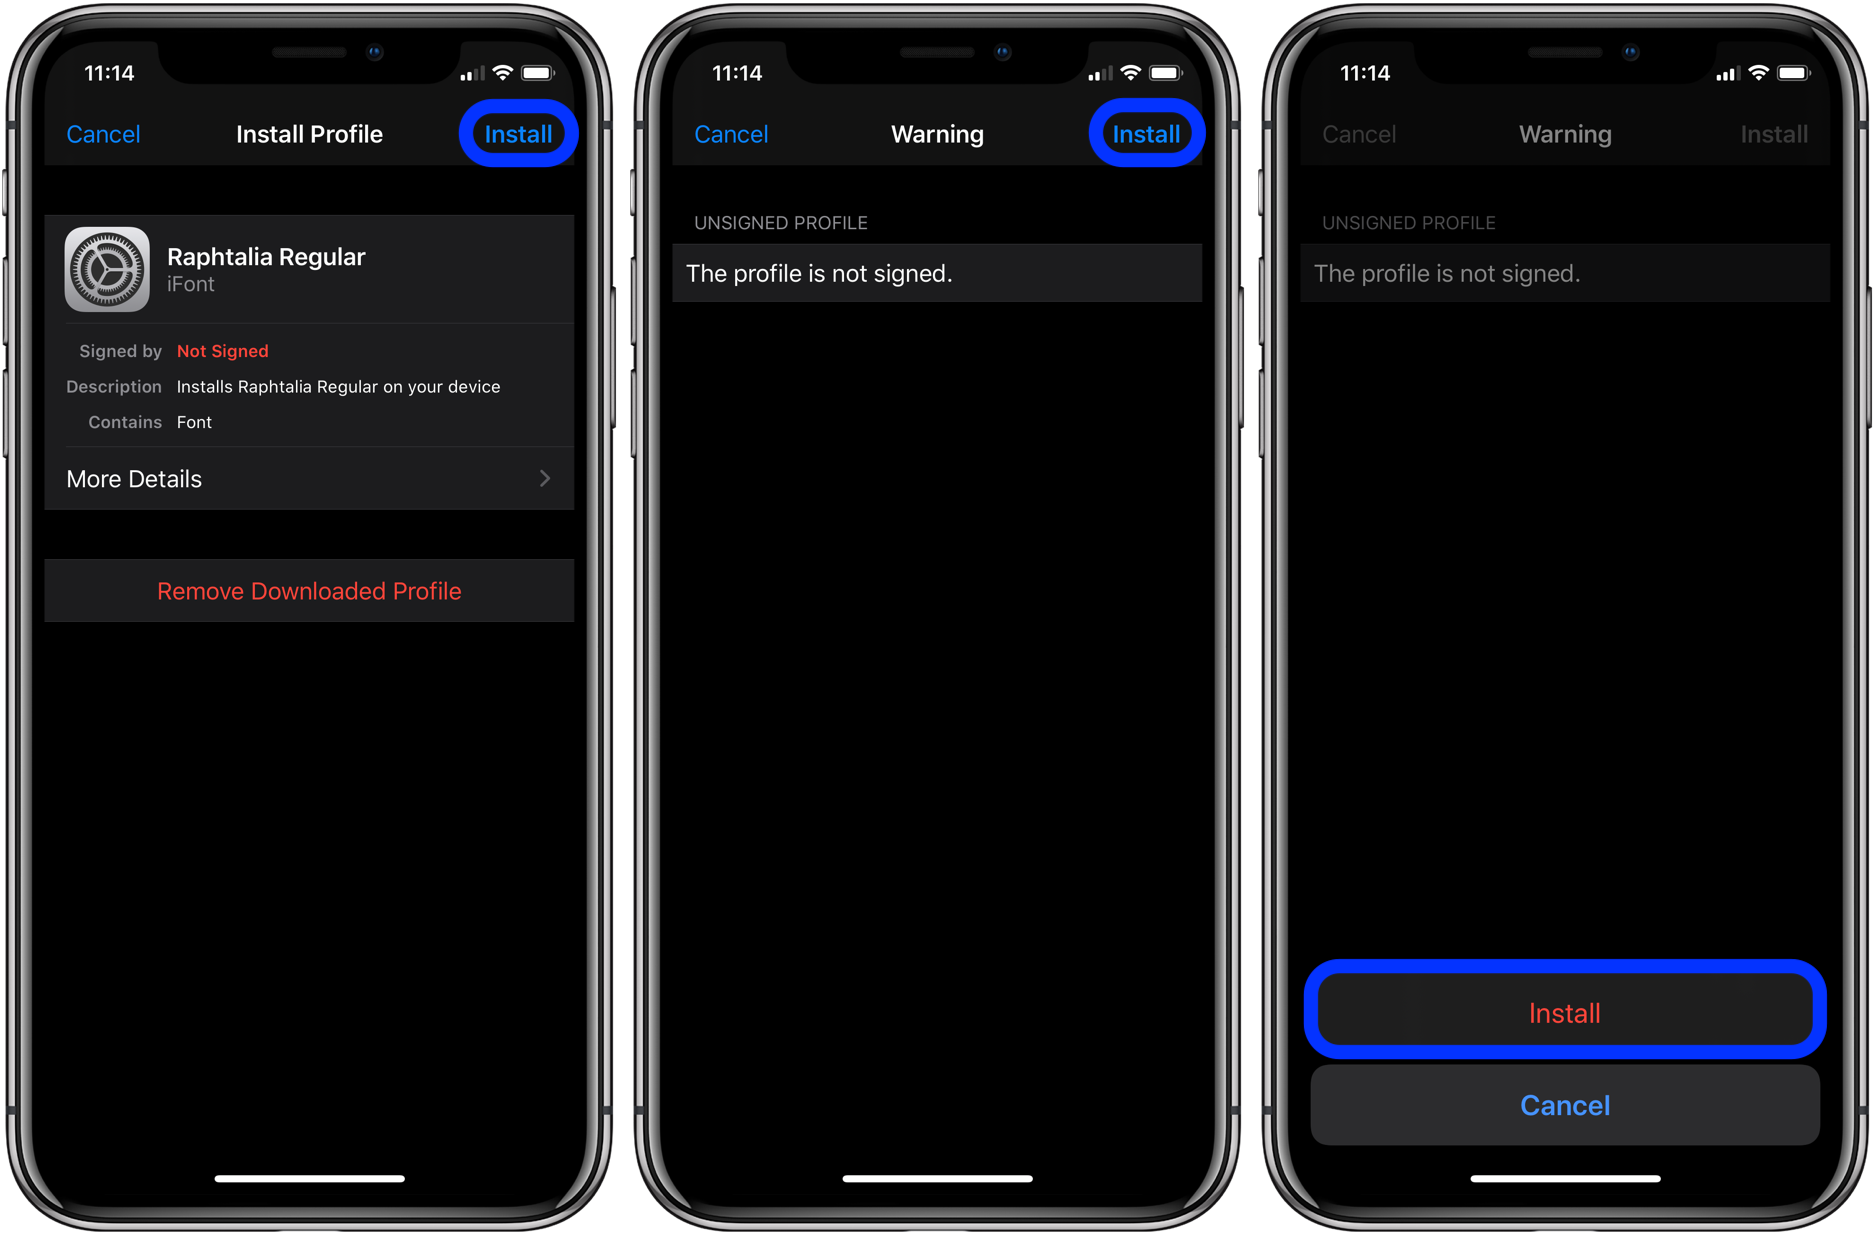
Now that you’ve got it installed, open an app and look for your new font.
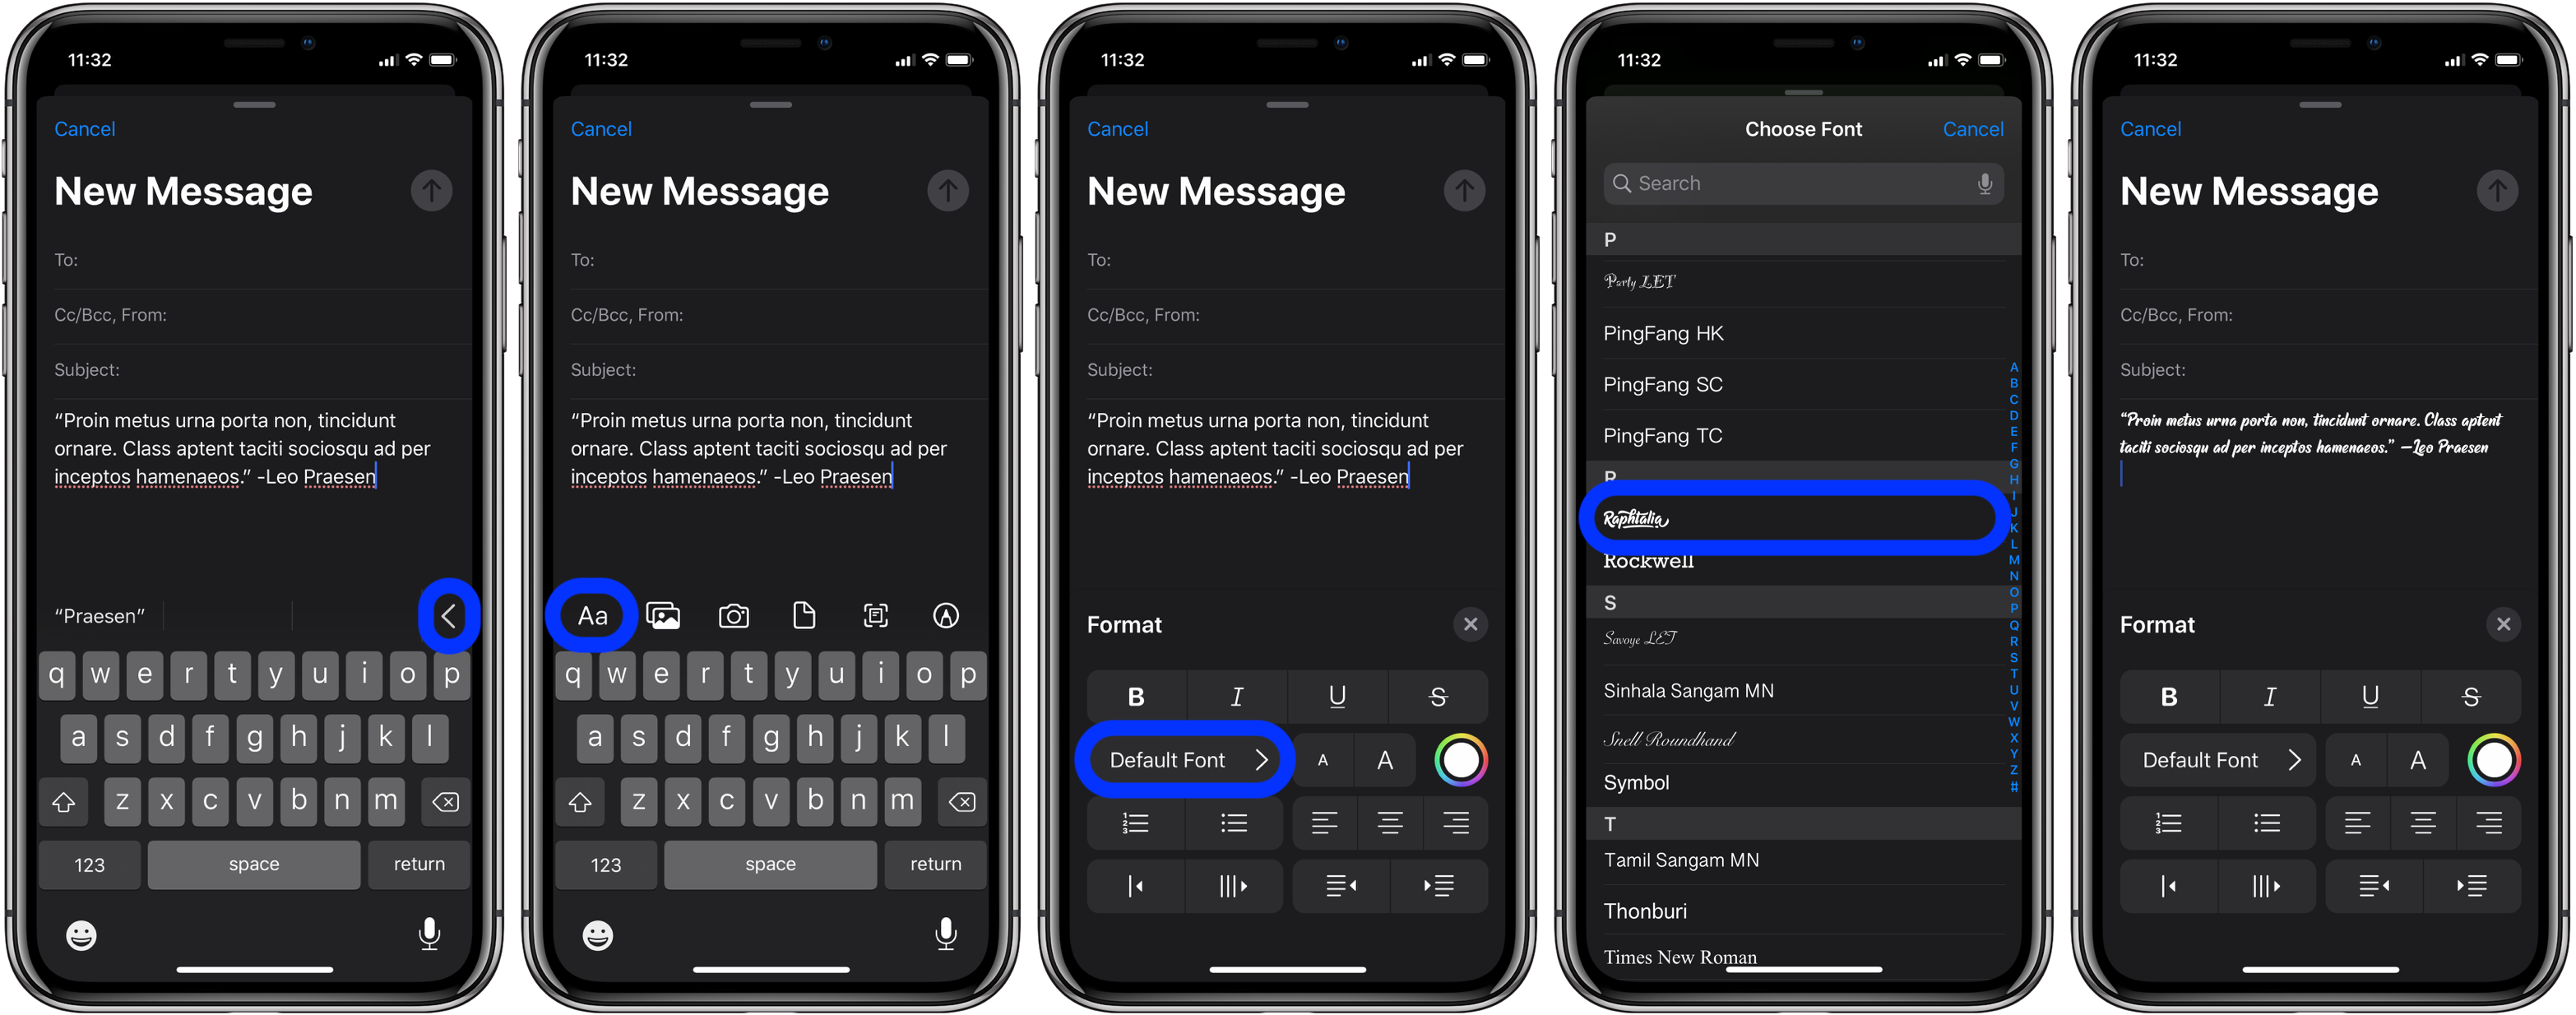 One of the benefits of using this method is being able to use fonts in more apps.
And here’s how it looks to import your own fonts or fonts you have saved in iCloud or Dropbox.
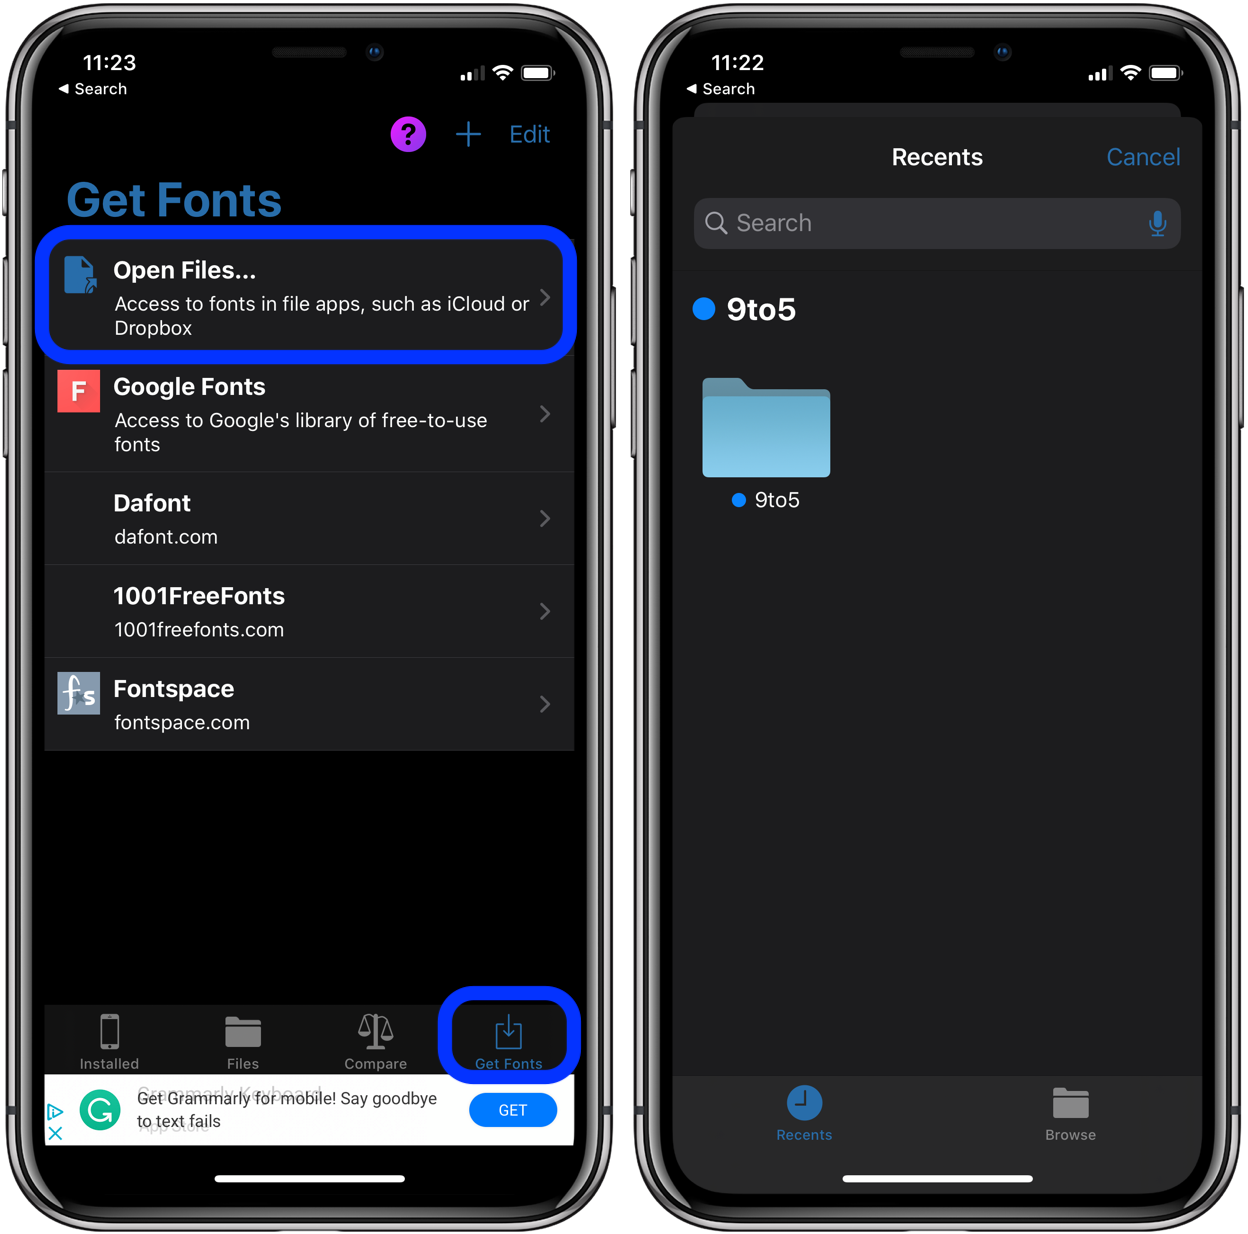 macOS Catalina:
- How to fix iCloud terms and conditions bug in macOS Catalina
- Missing iCloud content? Here’s how to recover lost iCloud Drive documents and files
- How to get started with and use Voice Control in macOS Catalina
- How to check iPad and Mac Sidecar requirements
- How to set up Screen Time on your Mac in macOS Catalina
- How to get your Mac ready for macOS Catalina
- How to create a bootable macOS Catalina 10.15 USB install drive [Video]
- How to sync iPhone and iPad to your Mac in macOS Catalina without iTunes
iPhone & iPad:
- How to edit messages on iPhone and iPad with two-finger tap
- How to use the ‘Remind when messaging’ feature on iPhone, iPad, and Mac
- iOS 13: How to use Reader View on iPhone and iPad
- How to change icons and colors for Reminders Lists on iPhone, iPad, and Mac
- How to make subtasks and sublists with Reminders in iOS 13 and macOS Catalina
- How to get started with and use ‘Sign in with Apple’ on iPhone, iPad, and Mac
- iPadOS 13: How to make iPad app icons and text bigger
- How to use the ultra wide camera on iPhone 11 and iPhone 11 Pro
- How to use iCloud Keychain to manage and store your passwords
- How to use Night mode on iPhone 11 and iPhone 11 Pro
Author: Michael Potuck
Source: 9TO5Mac


