
While it’s simple to just use the default or built-in ringtones, NASA supplies a range of mission sounds that can space-out your iPhone. Here’s how:
Table of contents
Step 1: Choose your audio
Head on over to NASA’s Audio and Ringtones page and find yourself some audio. You will need to scroll down to the Download NASA Sounds section to find the files that can be used for ringtones. NASA lists different categories to make selecting a sound easier; whether you want the sound of Mission Control when Apollo 11 landed or the final Space Shuttle launch.
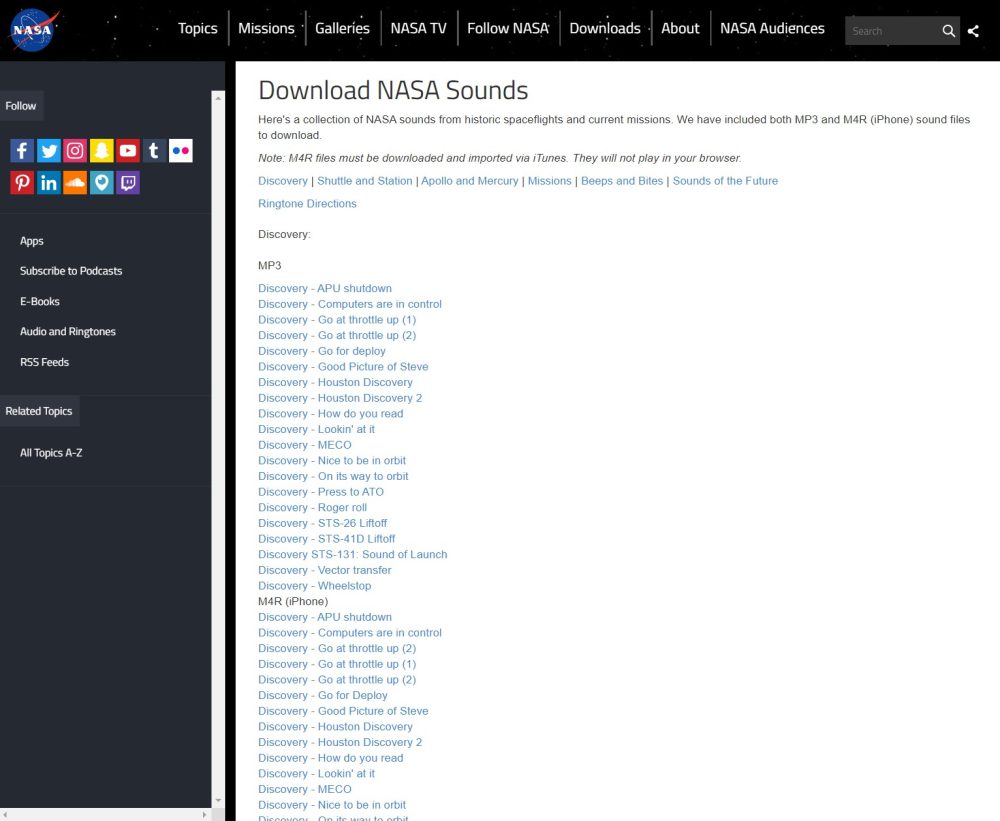
However, it is important to pay attention to the type of file you download. iPhones use the M4R filetype for ringtones. Thankfully, NASA thought ahead and provided two copies of each ringtone: one in the MP3 format and another in the M4R format. To download the file, right-click the file name and save the link. It should default to saving as the M4R format. If you have trouble saving the file, check how to do it for your specific browser.
Step 2: Import the ringtone
This is where this tutorial will split. We will first describe how to import ringtones to your iPhone using macOS (Catalina and newer). Afterward, we will describe how to do it using Windows and iTunes.
Click here to skip to the Windows section.
Starting with macOS Catalina, iTunes was no longer required for managing your content or devices. Device management is now carried out through Finder. Connect your iPhone to your Mac or Macbook. Follow any prompts that may appear on your device. Once you do this, your device should appear in the Finder sidebar.
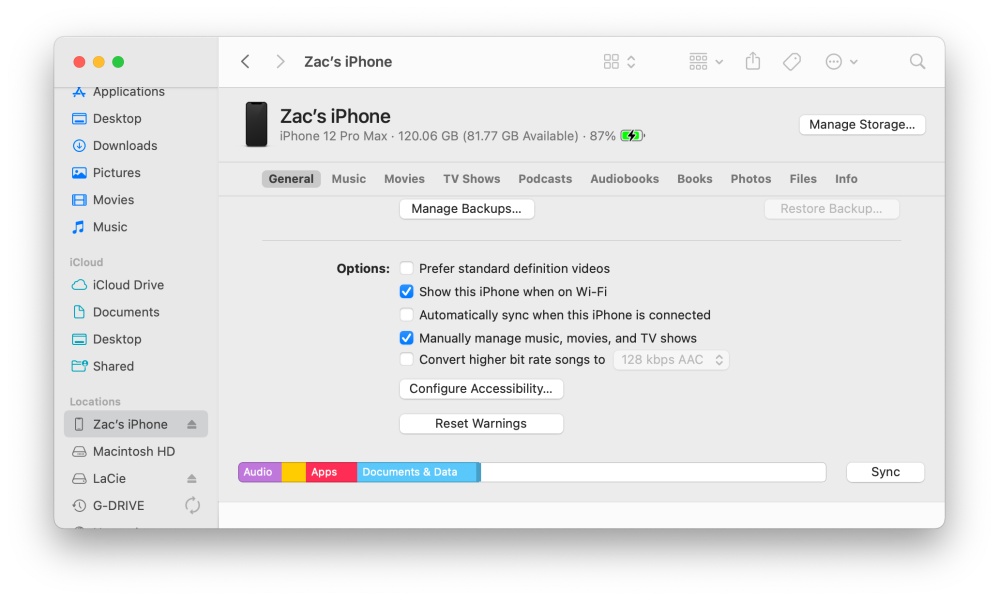
When you open the device, you will be brought to the sync menu. If you’re familiar with the iTunes sync menu, this should look familiar. On the General tab, there should be an option that says ‘Manually Manage Music, Movies, and TV Shows’. This will allow you to add the M4R file. Simply drag and drop the M4R file onto the sync menu.
The file should sync automatically and be available on your device. Proceed to the Sounds and Haptics menu in the Settings app. Then go to any of the options listed under Sounds and Vibration Patterns. If the transfer was successful, your custom ringtone should show up at the top of the list.
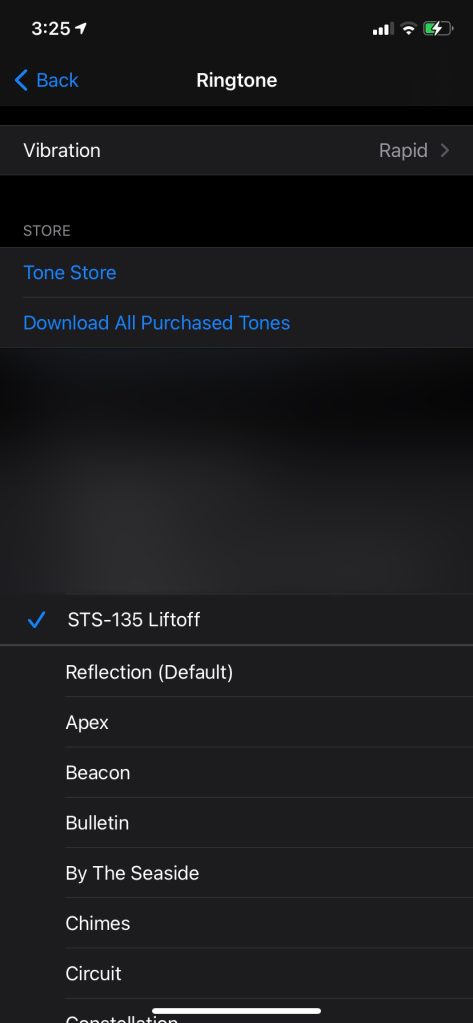
You have now successfully added a custom ringtone to your iPhone! This method can be applied to any sound/audio you have. You just have to make sure that the audio is not longer than 40 seconds and is in the M4R format. Should you want to remove a ringtone from your iPhone, swipe to the left on the ringtone.
You will need to use iTunes to import your ringtone if you use Windows. If you do not already have iTunes installed, go to Apple’s website to get the installer.
With iTunes setup, connect your iPhone to your computer. You will need to follow the prompts on your device to let your computer access your iPhone.
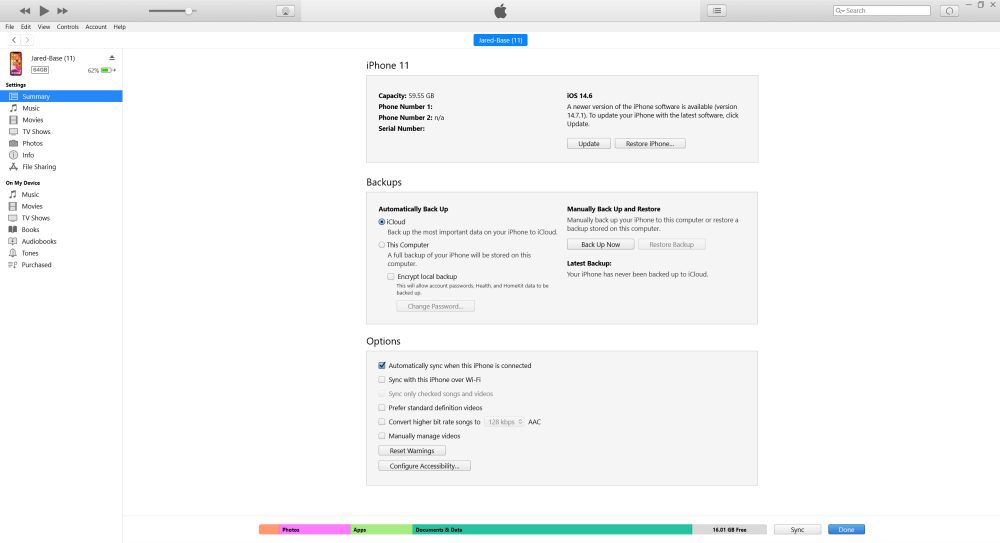
Once you connect your iPhone, proceed to the Tones tab. This is where all your custom ringtones will be listed. Drag and drop the M4R file you downloaded into iTunes. The Drag and Drop method sometimes doesn’t work. In this case, copy and paste the M4R file into iTunes.
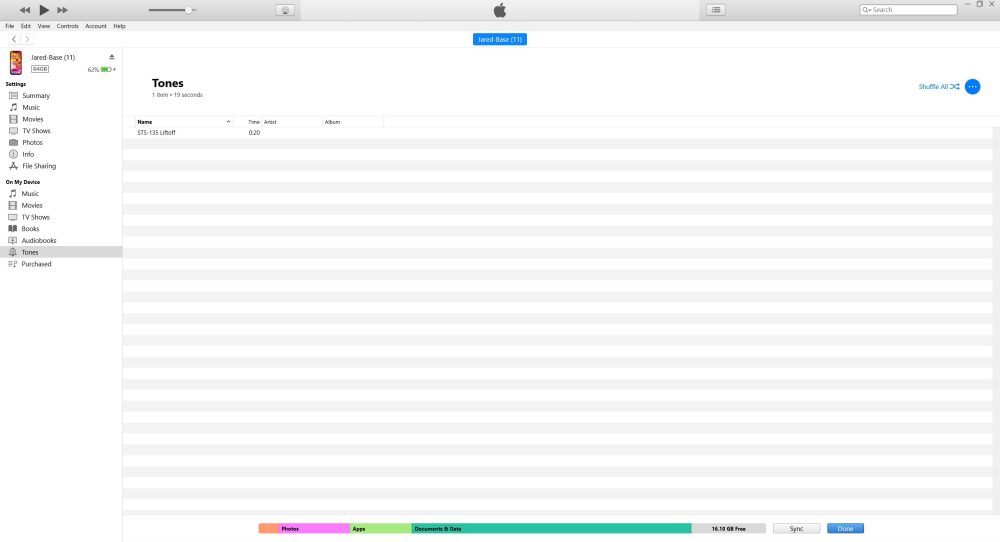
The file should sync automatically and be available on your device. Proceed to the Sounds and Haptics menu in the Settings app. Then go to any of the options listed under Sounds and Vibration Patterns. If the transfer was successful, your custom ringtone should show up at the top of the list.

You have now successfully added a custom ringtone to your iPhone! This method can be applied to any sound/audio you have. You just have to make sure that the audio is not longer than 40 seconds and is in the M4R format. Should you want to remove a ringtone from your iPhone, swipe to the left on the ringtone.
Step: 3 Enjoy!
You have now added your own custom ringtone to your iPhone! While we may be partial to the sound of rockets tearing through the atmosphere, this method can be applied to any audio. If your audio source is an MP3 or something other than an M4R, you can use iTunes, or an online converter, to convert the MP3 file to an M4A file. Just change the file extension to M4R before trying to add the ringtone if you use iTunes!
Check out 9to5Mac’s sister-site SpaceExplored.com for more space-focused topics!
Author: Jared Locke
Source: 9TO5Google


