
The Reminders app for iPhone, iPad, and Mac got a big upgrade with iOS 13, iPadOS 13, and macOS Catalina. One of the handy new features is the option to create nested to-dos (and lists, too). Follow along for how to make subtasks and sublists with Reminders on iPhone, iPad, and Mac with the latest software.
Apple’s Reminders app has become more and more capable over the years, and this fall it has taken another big step forward. One feature that makes some third-party to-do apps more powerful is the ability to create subtasks and sublists. With the latest software, Apple has brought these features to its Reminders app for iPhone, iPad, and Mac.
However, there are a few nuances and quirks with how Apple has implemented subtasks and sublists. We’ll start with how it works on iPhone and iPad, then finish up with what it looks like on Mac, covering how to make subtasks from new reminders, how to make subtasks from existing ones, and how to make sublists.
How to make subtasks with Reminders on iPhone, iPad, and Mac
- Open the Reminders app
- Type in a new reminder as your primary task
- Tap the “i” to the right of the task
- Swipe down and tap
- Create your Subtasks
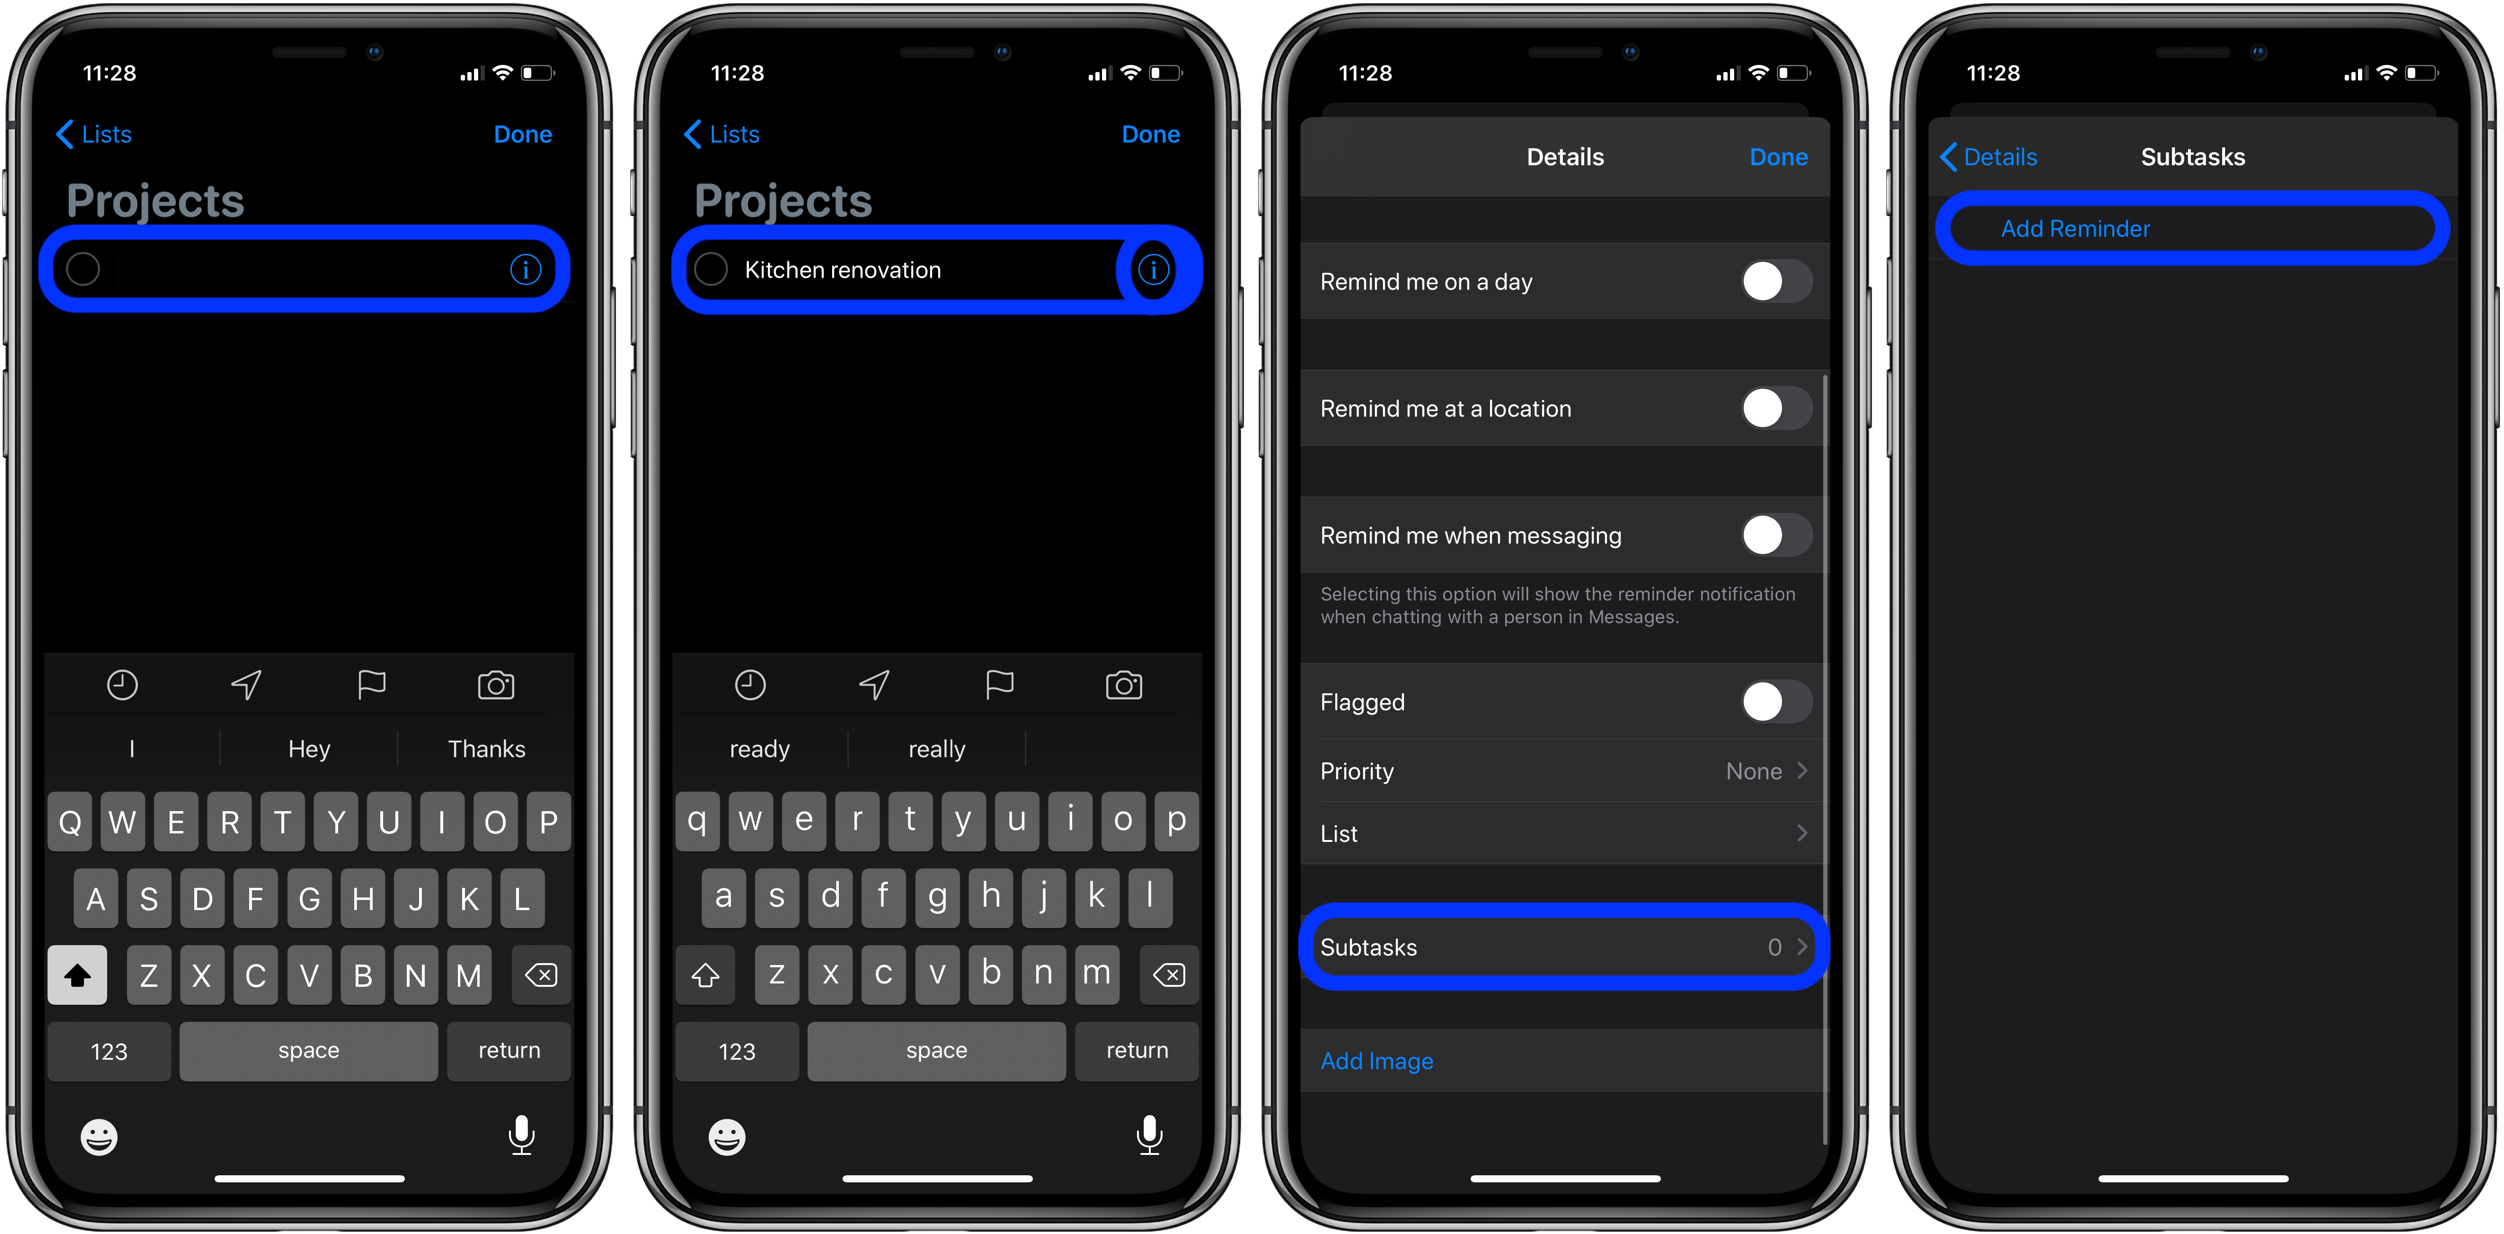
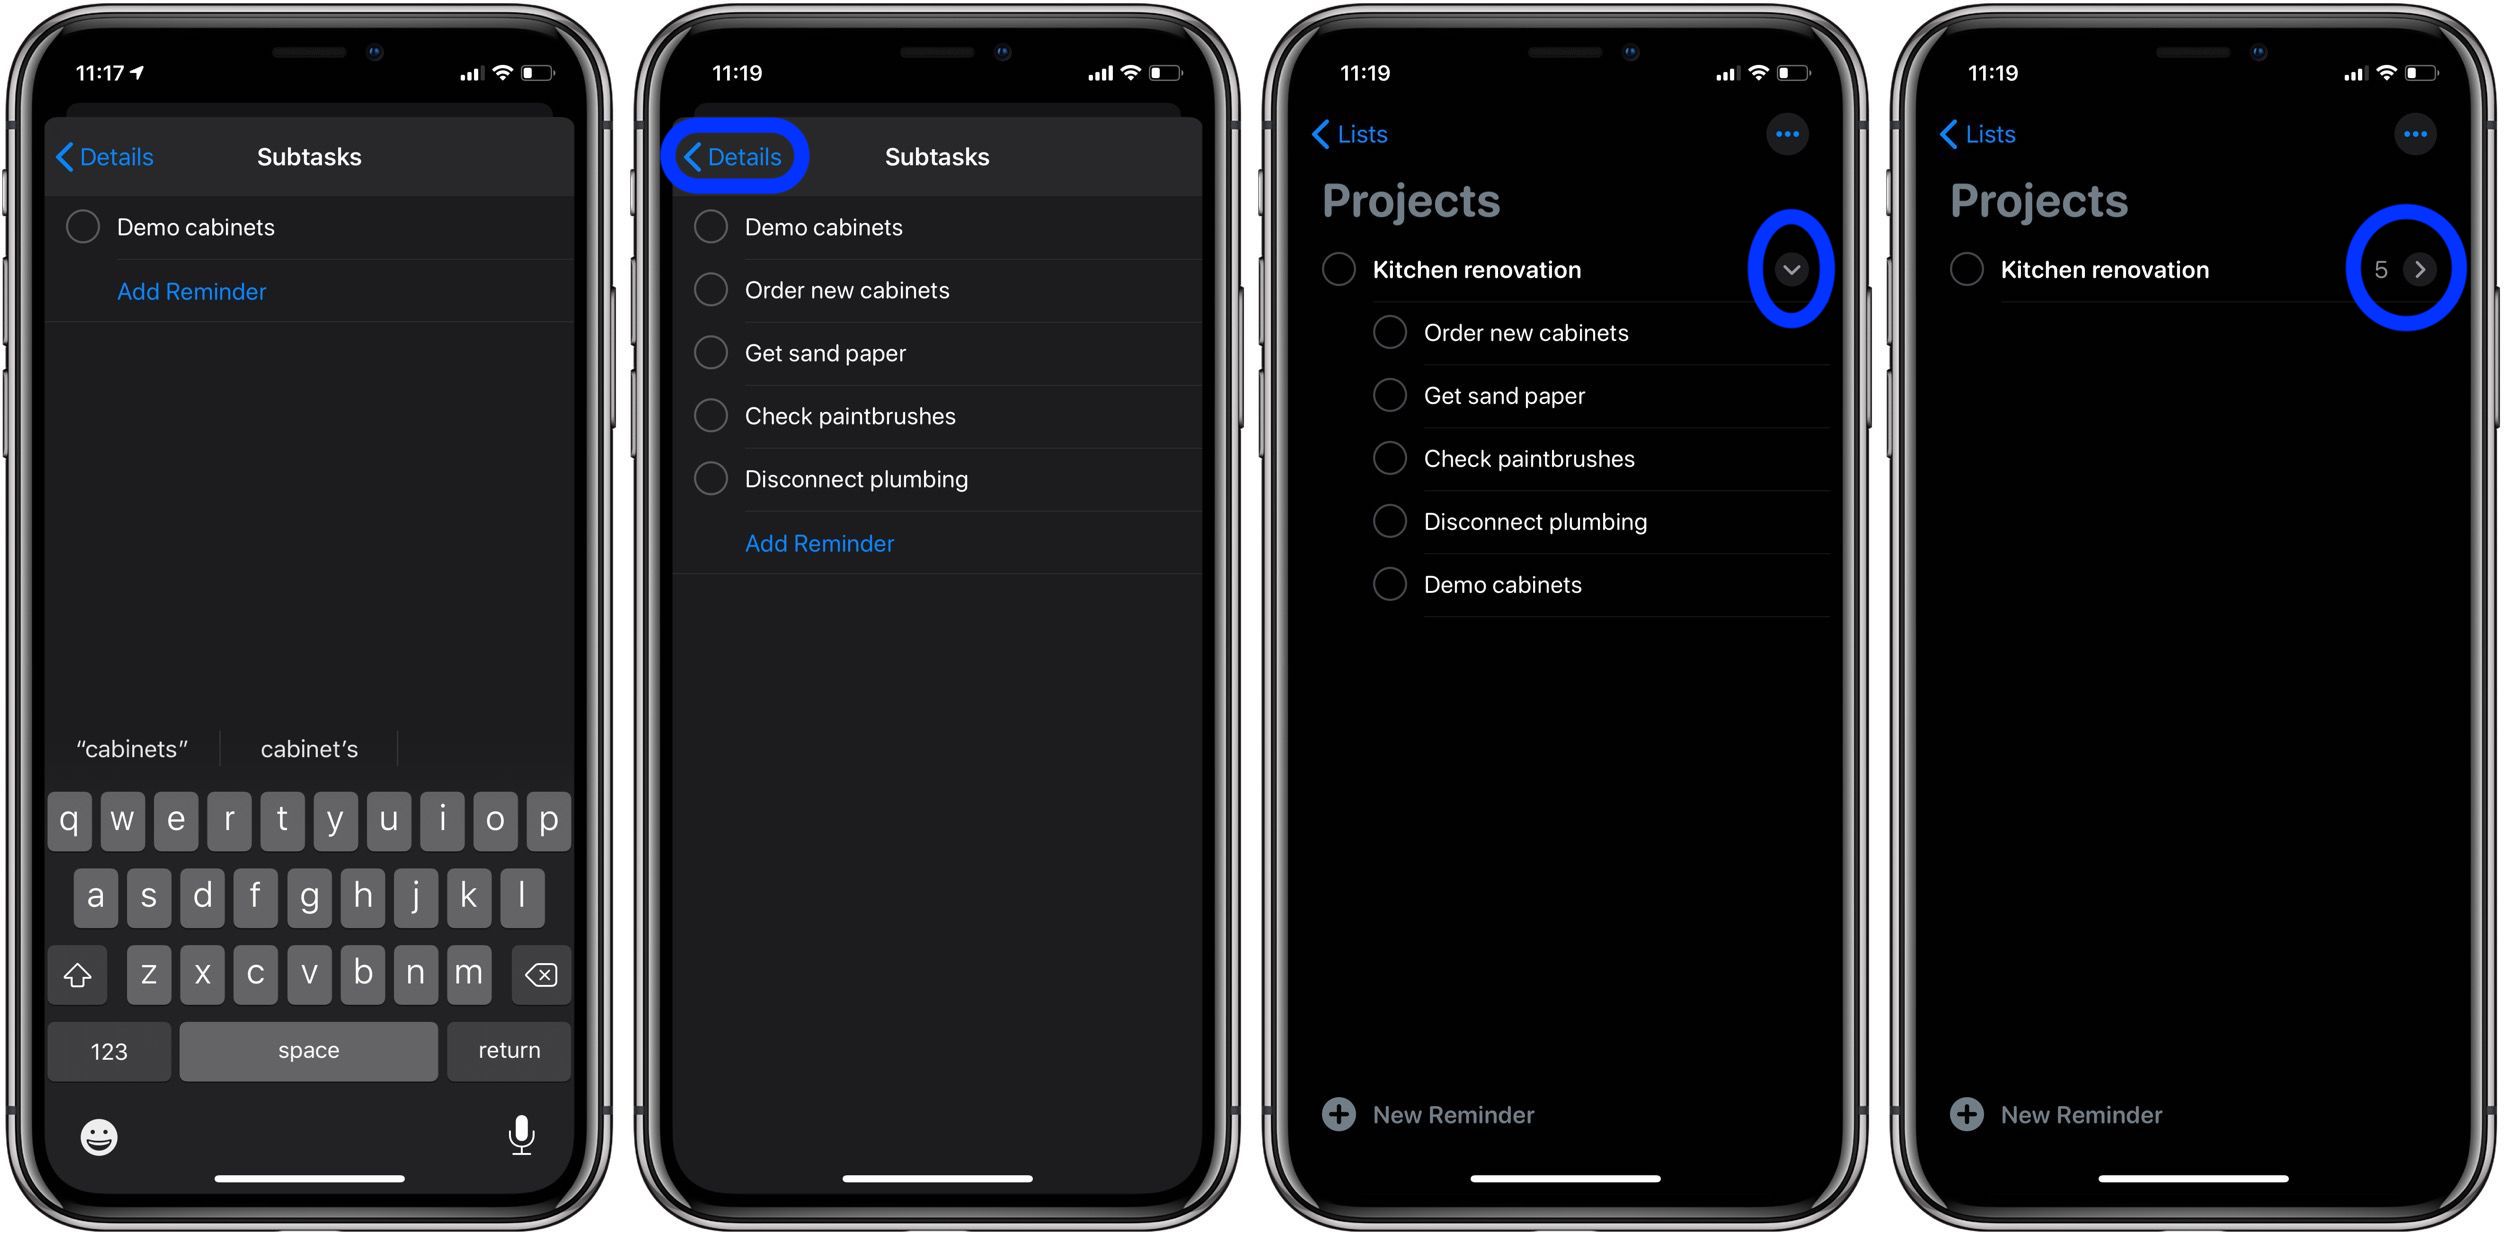
Once you’ve got your subtasks added, tap in the top left corner, then . You can see subtasks in an expanded or contracted view by tapping the arrow to the right of your main task.
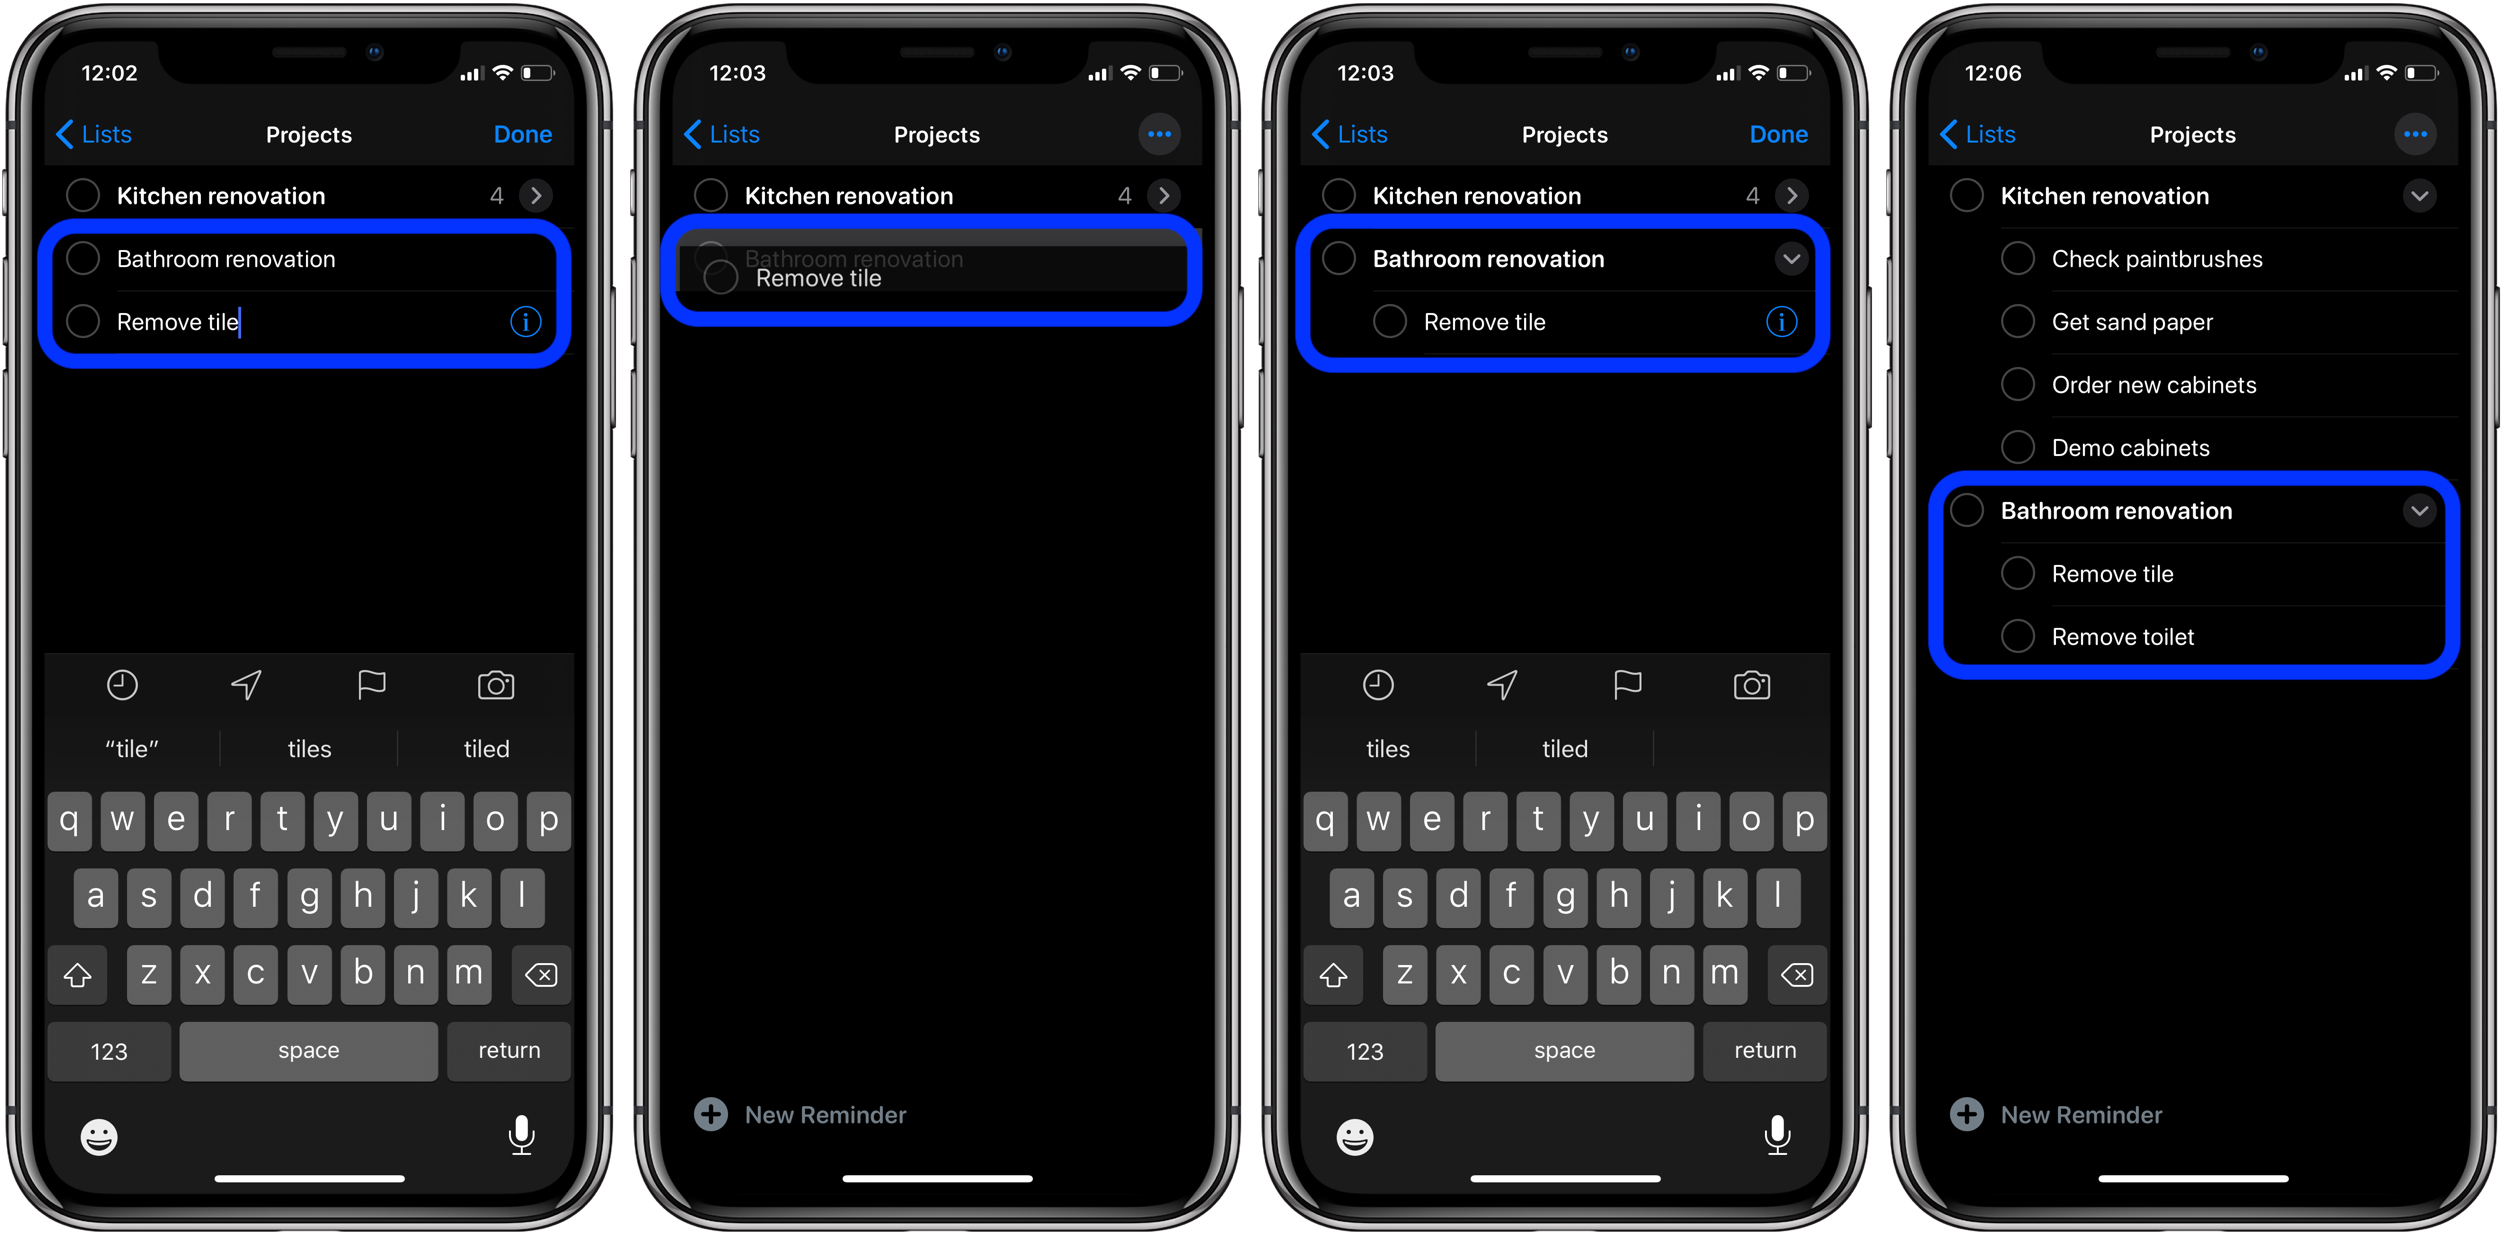
- Open Reminders and create a new task that you want as your primary reminder
- Create a second one that you want as your first subtask
- Tap away from the last task you made (to be able to drag it you can’t have the cursor active on a task)
- Drag the second task on top of the first to make it a subtask (naturally, works for existing tasks)
- Like the process above, drag the existing task you’d like to turn into a subtask on top of what you want to be your primary task
- Drag more existing tasks on top of the primary to convert others into subtasks
- Keep in mind you can’t have an active cursor on a task that you’d like to drag, so you may need to deselect a task to make it draggable
Notably, using the tab key doesn’t work to create subtasks underneath a primary one. Here’s what to do…
- Open Reminders on your Mac
- Make a new task that you’d like to be your primary
- Now create a second one below that you’d like to be your first subtask
- Right-click on the task and select
- Create more subtasks by pressing return/enter
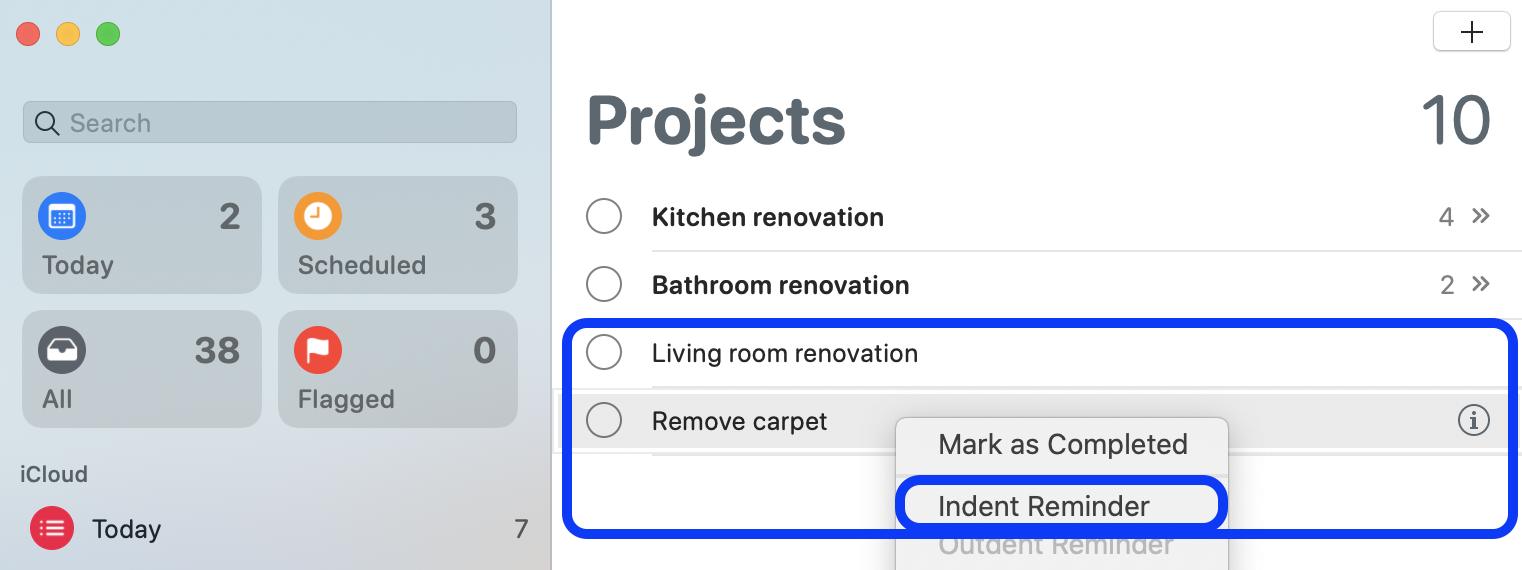
Now it will become a subtask. Hit return/enter to create more subtasks
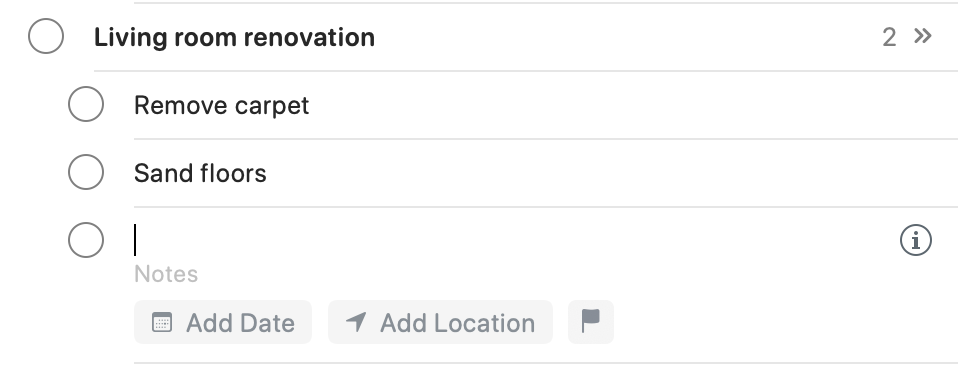
- Create or find your existing reminders
- Drag the task you’d like to become a subtask below the one you want as a primary
- Look for the blue indent line to indicate it will become a subtask when you let go
Here’s how this looks:


Another great option is to make sublists for even more organization, or as Apple calls them in Reminders, “Groups.”
On iPhone, iPad, and Mac:
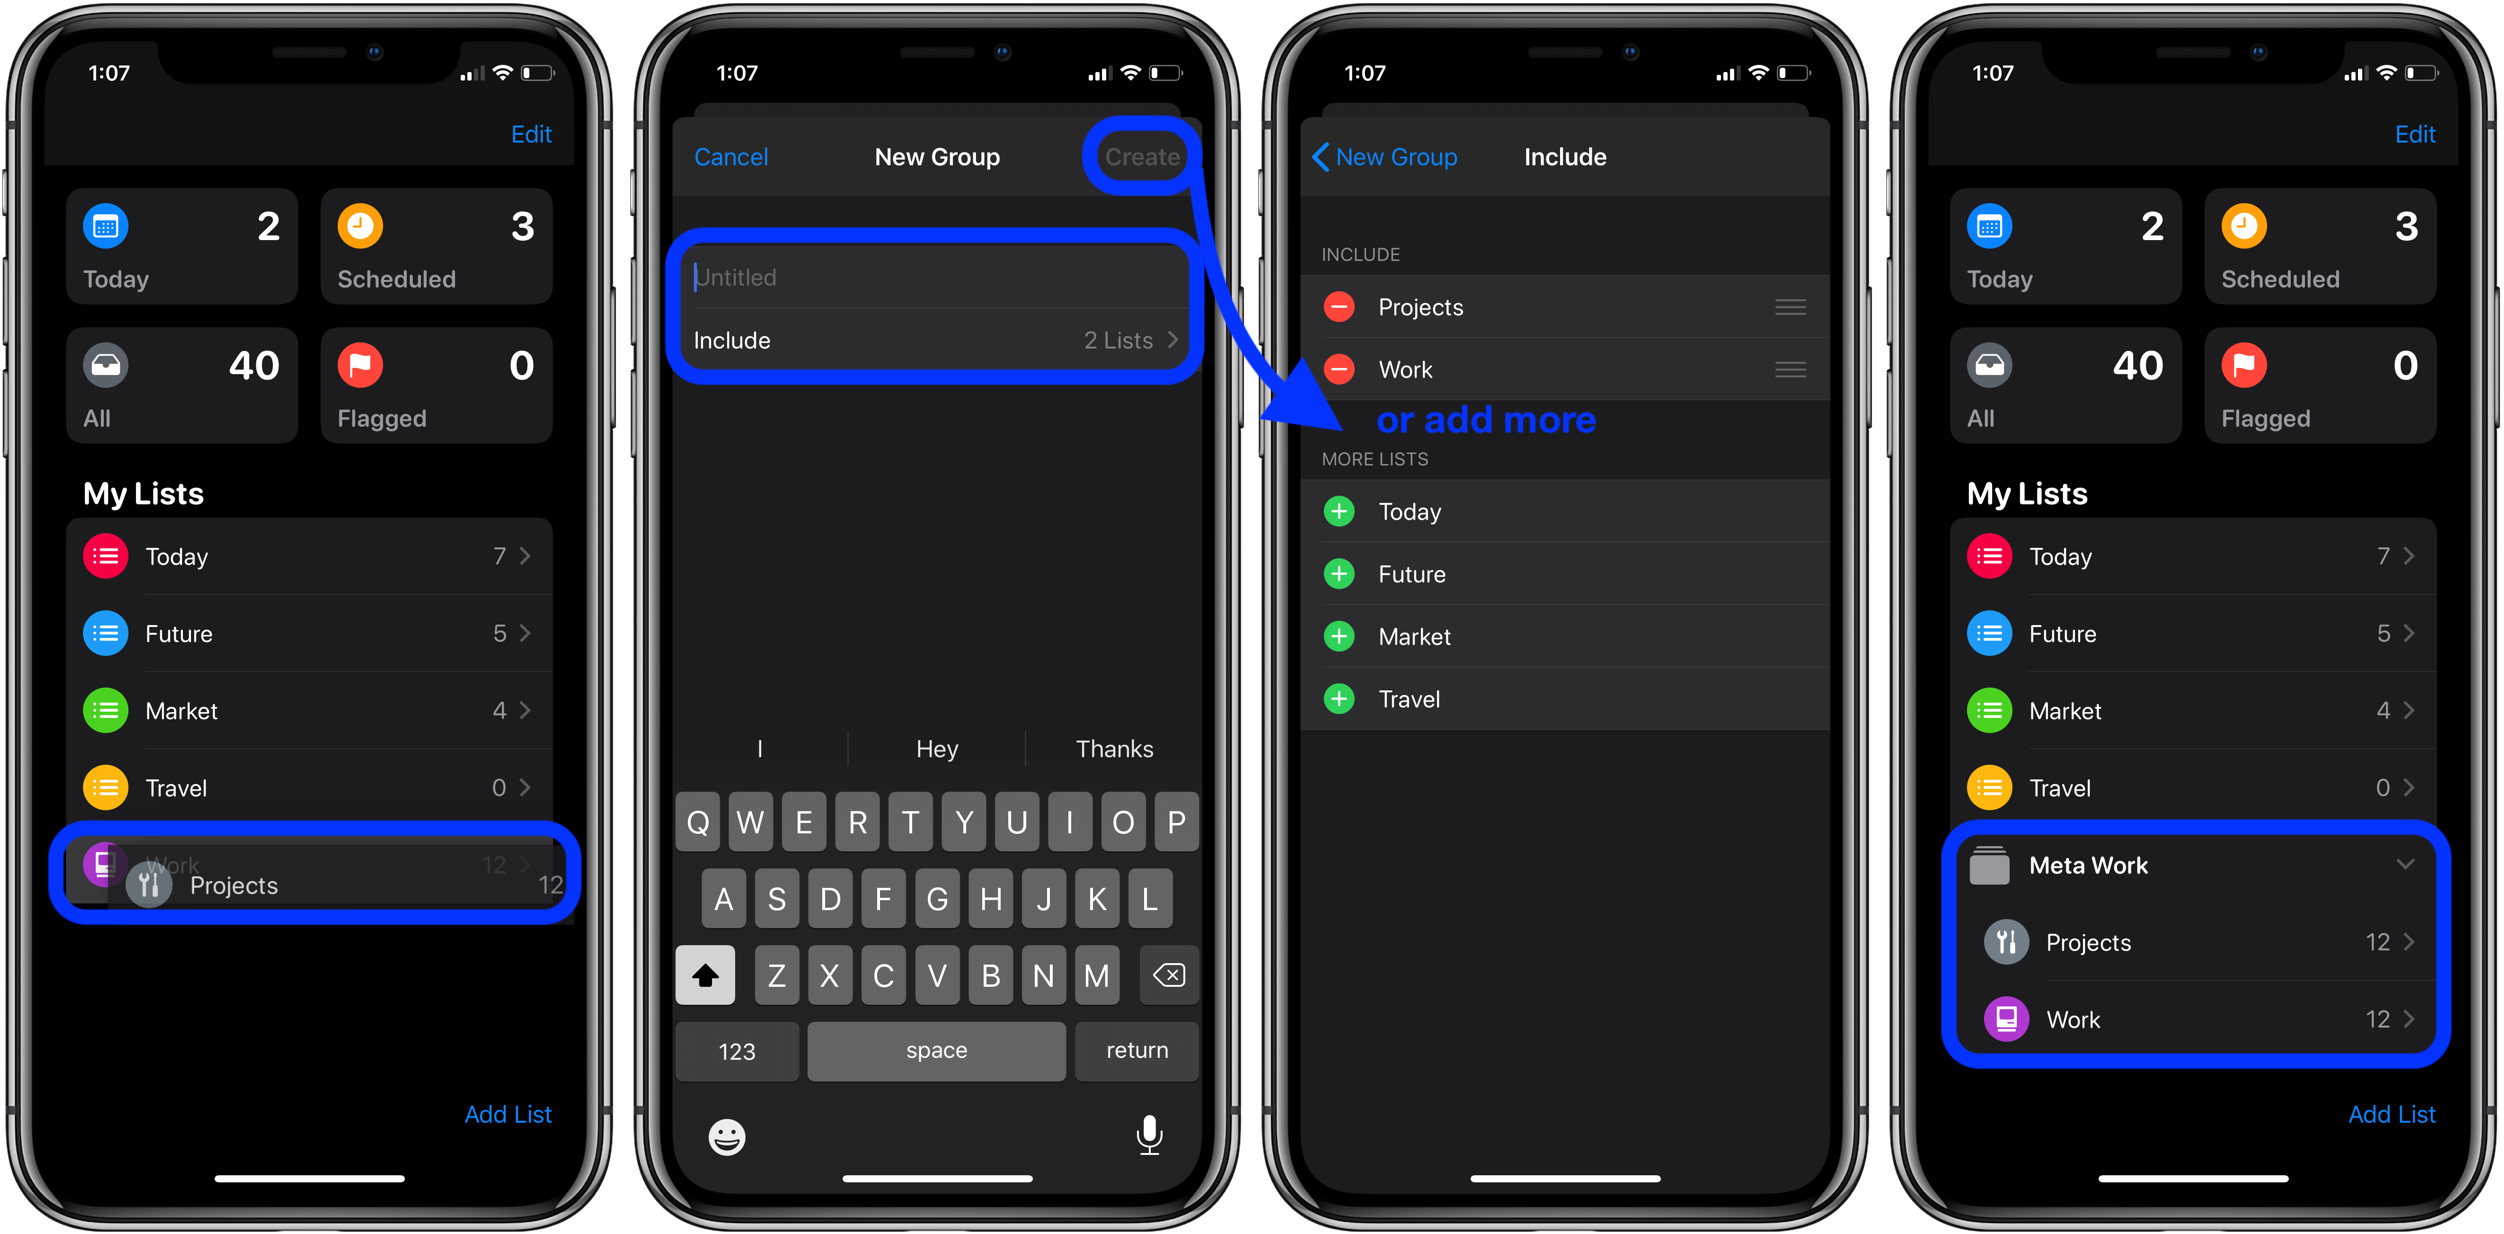
- In Reminders, head to the all Lists view
- Drag and drop a list that you’d like to combine with another
- Create a sublist/group name
- You can also opt to add more Lists to the new group
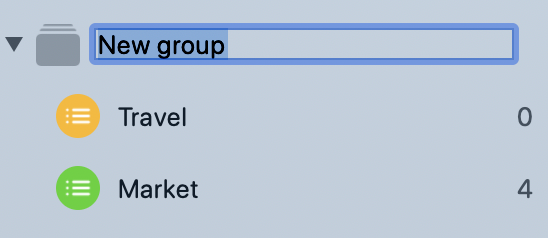
Here’s how it looks on Mac:
Now you’re all set to enjoy the improved organization of Reminders across all of your devices!
macOS Catalina:
- How to check iPad and Mac Sidecar requirements
- How to set up Screen Time on your Mac in macOS Catalina
- How to get your Mac ready for macOS Catalina
- How to create a bootable macOS Catalina 10.15 USB install drive [Video]
- How to sync iPhone and iPad to your Mac in macOS Catalina without iTunes
iPhone & iPad:
- How to get started with and use ‘Sign in with Apple’ on iPhone, iPad, and Mac
- How to share your location on iPhone and more with the Find My app
- How to check if your iPhone 6s is eligible for Apple’s new repair program
- iPadOS 13: How to make iPad app icons and text bigger
- How to use the ultra wide camera on iPhone 11 and iPhone 11 Pro
- How to use iCloud Keychain to manage and store your passwords
- How to take timed photos with iPhone 11 and 11 Pro Camera app
- How to use Night mode on iPhone 11 and iPhone 11 Pro
Check out 9to5Mac on YouTube for more Apple news:
Author: Michael Potuck
Source: 9TO5Mac


